I’m excited to be participating in a fun blog hop today, where several other bloggers and I have partnered to bring you 18 Easy to Build Christmas Projects, all using RYOBI power tools! (My fave.)
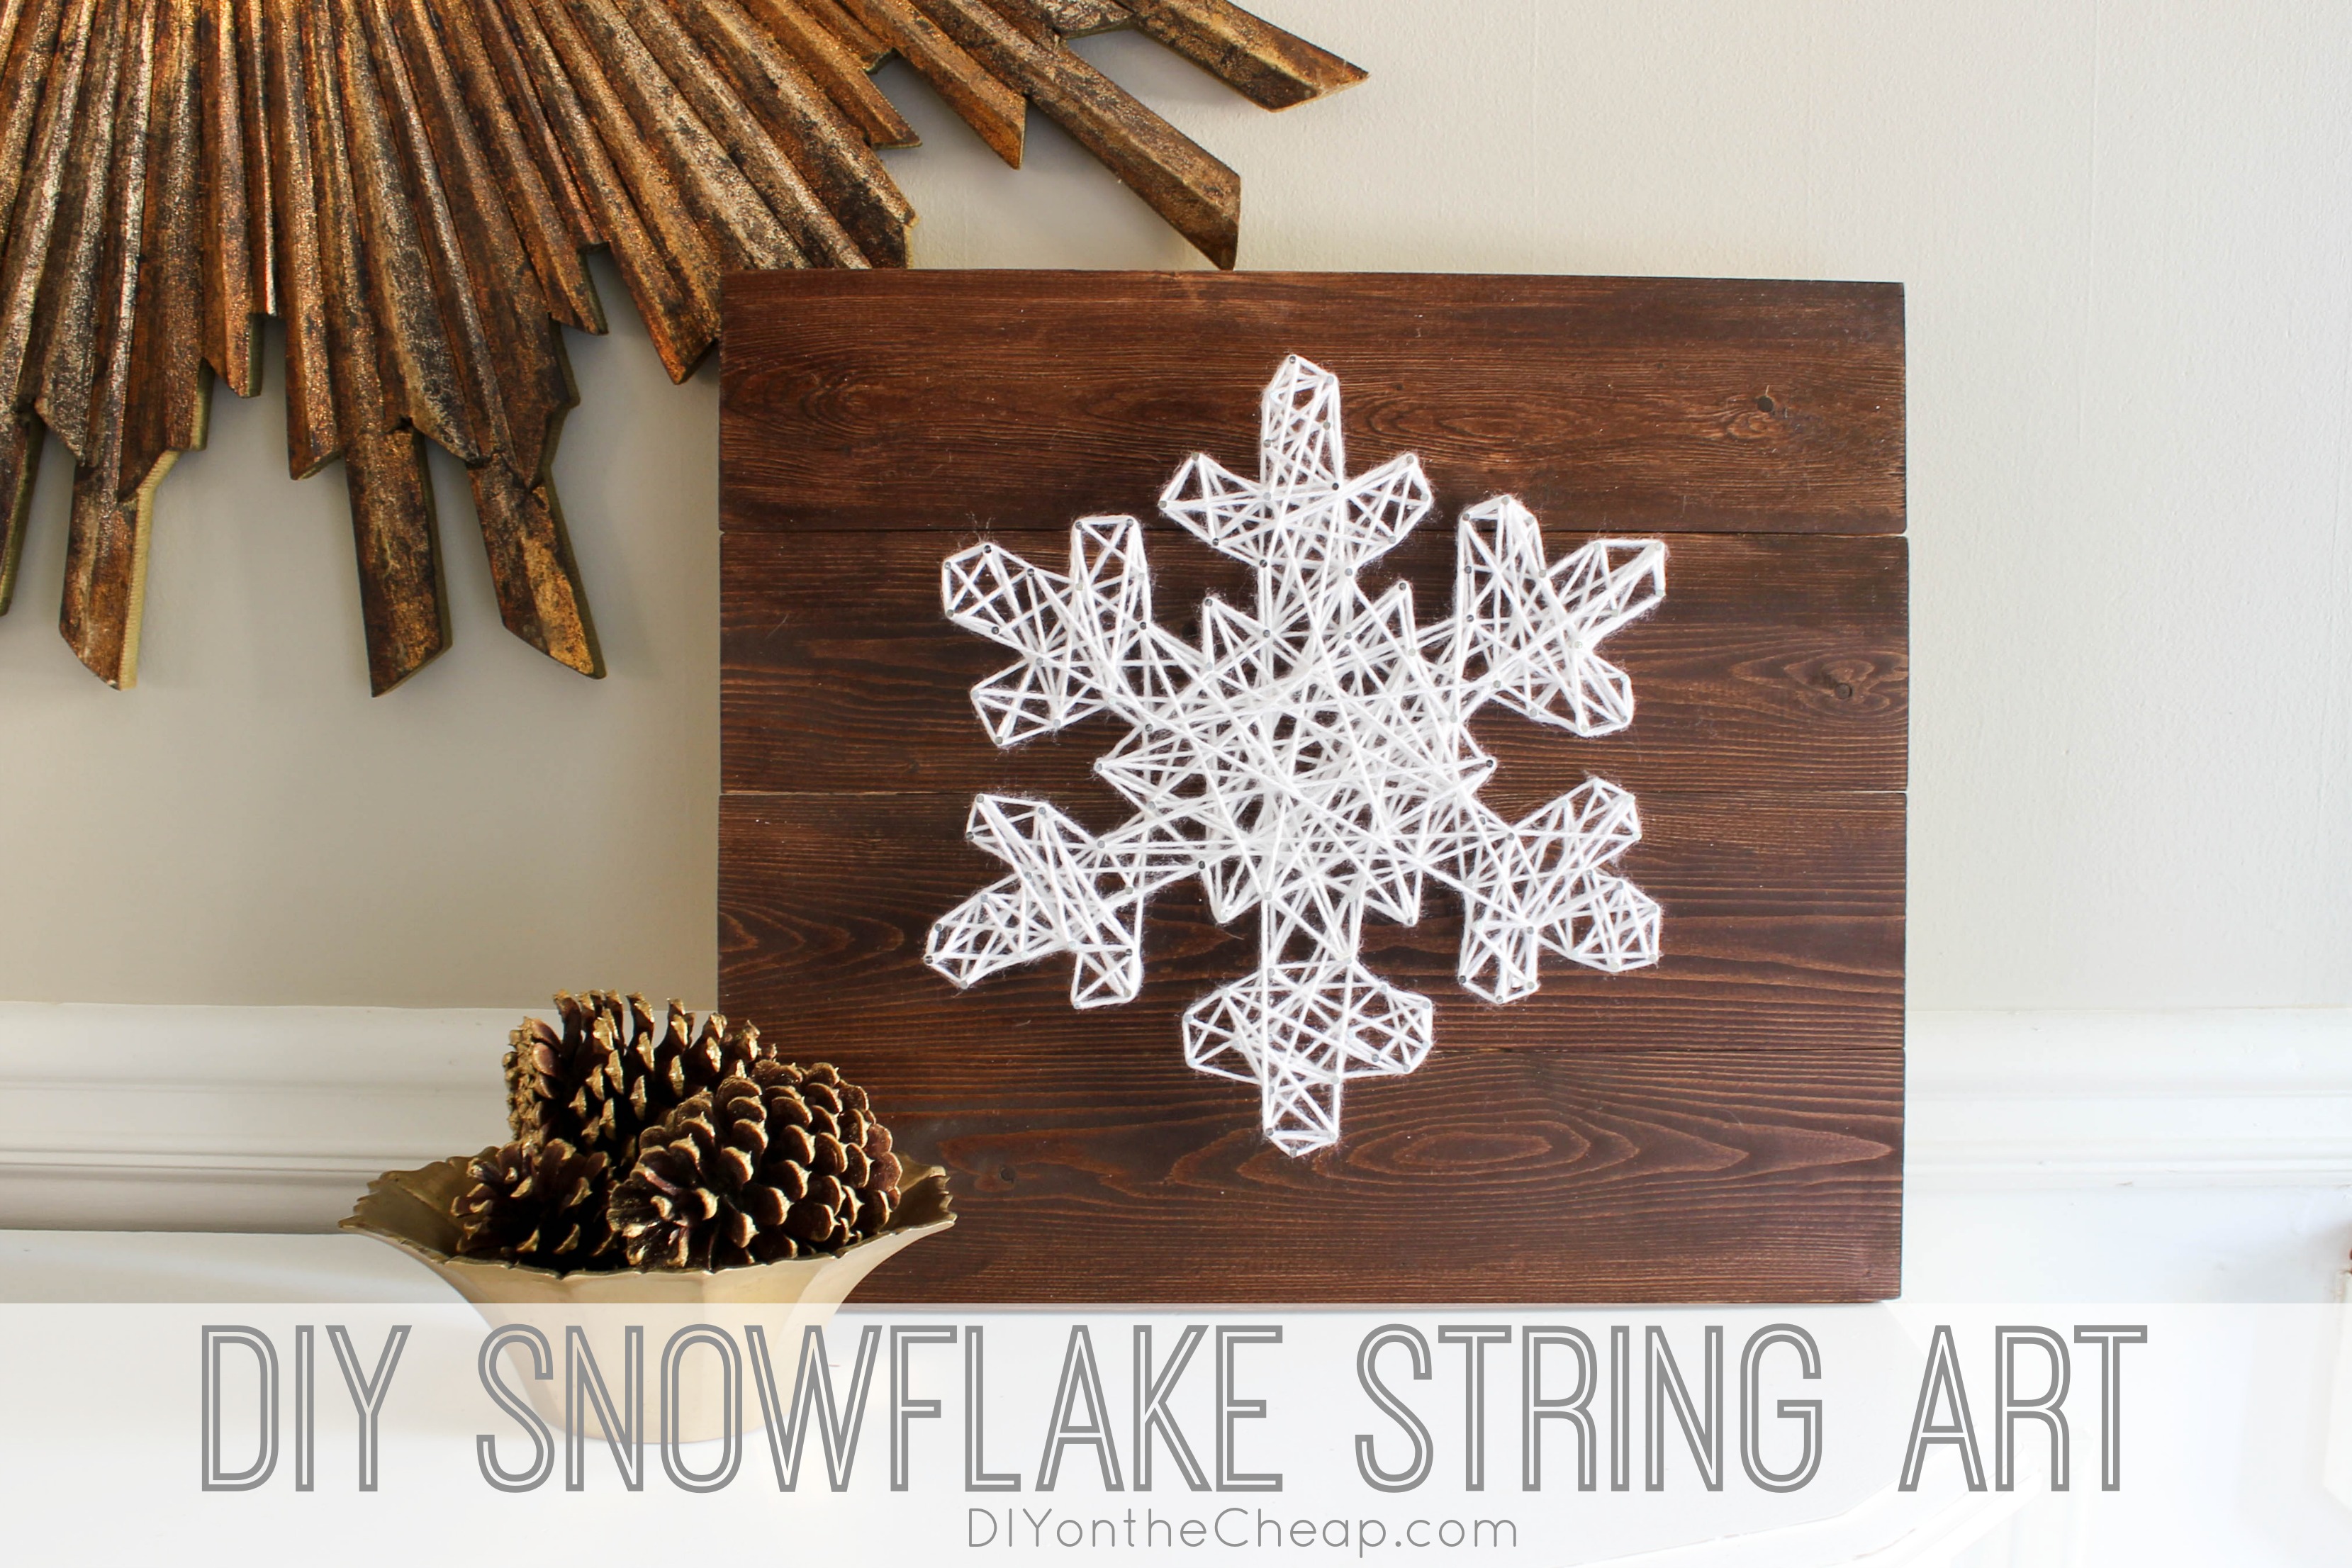
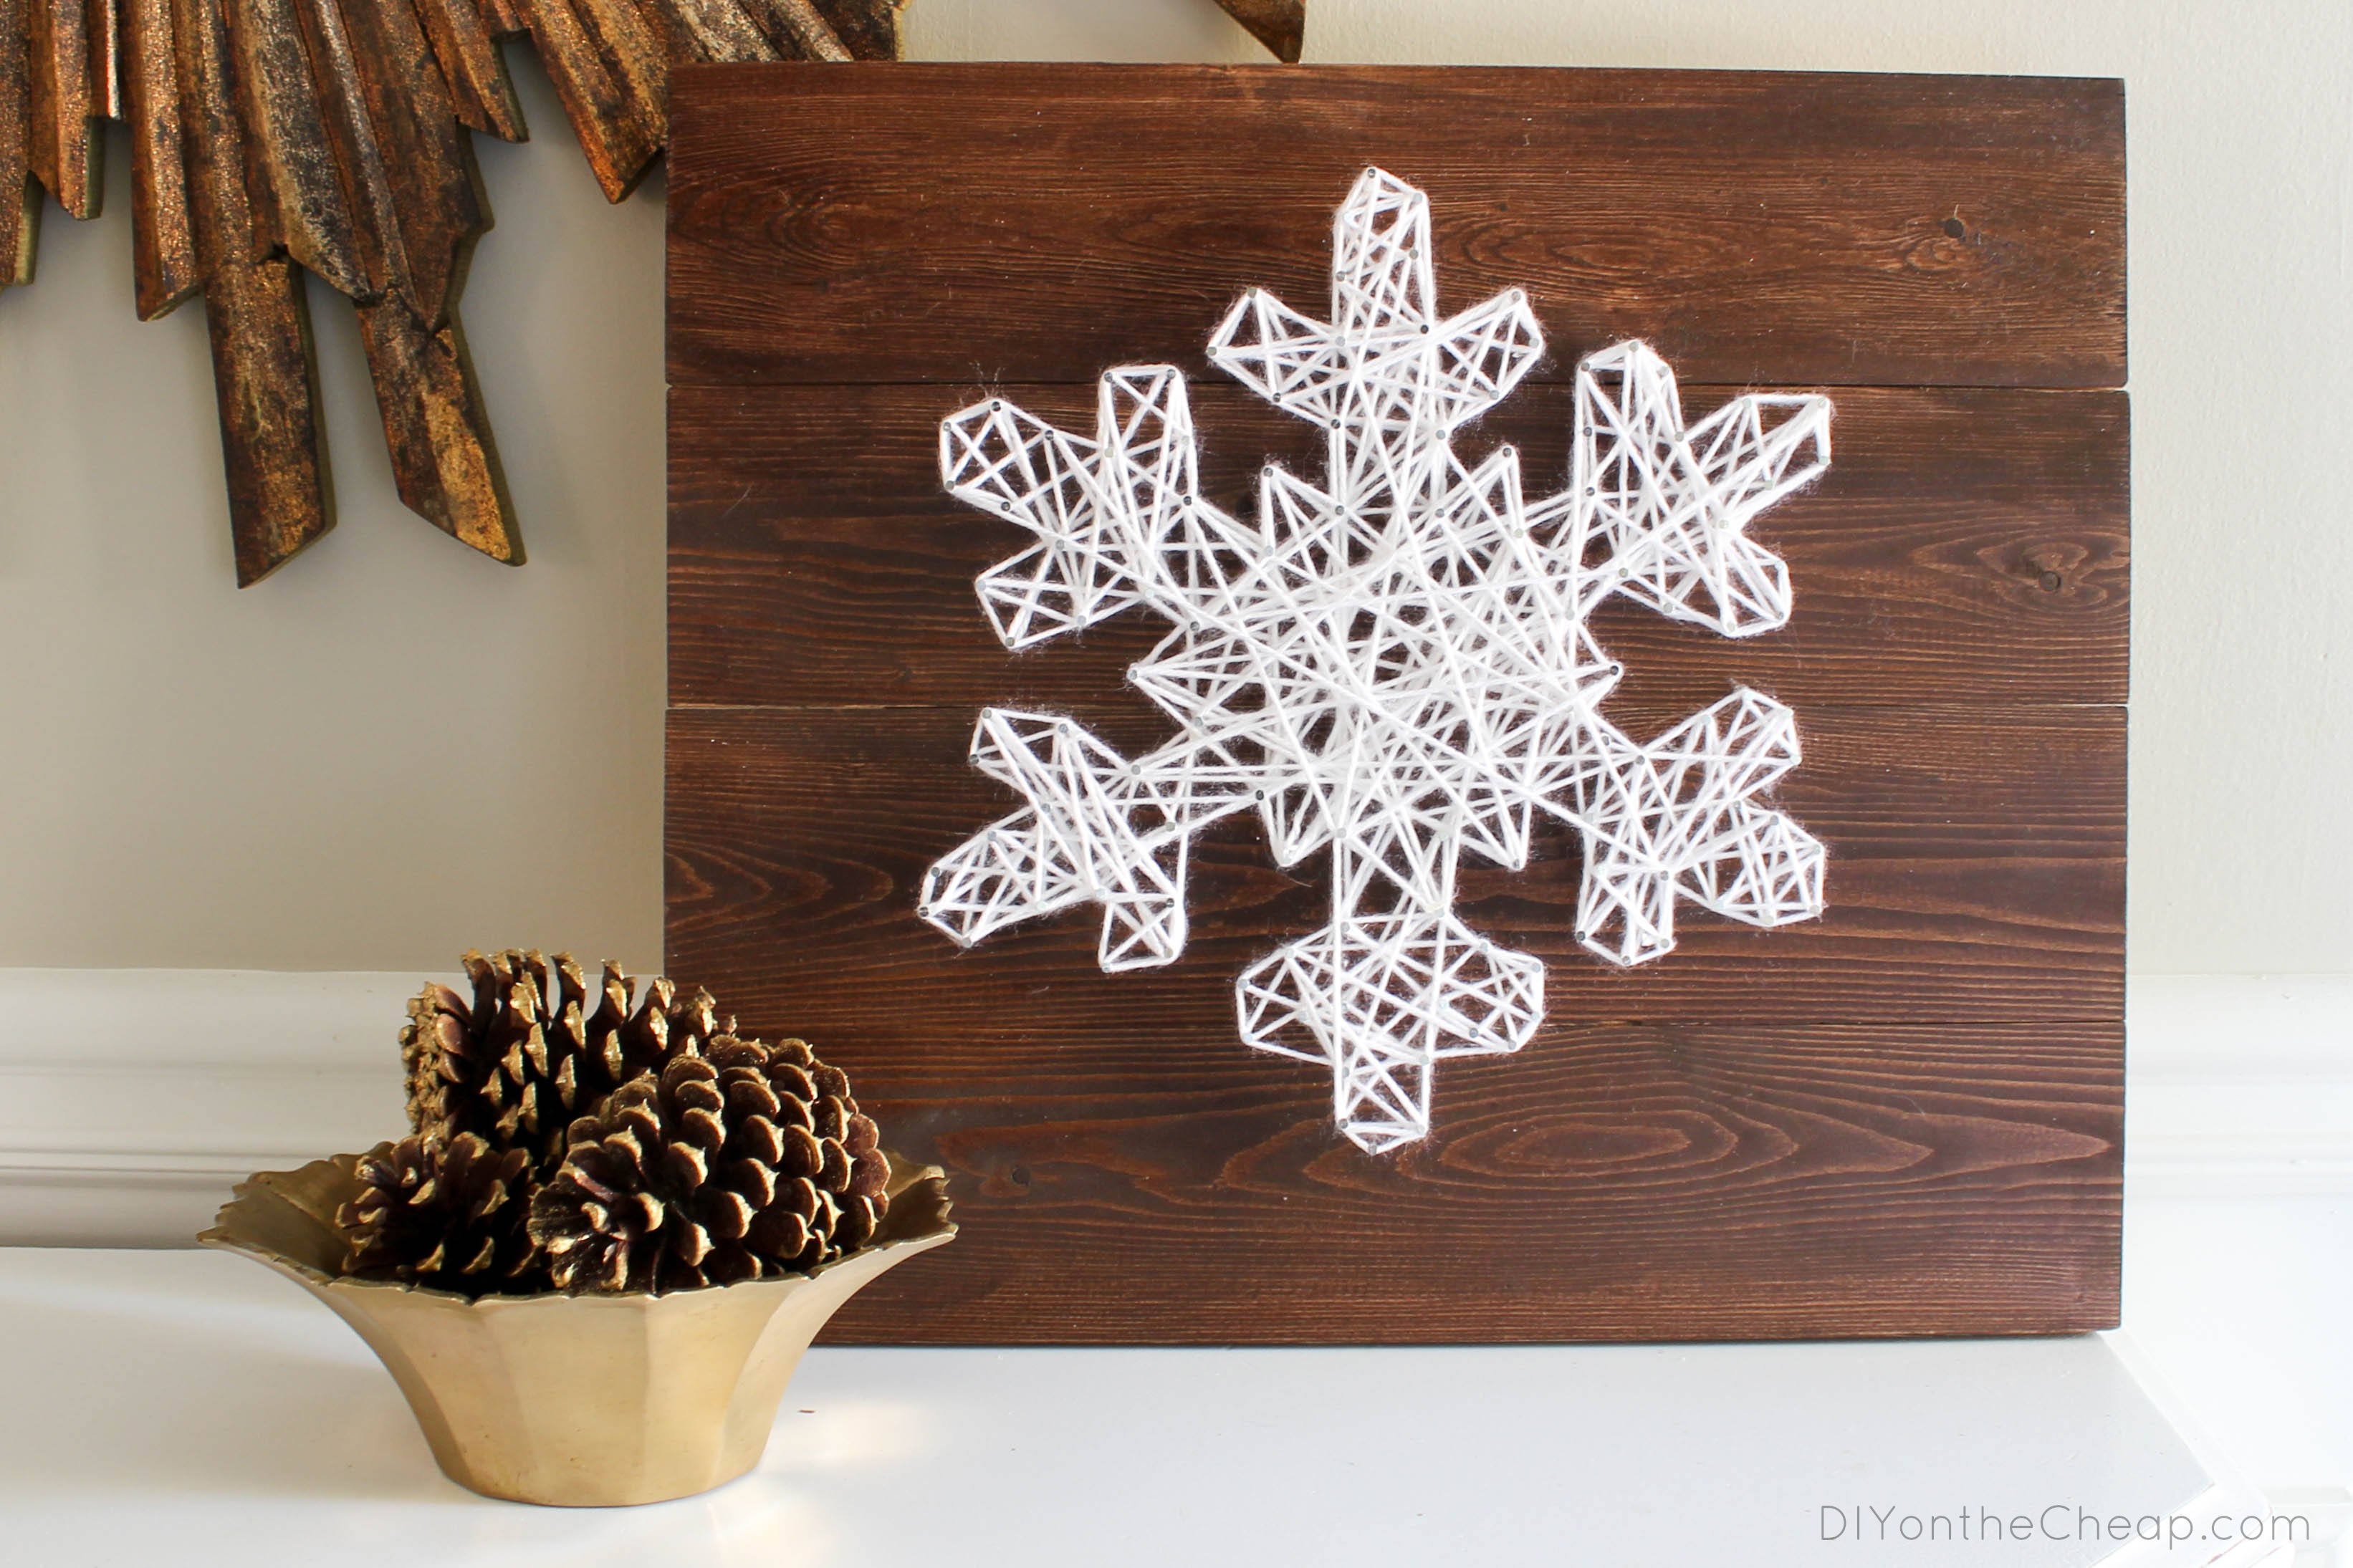
I can’t believe how quickly the holidays are approaching! The project I chose to make is this DIY Snowflake String Art. (You can find links to all the other bloggers’ projects at the end of this post.)
Here’s what you’ll need for this project:
(Affiliate links included. As an Amazon Associate I earn from qualifying purchases.)
- 1×4 cut into (4) – 16″ segments
- Saw
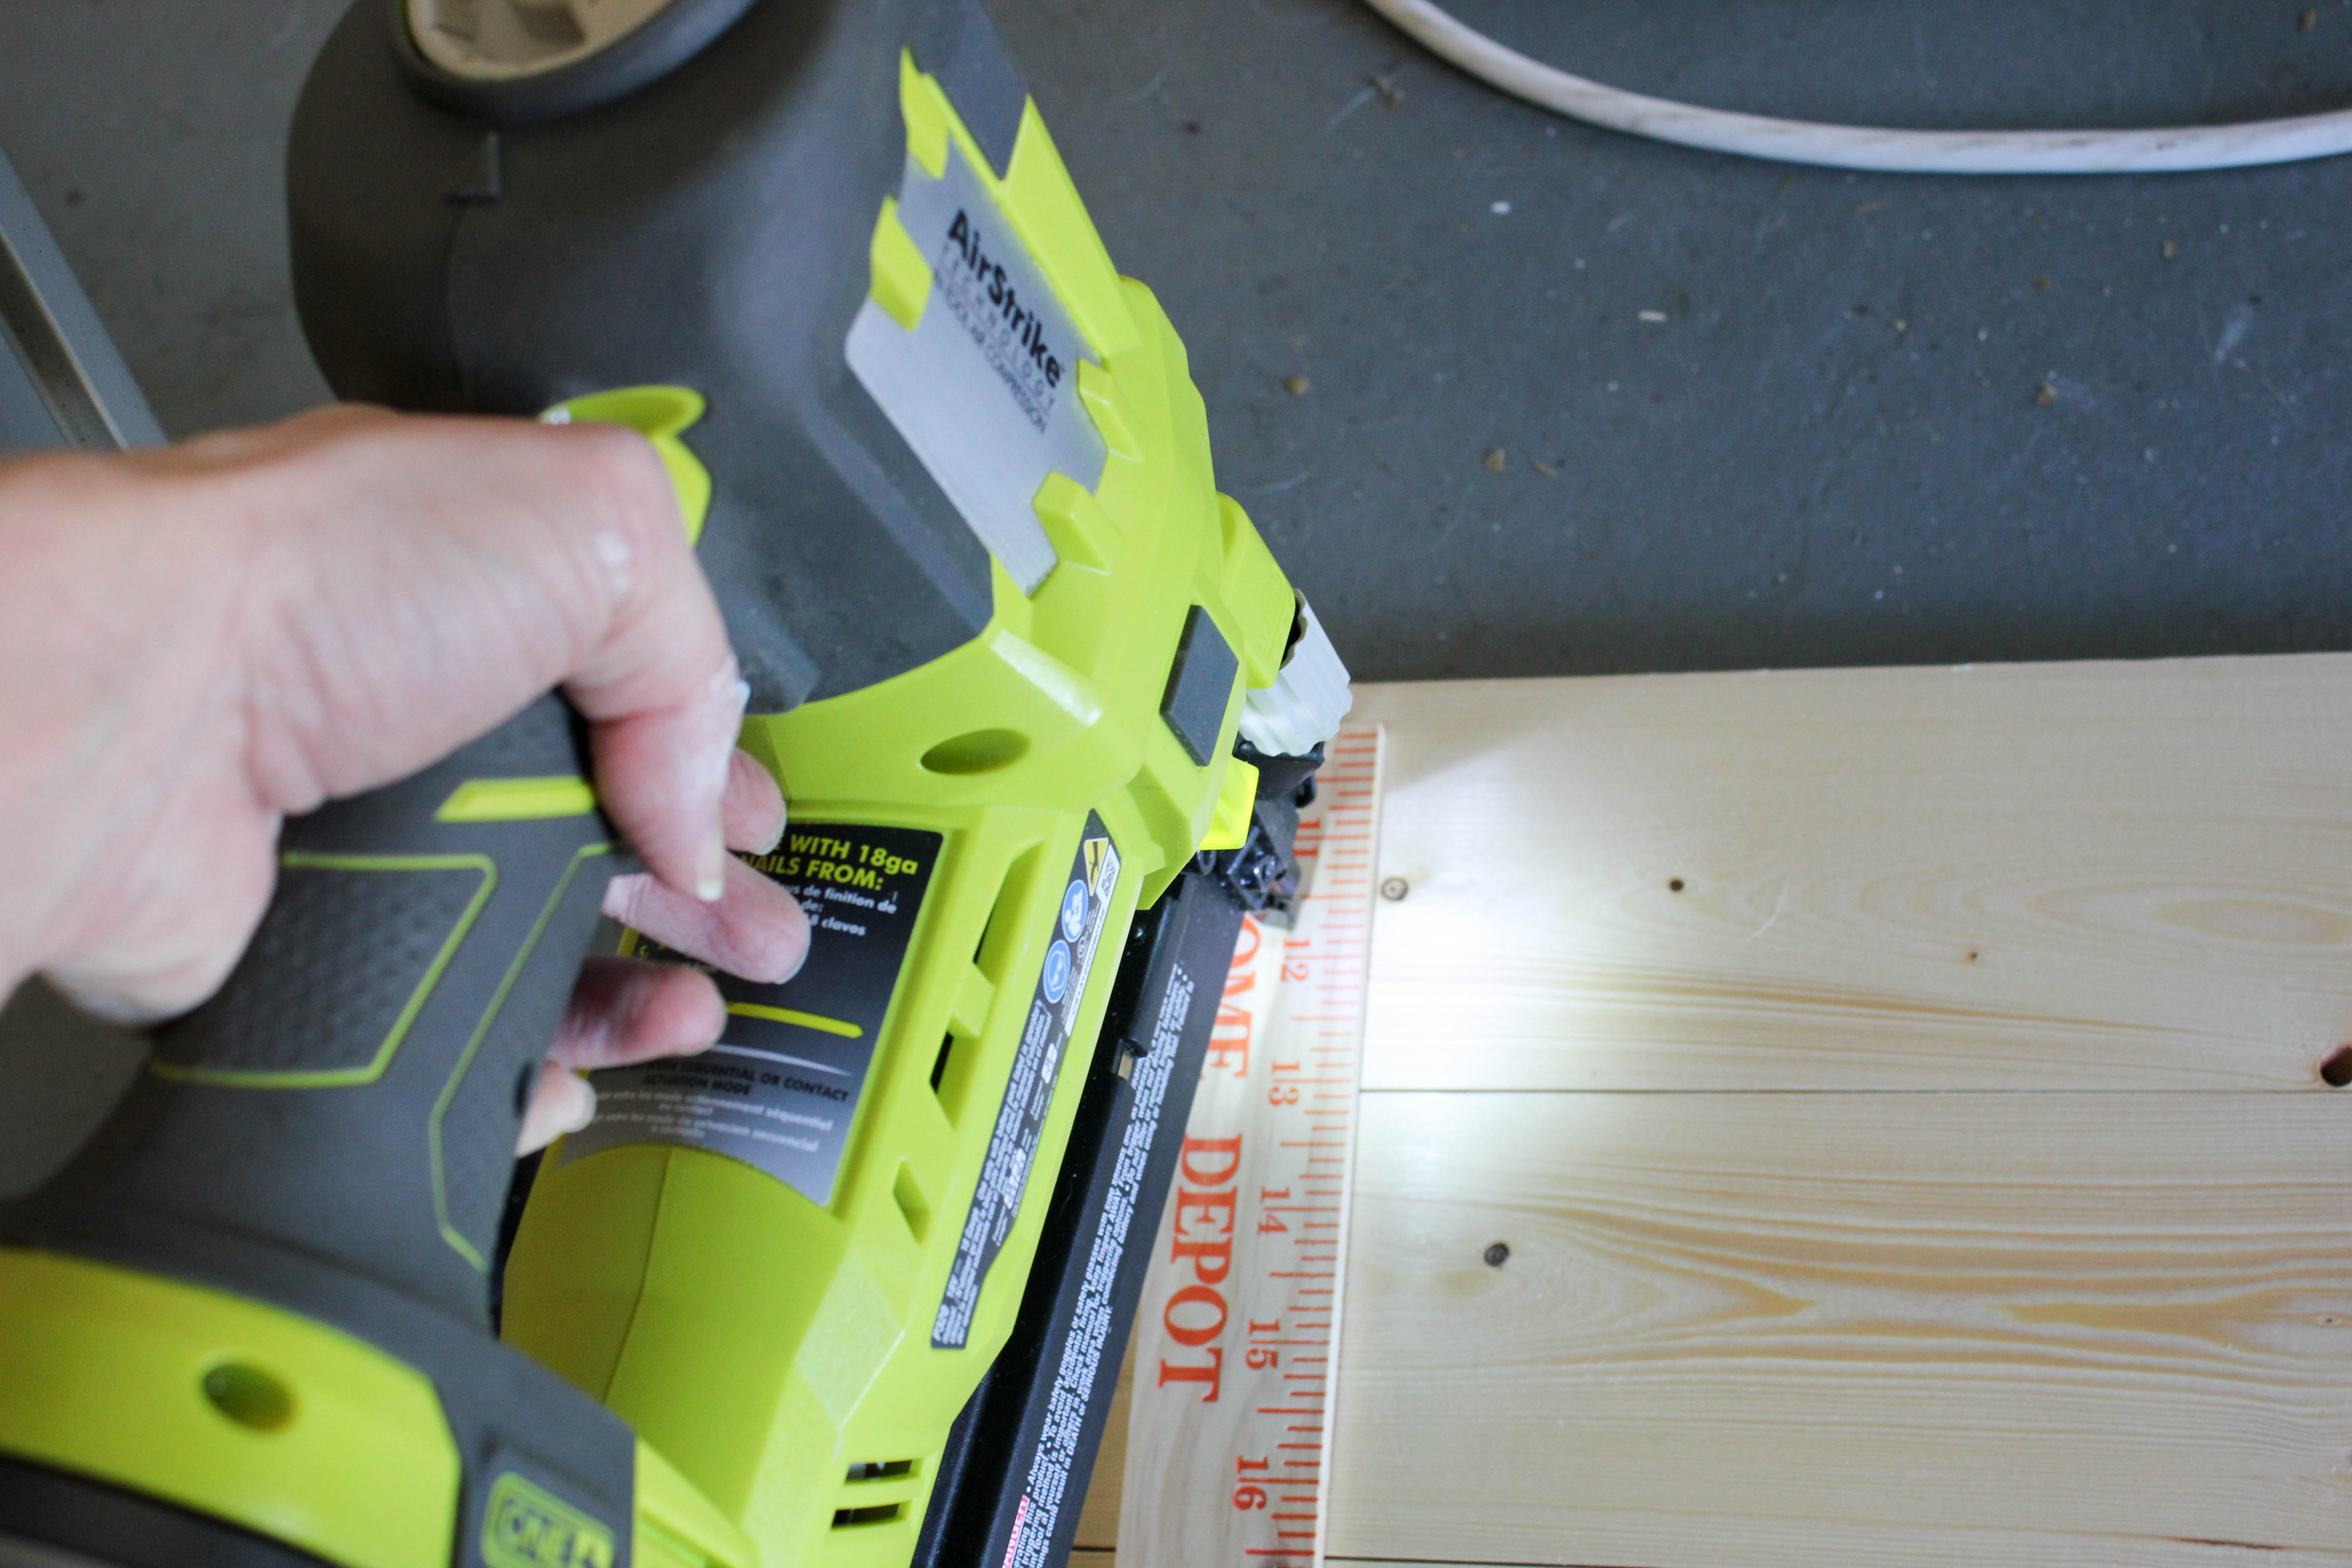
- RYOBI Brad Nailer
 and 1/2″ brad nails
 - RYOBI Sander
- Wood Glue
- Thin scrap wood (I used a wooden yard stick) to connect your boards
- Wood stain of your choice (I used two coats of Minwax Special Walnut)
- Small Nails or Brass Escutcheon Pins
- White Yarn
- Printed snowflake template/stencil of your choice OR Overhead Projector and Transparency Paper
- Scotch tape (if you use a paper template)
- Hammer
- D-Rings
Ok, I know the supply list seems a little long, but this is really an easy project, particularly if you have experience with tools.
Step 1:
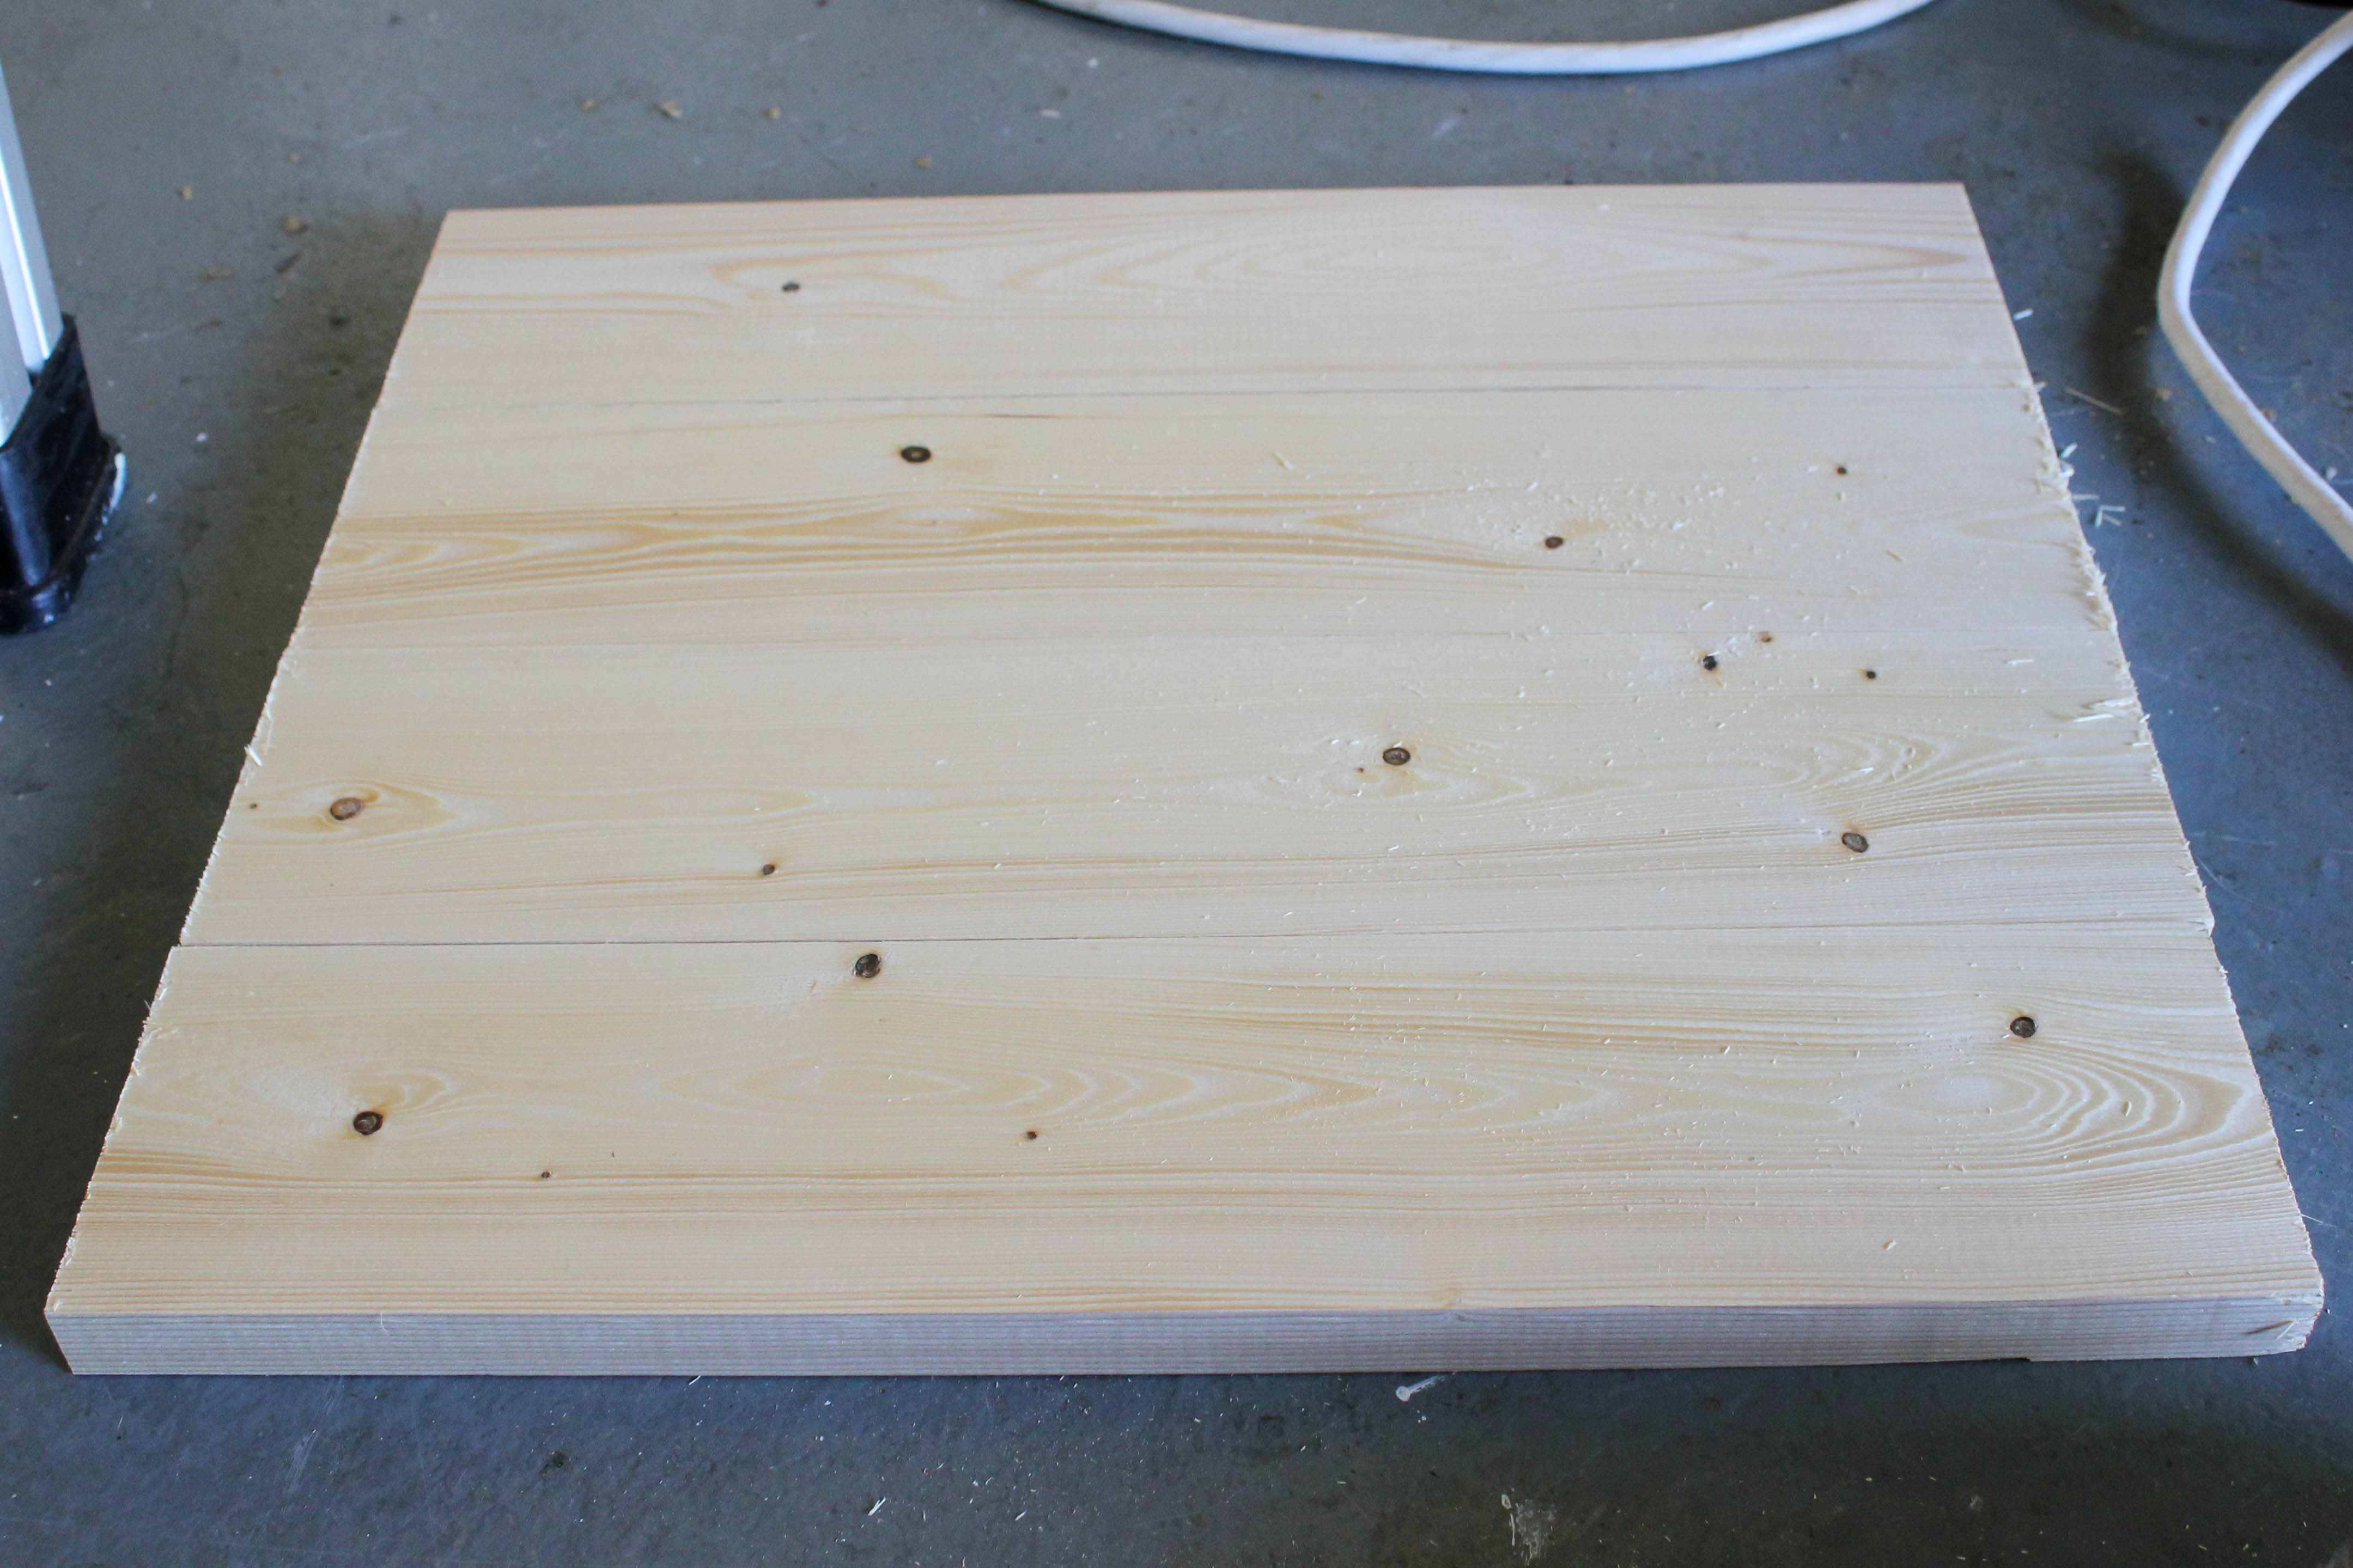
First, cut your 1×4 into (4) 16″ segments. I used my RYOBI Sliding Compound Miter Saw for this. (A circular saw would work too — I just love my miter saw for making perfectly straight cuts!)
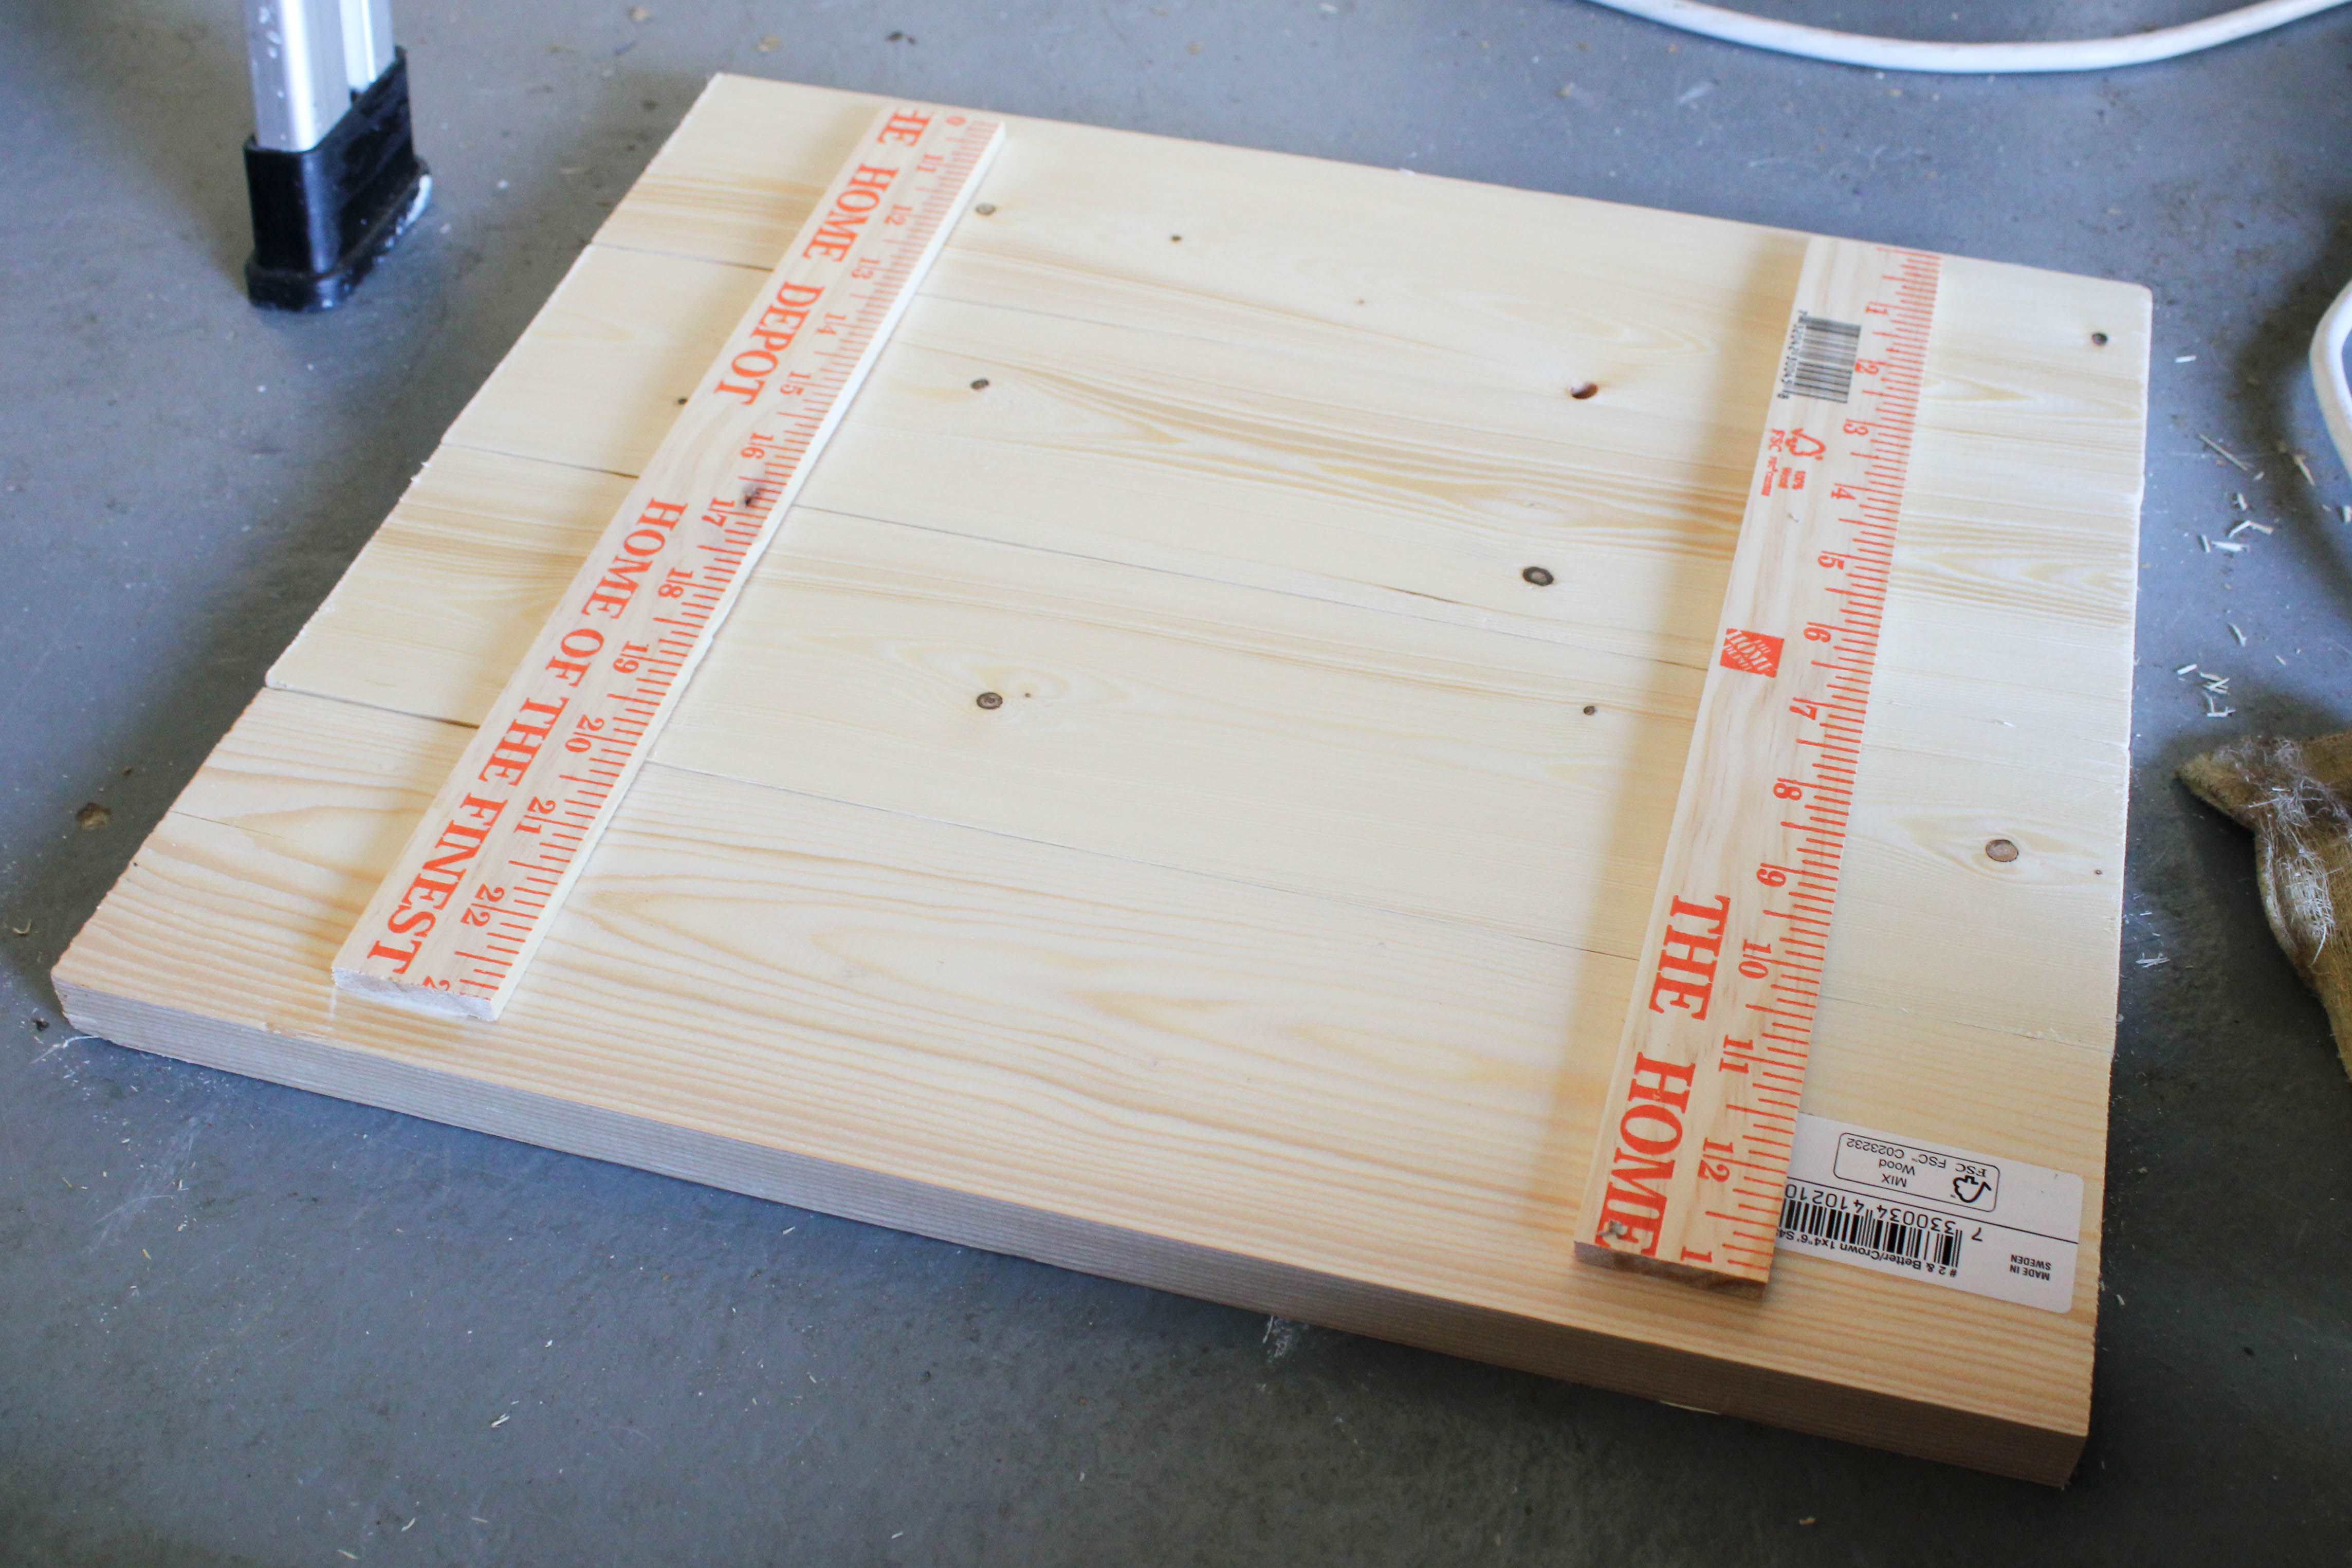
These segments make up the actual artwork. Cut two additional segments (you can use scrap wood or whatever you have on hand for this part), to 13″ each.
I used a wooden yard stick — thin wood is best if you want to hang your art on the wall, otherwise it will protrude an inch or two from the wall.
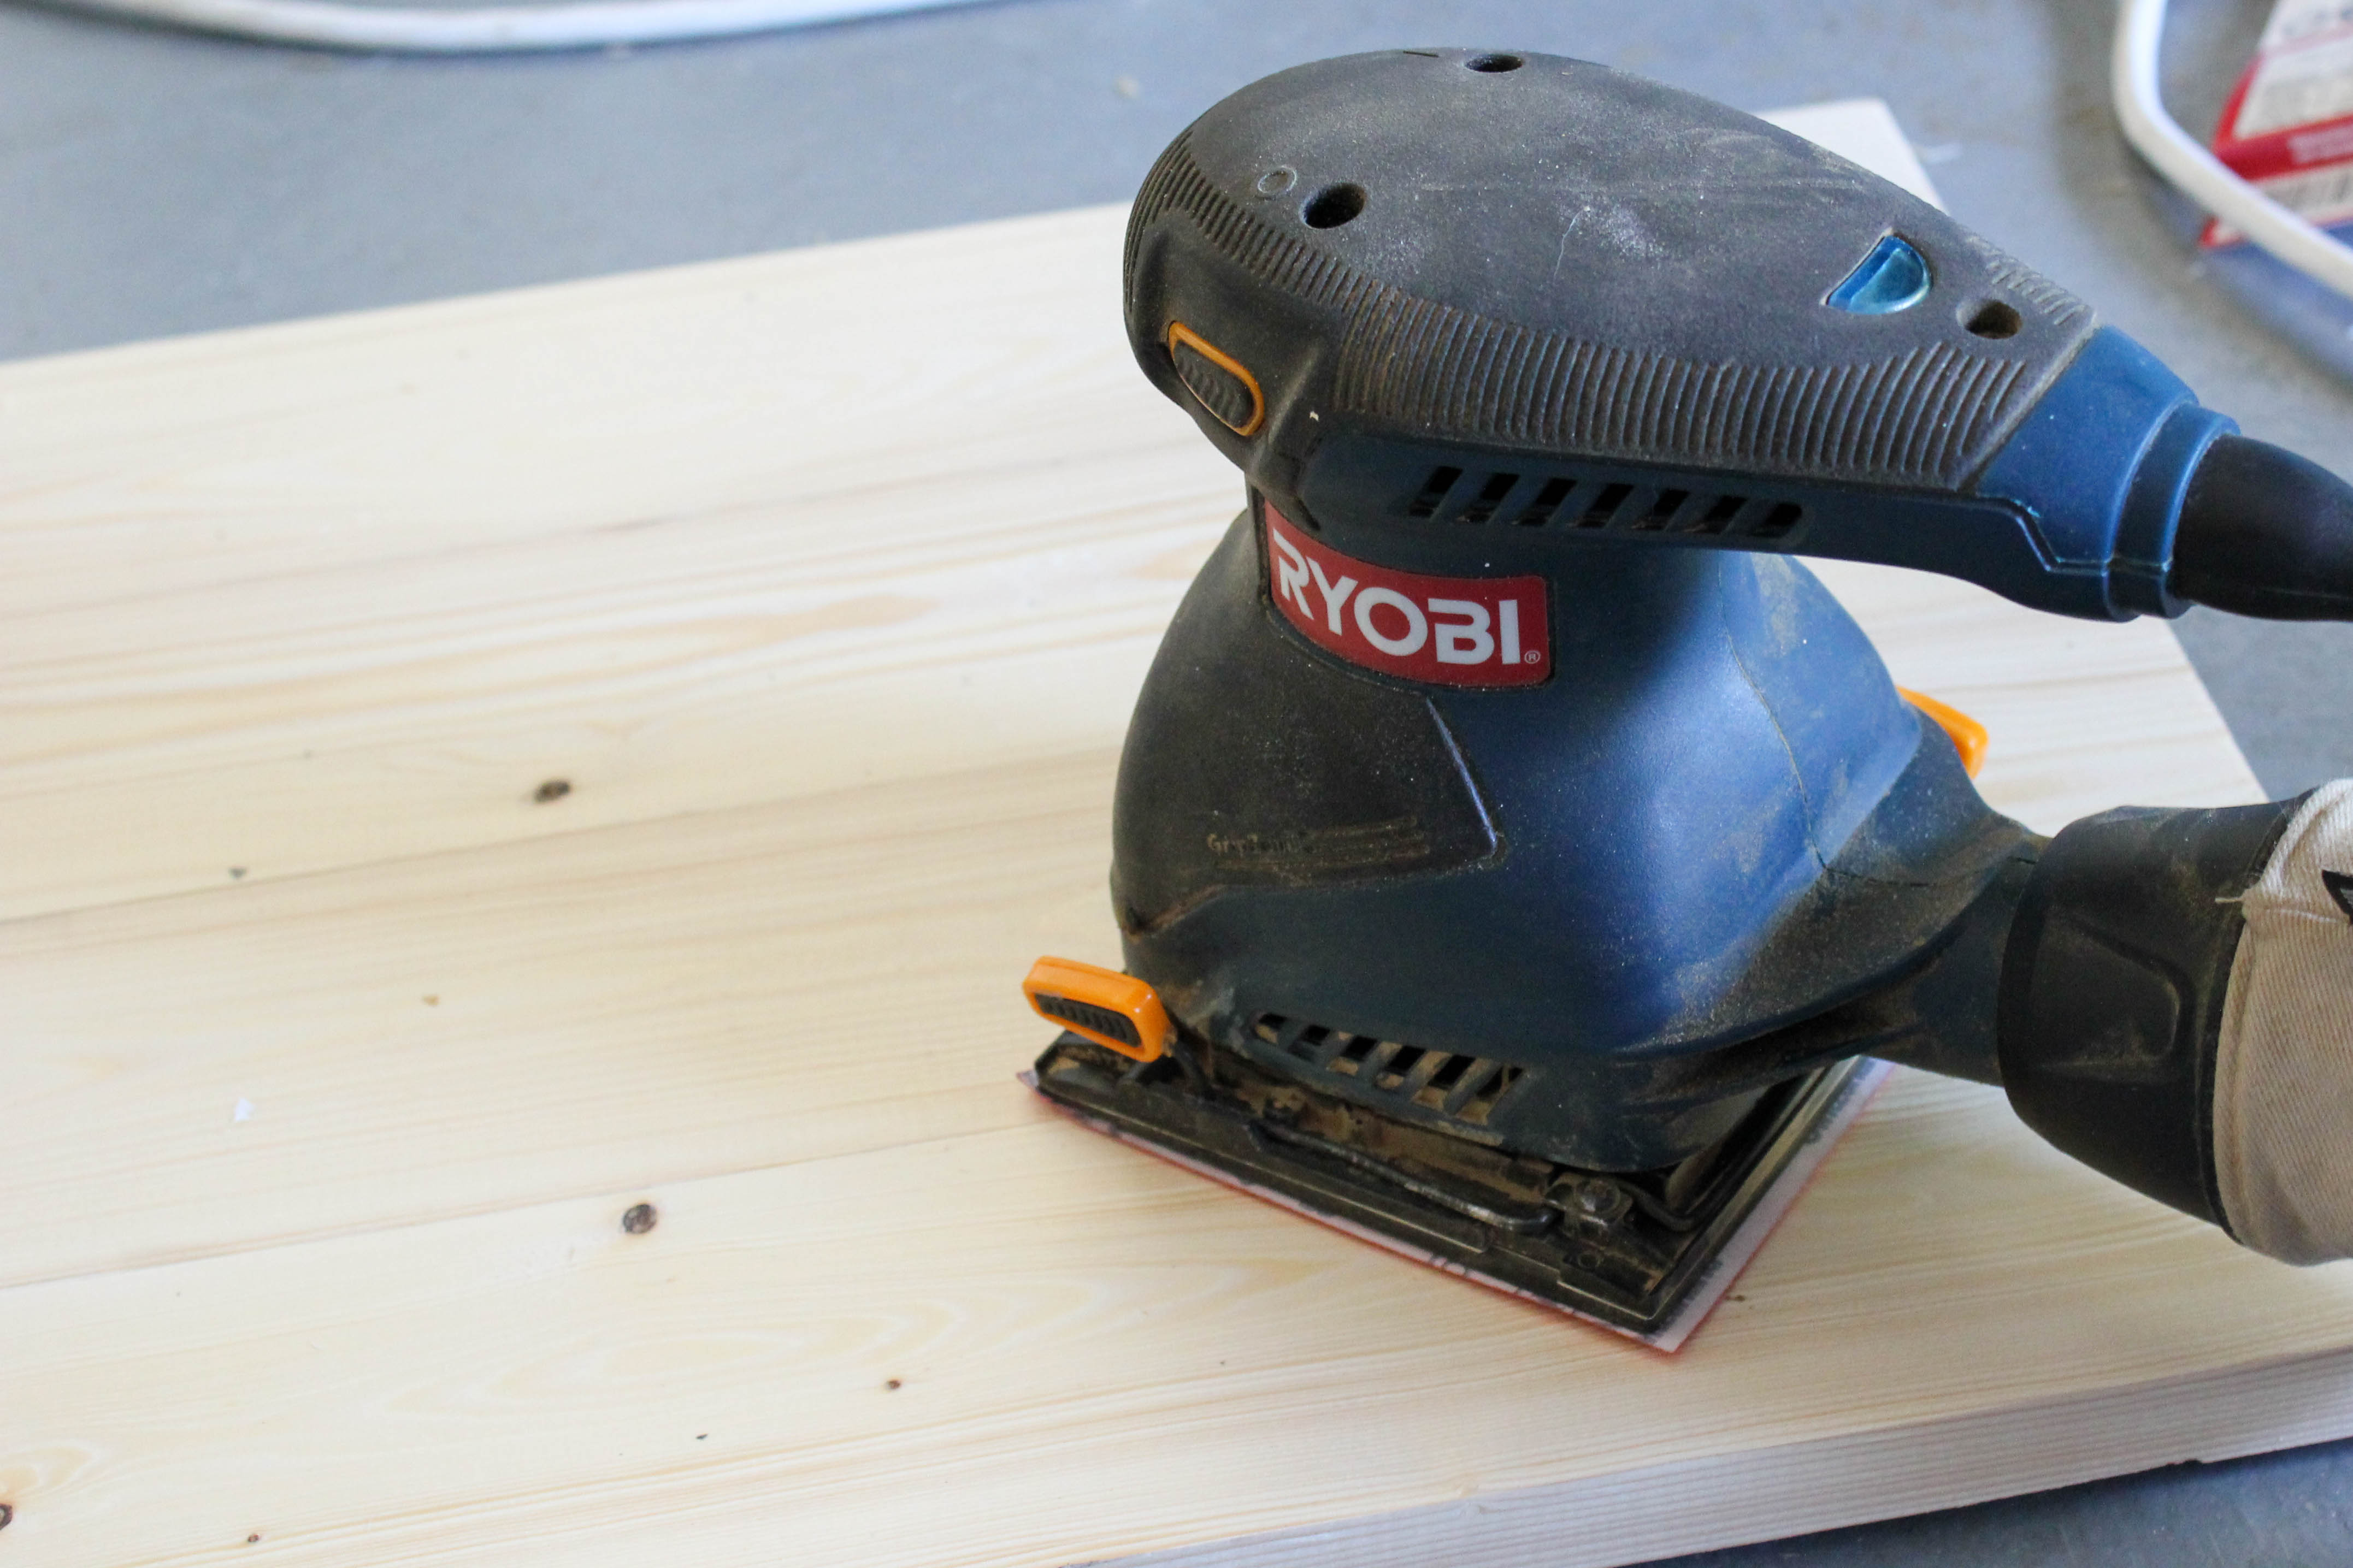
Step 2:
Sand your wood.
Step 3:
Line up your four 16″ boards so that they are pressed together, parallel to each other.
Attach the two additional 13″ segments to the back (perpendicular to the boards) with wood glue and brad nails to connect all of the boards together. Nail twice into each board.
Step 4:
Stain the boards in the color of your choice. I like to use a good pre-stain wood conditioner![]() first, and then I used Minwax Special Walnut Stain
first, and then I used Minwax Special Walnut Stain![]() . (Here’s a helpful post about how to stain wood.)
. (Here’s a helpful post about how to stain wood.)
Step 5:
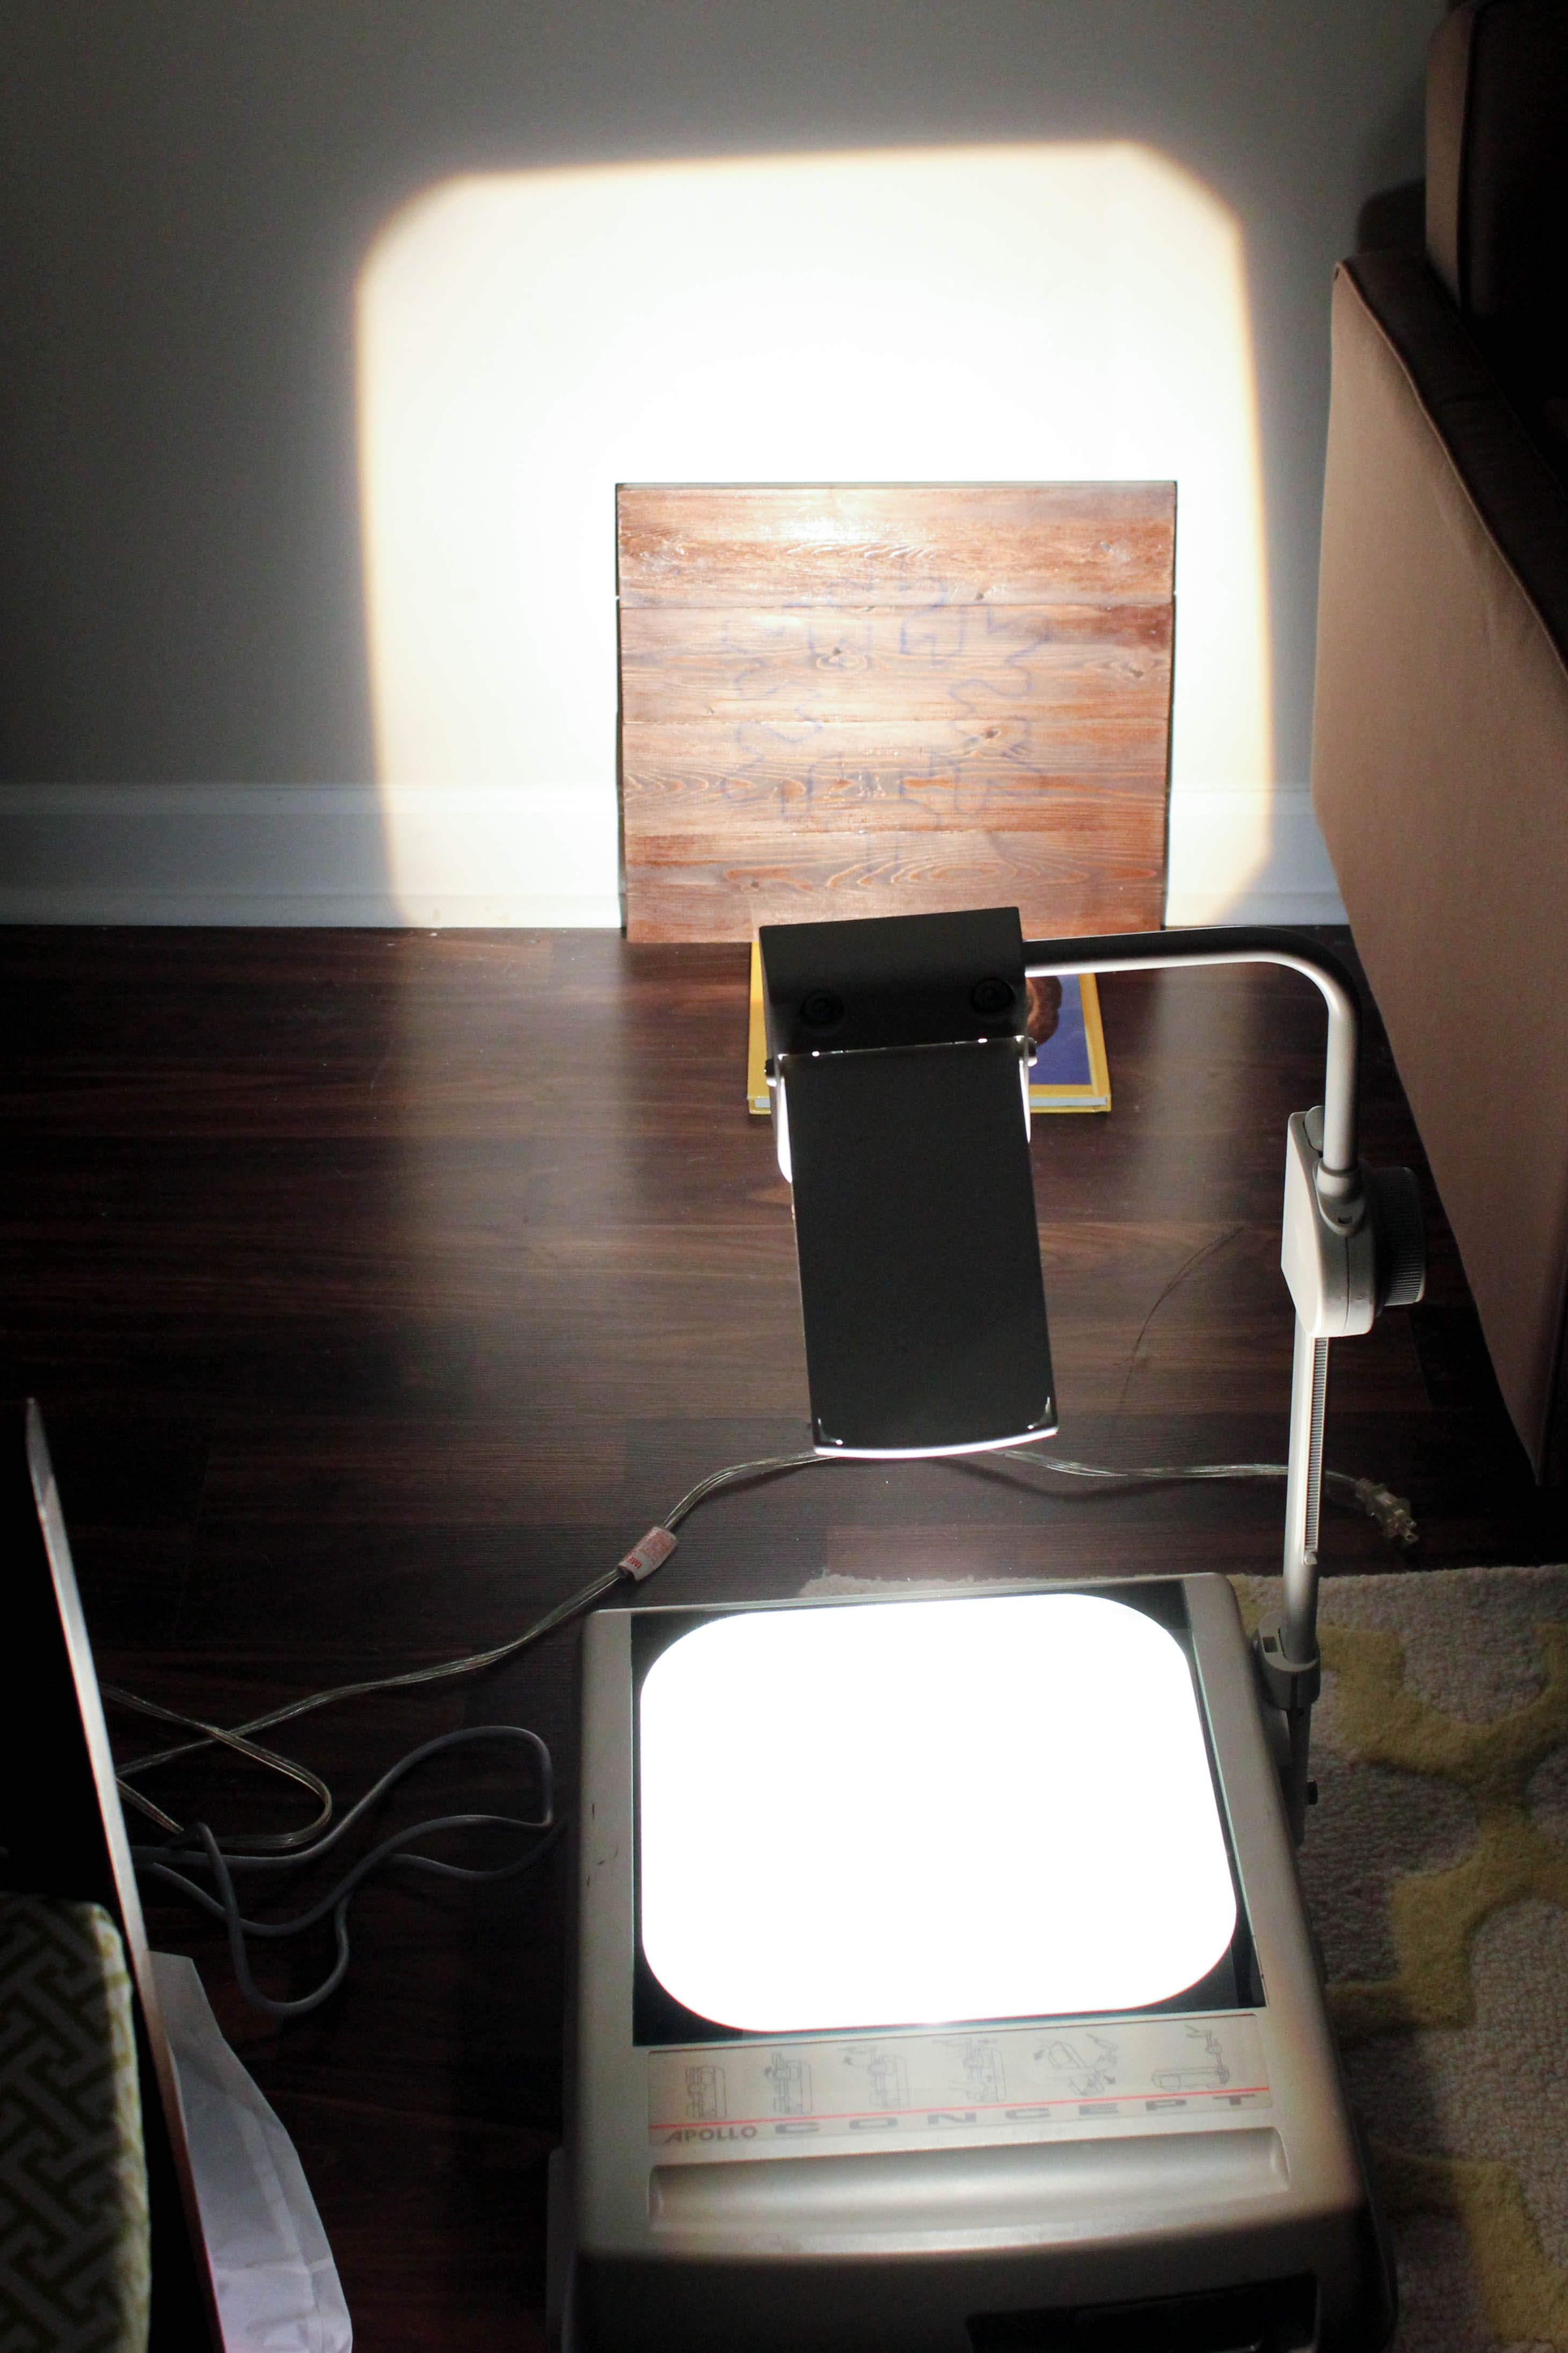
If you’re using a stencil or paper template, gently tape it to the center of your boards.
If you are using a projector (which I did), print out a snowflake photo or clip art and trace it onto a transparency sheet with a Sharpie. (This is way cheaper than having it printed.)
Trace it with chalk or a pencil. (Thank you to my friend Dena from Hearts & Sharts for letting me borrow her projector!) For my snowflake image, I just Googled “free snowflake clip art” and chose one that I liked the best.

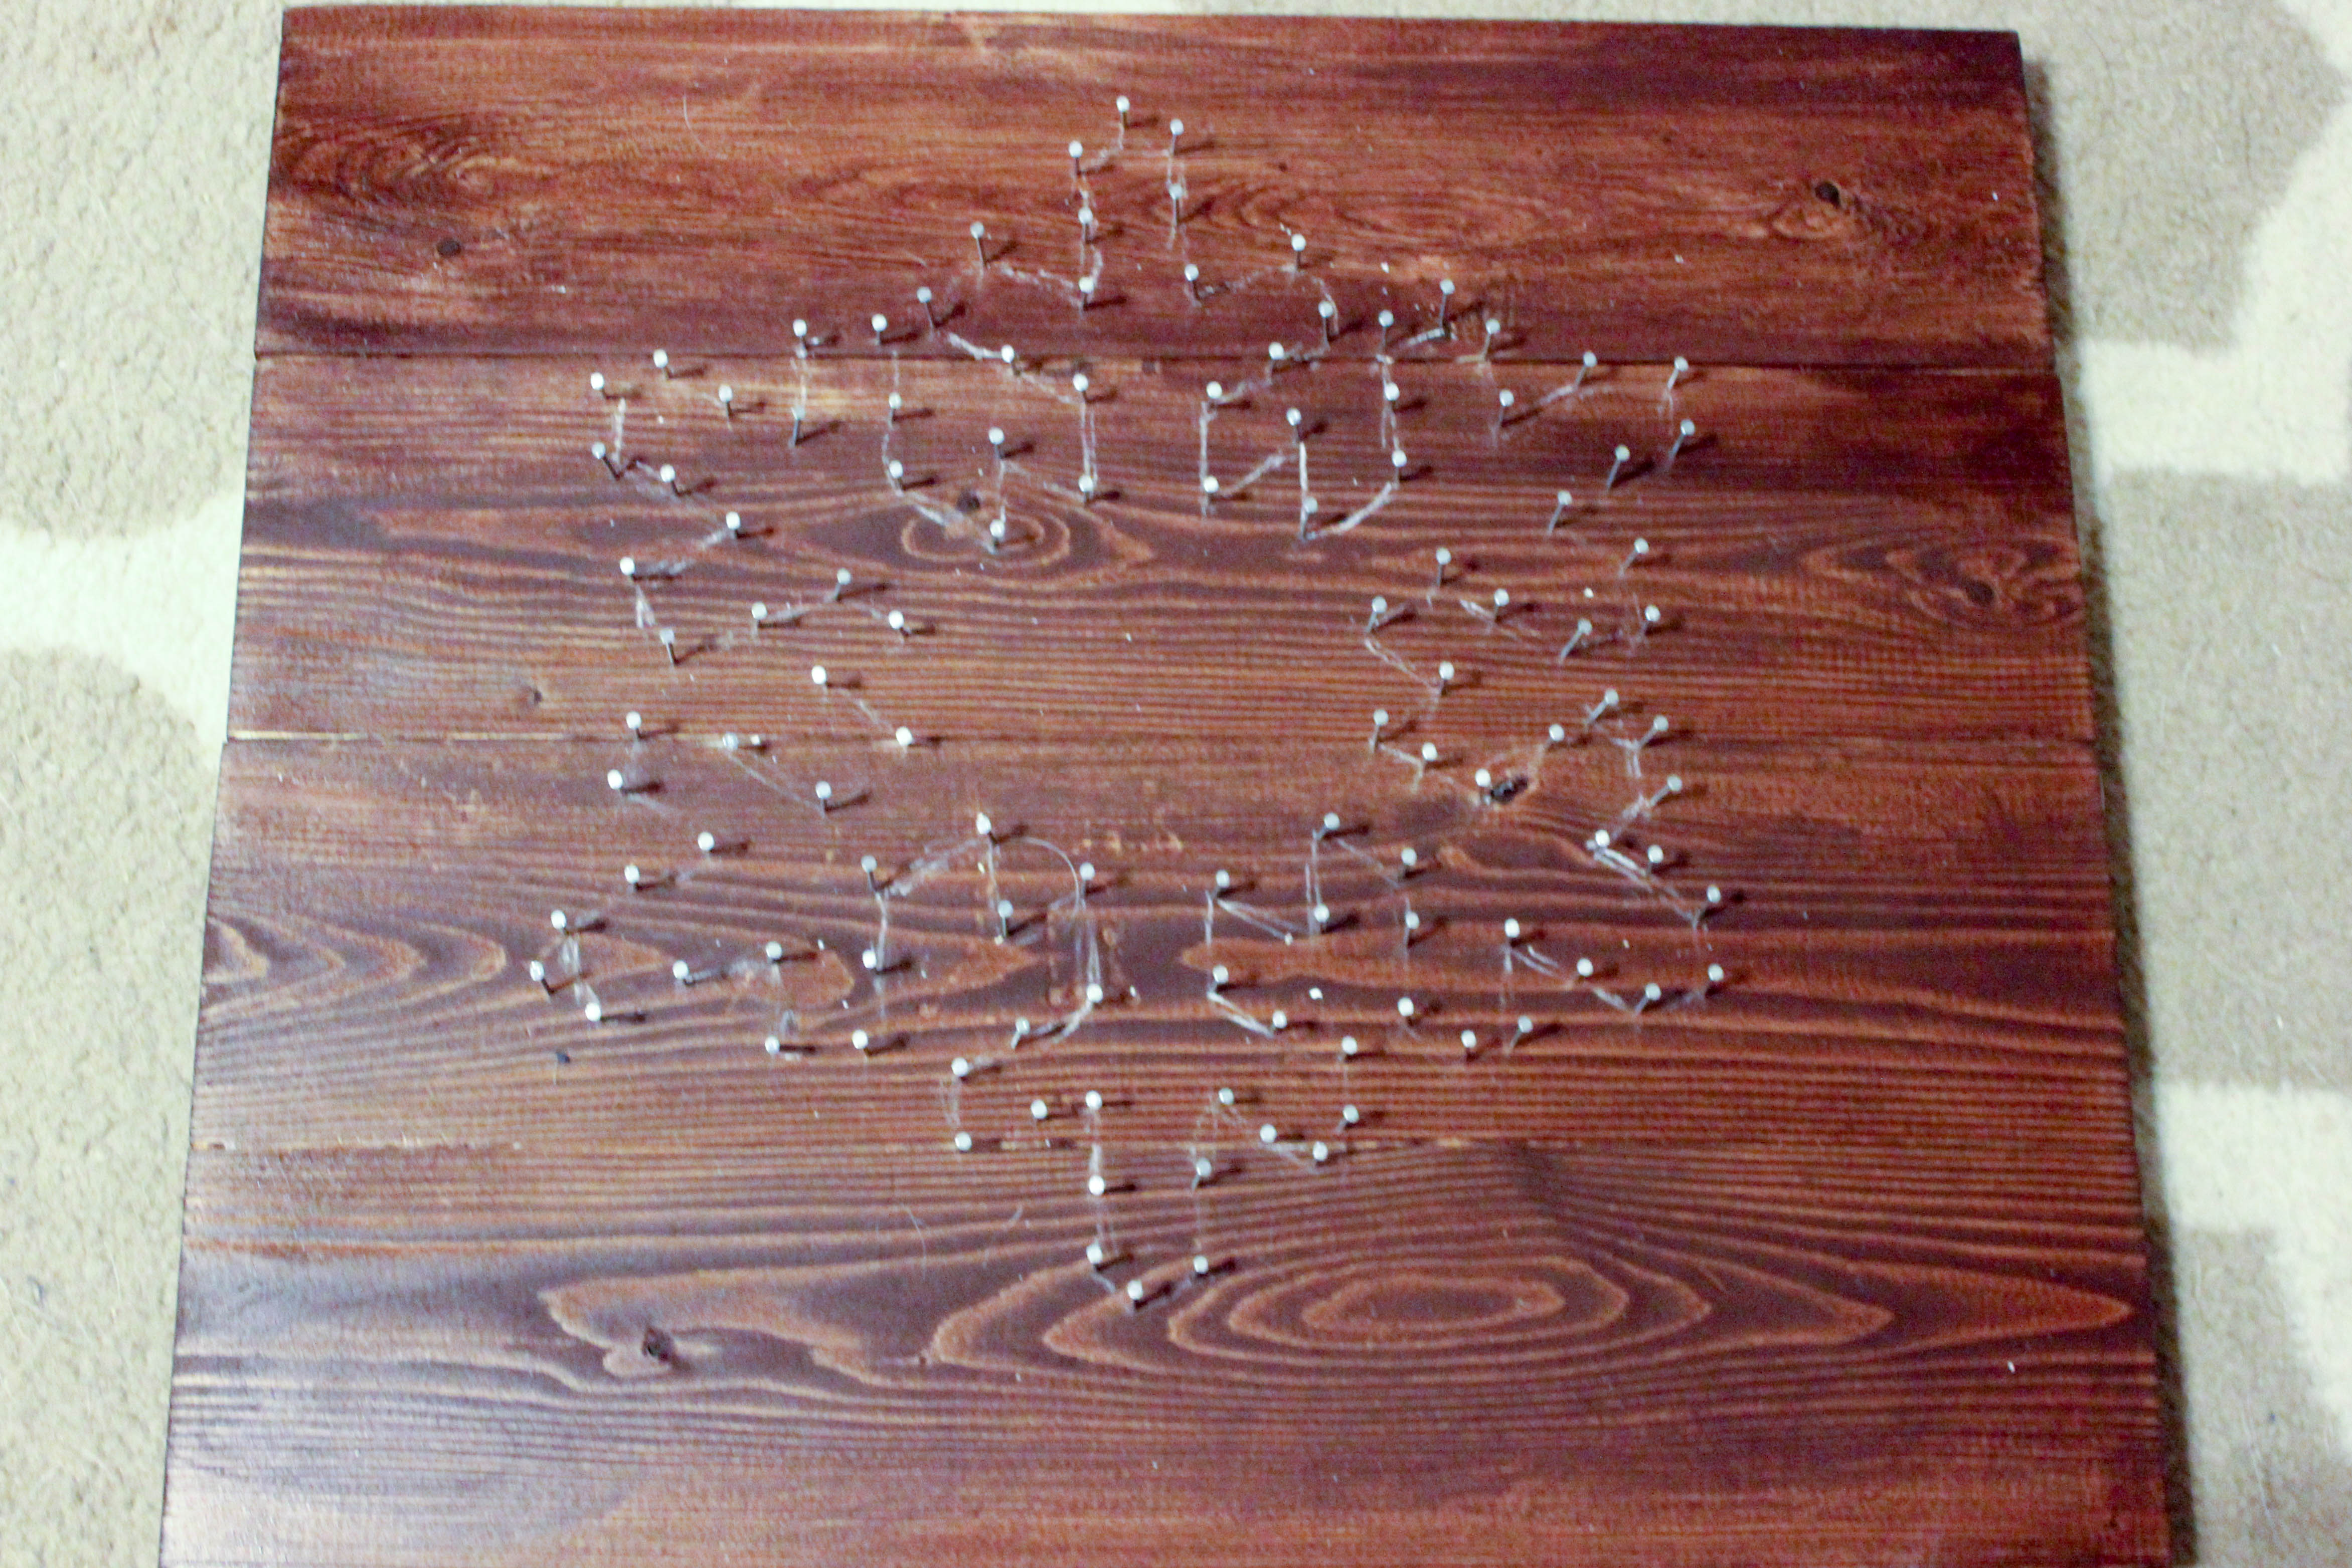
Step 6:
Hammer tacks or nails around the snowflake, spacing them about an inch apart, to create the snowflake shape on your boards. You can wipe away the chalk with a damp rag or a wet wipe.
Step 7:
Connect your brad nails with yarn. Randomly string it across and back and forth until you achieve the amount of coverage you want. Tie a small knot when you begin and another one when you end to secure the yarn in place.

Step 8:
Attach d-rings to the back of your string art to hang it on the wall. (Or you can prop it on a table or shelf like I did.)
Of course you could do this with any shape you choose, but I love the look of the snowflake!
(If you like this project, you might also like this DIY Tree String Art.)
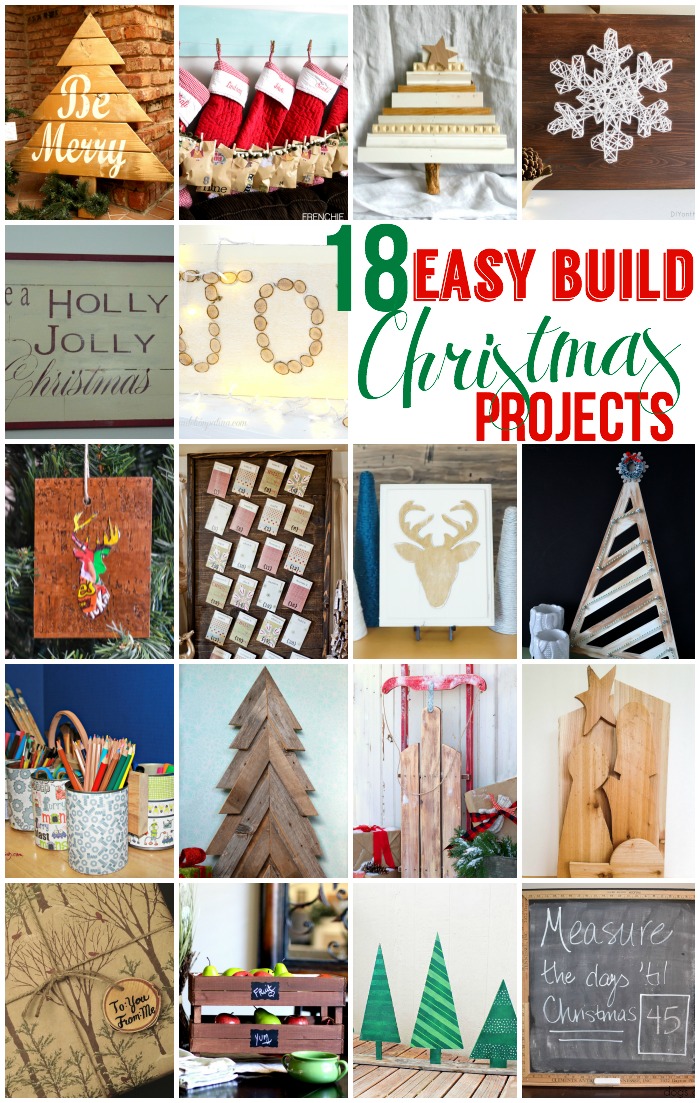
Be sure to check out all of the other RYOBI Christmas projects from participating bloggers! Here is the entire lineup:
Rustic scrap wood Christmas tree– Dukes and DuchessesSnowflake String Art– DIY on the Cheap
Silhouette Stand Nativity– My Day Lights
Instagram stocking holders– Frenchie Wraps
DIY Twine Christmas Tree – Poofy Cheeks
Repurposed Gift Carry All- Let’s Go Junking
Rustic Christmas Tree Decoration-Her Tool Belt
PB Inspired Wall Art– Create and Babble
Woodland Reindeer Ornaments-Whats Ur Home Story
Advent calendar– Carissa Miss
DIY Stackable Slatted Fruit Crates– Pink When
Joy wood slice sign– Dandelion Patina
Gold Reindeer Décor– Simply Designing
Wooden Christmas Tree Display– Lauras Crafty Life
Pallet Wood Christmas Tree– Roubinek Reality
Christmas countdown chalkboard- Dogs Don’t Eat Pizza
Caddy with Herb Infused Oils- 356 Days of Crafts
Wood gift tag– Being Spiffy DIY Vintage Sled – Fynes Designs
Have you started decorating for the holidays yet? Or do you wait until December?
YOU MIGHT ALSO ENJOY THESE POSTS:
- DIY Mason Jar Lid Ornaments
- Monogrammed Glass Ornament
- Hand Stamped Clay Ornaments
- DIY Paper Feather Ornaments
- Christmas Home Tour
Disclosure: This post contains affiliate links.
Connect with me here:
![]()
![]()
![]()
![]()
![]()
![]()
