I’m finally back! I know I’ve been missing in action for a while. Between traveling for a week over the Thanksgiving holiday, and being knocked out with an almost month-long respiratory illness, I wasn’t able to work on many projects over the past few weeks. I’m finally slowly getting back into a routine, and I have something fun to share with you today! Even though I was sick, I managed to somehow work on our Living Room/Office Makeover and I want to share the before and after with you.
Today I will mainly show some before/after and in-progress photos, along with a source list for stuff in this room. I still need to add curtains and some little odds and ends, and do something about the filing cabinet, but this room is close enough to be called “done” as far as I’m concerned. As I’ve mentioned before, we are going for a somewhat mid-century modern/contemporary-ish style in here since my husband loves “Mad Men” style stuff and he spends a lot of time working in here. You’ve seen some photos along the way as projects have been completed, but I wanted to show as much of the “beginning to end” process as I could this time.
Just to refresh your memory, here is the room “Before.” It was hard to get a picture that showed the true color of the walls, but it was a yellowy off-white color. This picture probably shows it the most accurately, although you can’t see all of the nicks and scuffs. (There were plenty.) I also couldn’t find any photos taken earlier than this one, before we added the rug and dresser. But you can imagine – it was pretty bare.
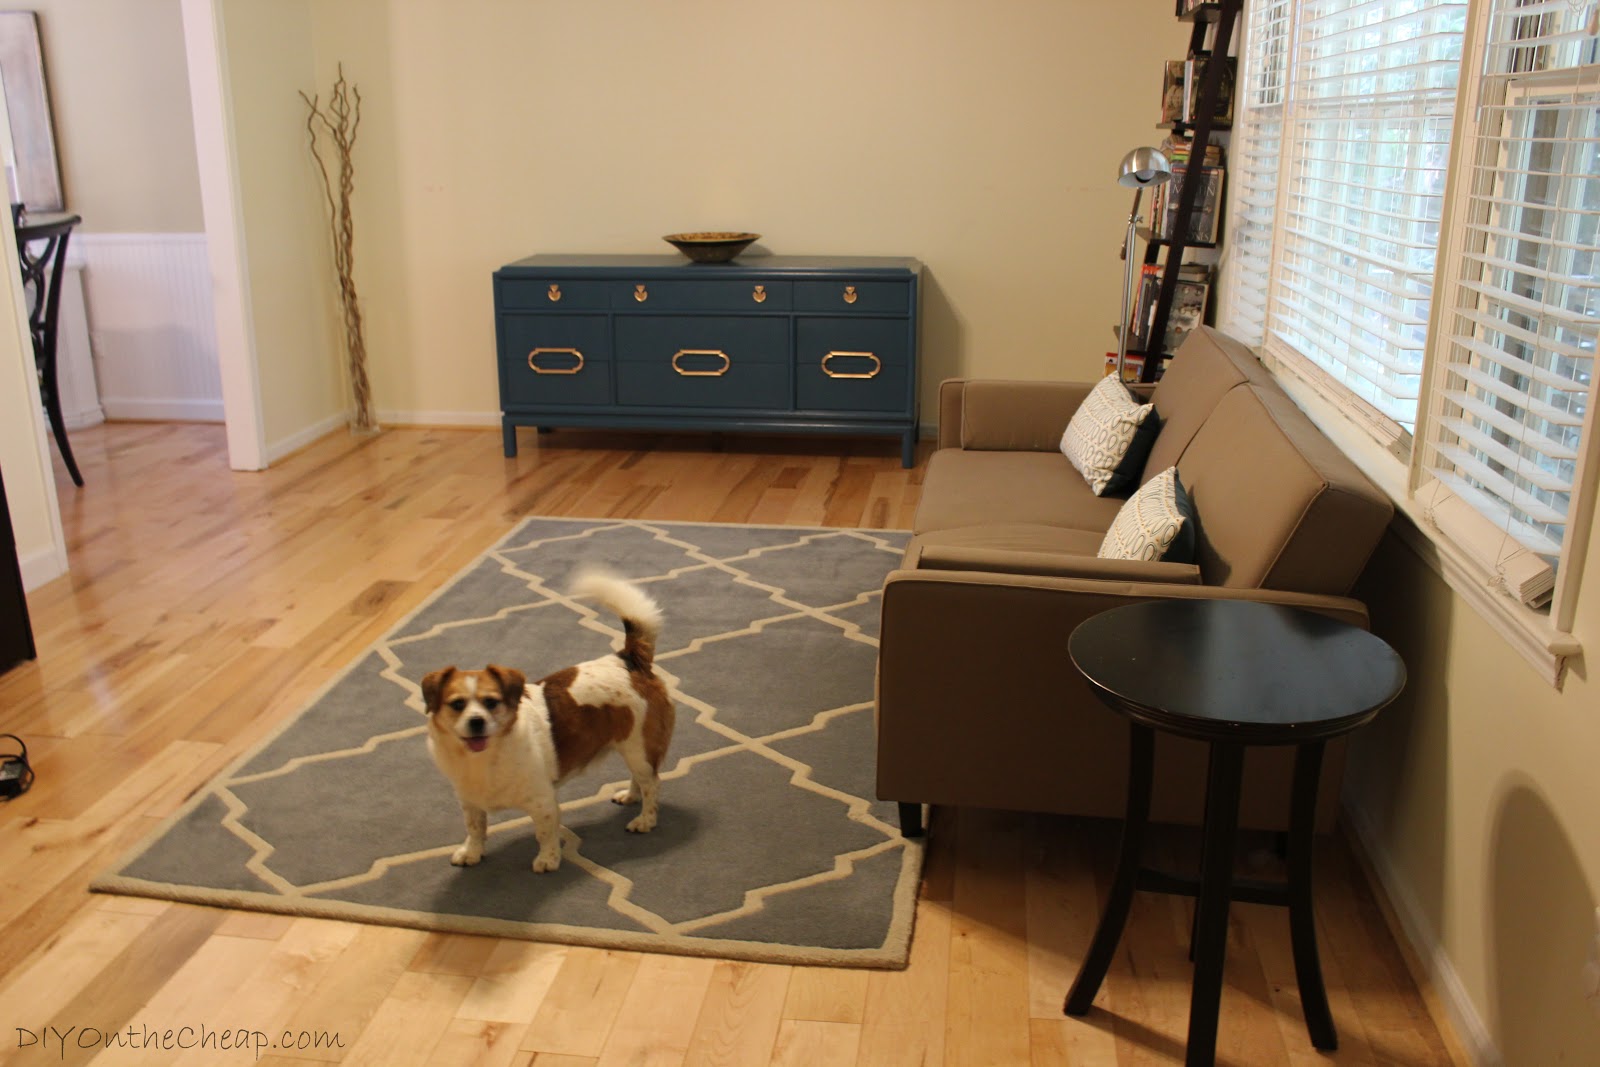 |
| That’s our sweet dog Polly, who now lives at my in-laws’ house. |
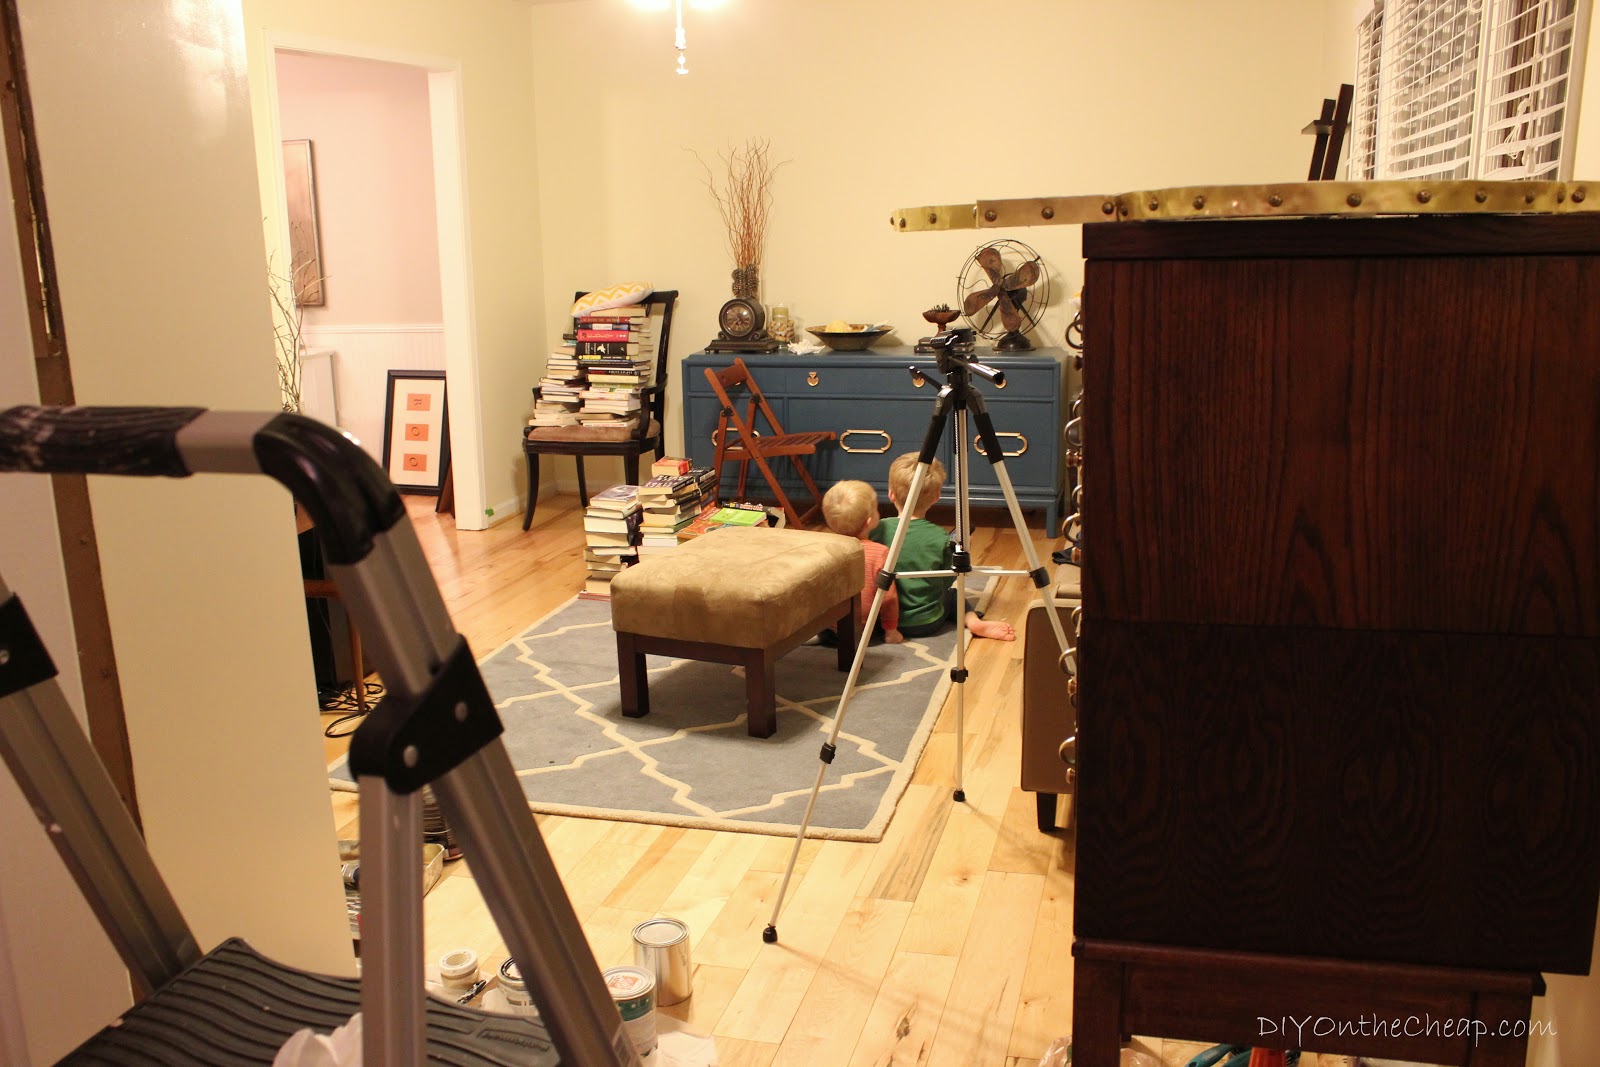
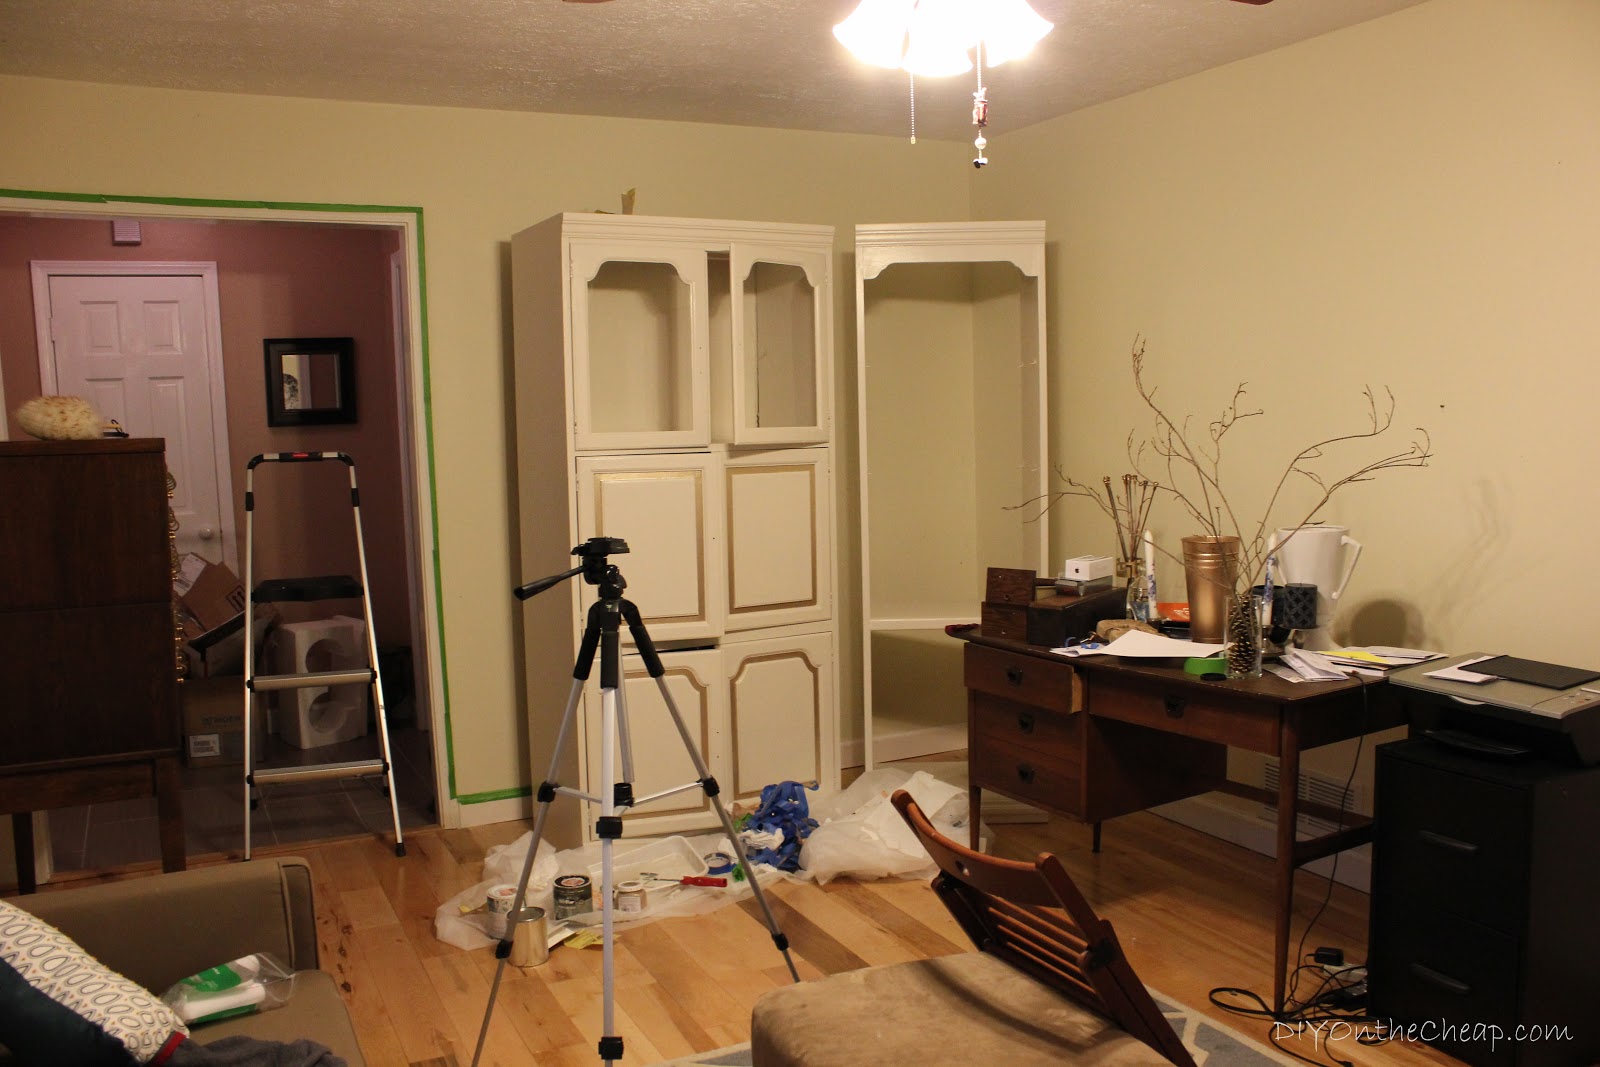
Here we are in-progress. Just being honest here, folks. It’s not always pretty behind the scenes. (P.S. Can you spot the munchkins?)
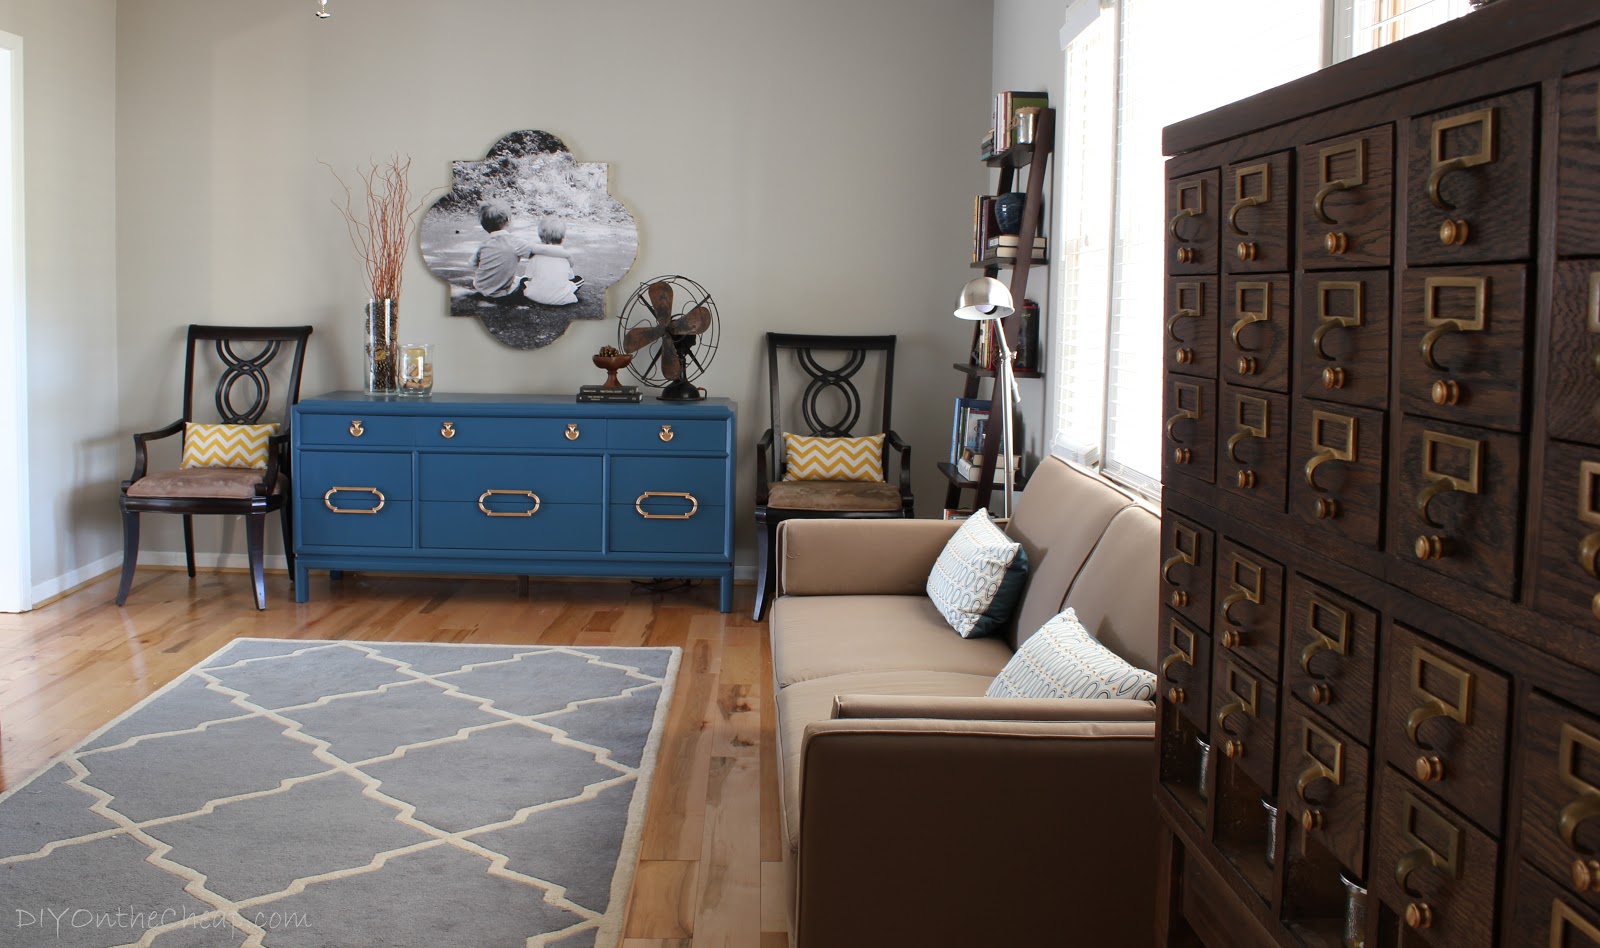
And here we are After!


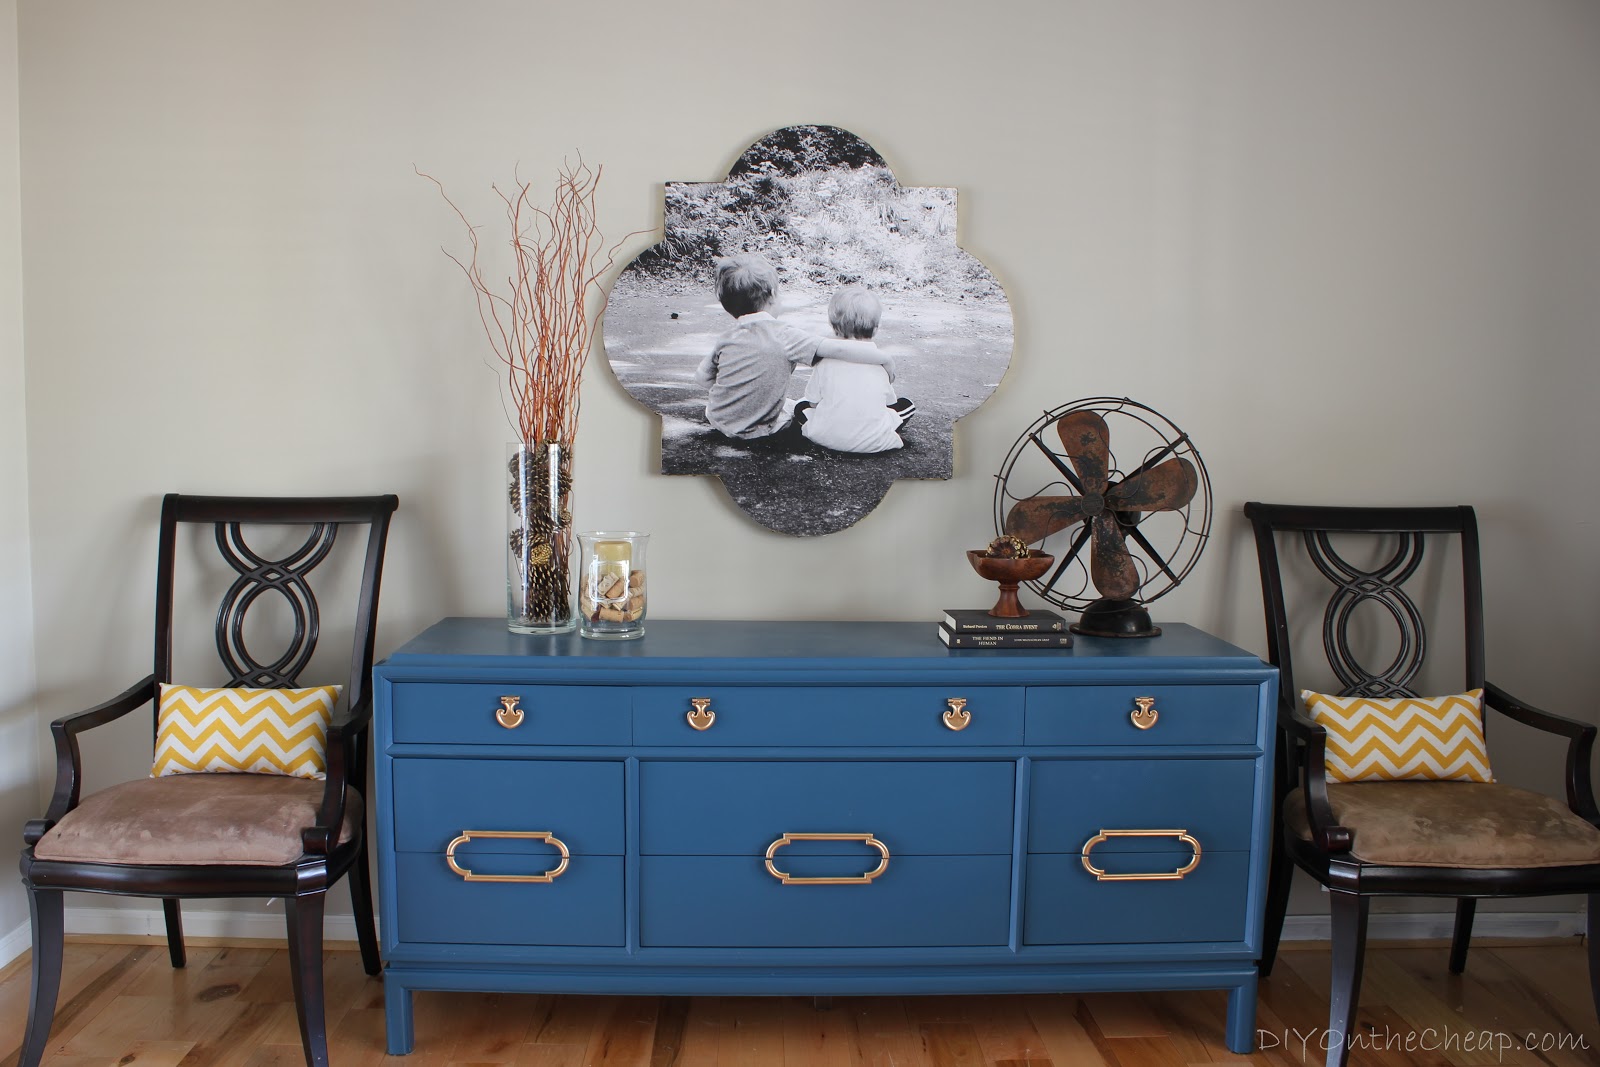


I painted the walls with Benjamin Moore’s Revere Pewter in a matte finish. I had more than a gallon left over from our dining room makeover, so I needed to put it to good use. I love the color. It’s a good neutral, and it’s not too light, not too dark. Just right. Aside from not loving the original yellowy/off-white color, the walls had tons of scuffs, nicks, scratches, holes, etc., that needed to be patched and painted over.
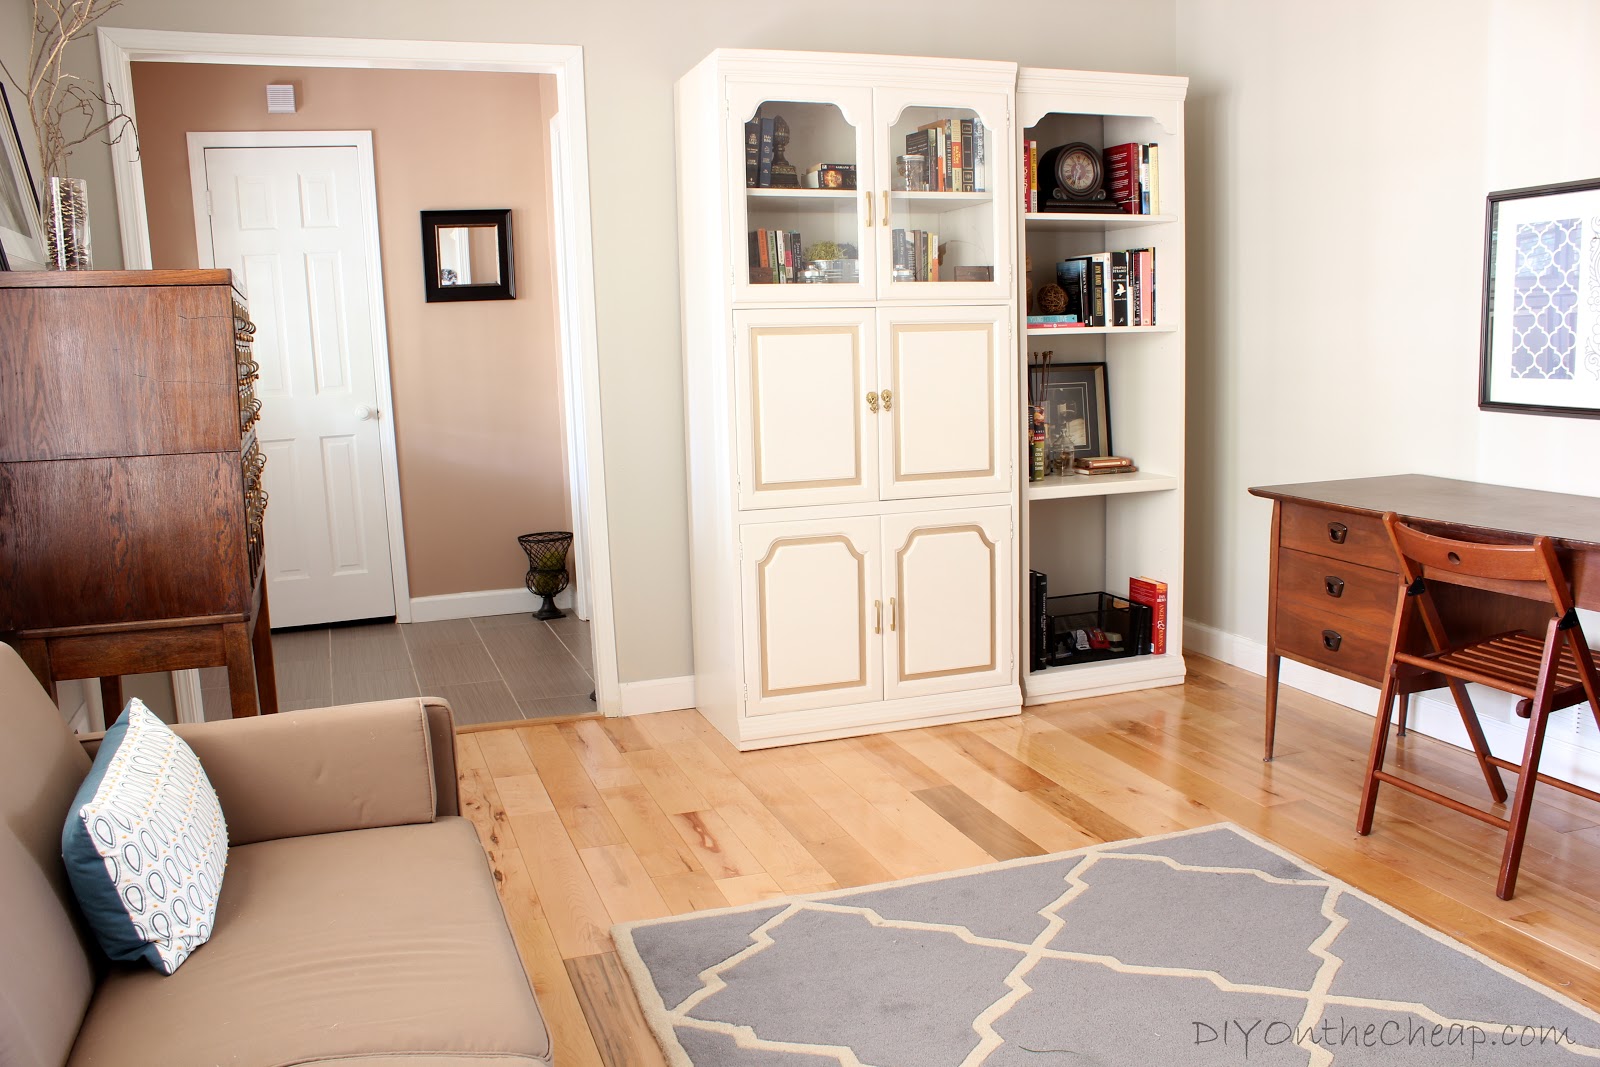
I also painted the never-before-seen-on-the-blog-before cabinet and bookcase pictured above, which is going to be another blog post altogether. (Update: Here is the furniture makeover post!)
Just to recap, here are the projects/posts I’ve done for this room:
- I used a sweet photo of my boys to create this Quatrefoil Photo Wall Art.
- I painted this Bold, Modern Dresser which was an inexpensive Craigslist find.
- I refinished this vintage Library Card-Catalog Cabinet which was rescued (for free!) by my grandparents.
- We scored this Mid-Century Modern style desk off of Craigslist for el-cheapo.
- I found this antique fan while shopping with some of my fellow Atlanta bloggers.
- I made these easy gilded pine cones to use as vase filler.
- I painted this monogrammed hurricane candle holder which now sits on top of the dresser.
Here is a quick source list for some of the other things in this room:
- Small pull-out sofa: Target
- Rug: Overstock.com
- Silver Floor Lamp: Craigslist
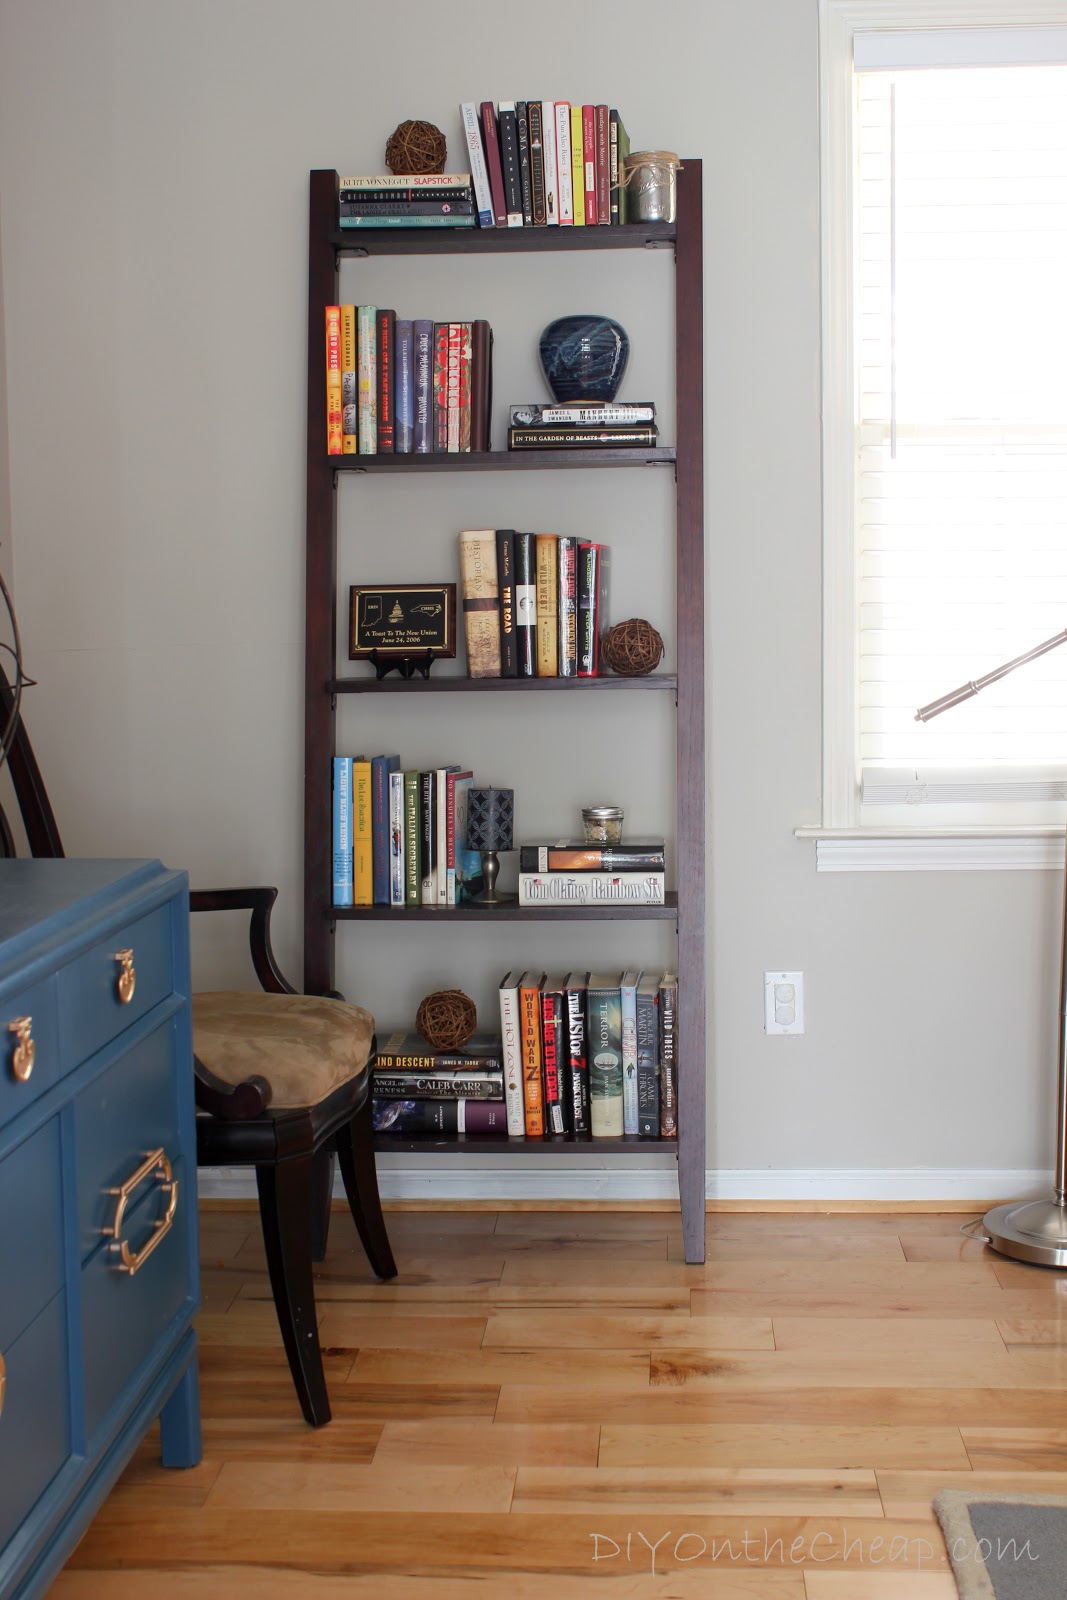
- Leaning Bookcase: Target
- Yellow Chevron Pillows: idari Etsy shop
- Throw pillows on Sofa: Target
- Dining Chairs (They go with our dining set): Z Gallerie
- Desk Chair: IKEA
- Artwork above desk: Target
- Framed picture on top of Library Cabinet: Michaels
I’ve really enjoyed working on this room, but now it’s onto some other items on my never-ending “to do” list.
Do your rooms ever look like my “in-progress” photos above? Please tell me yes… please? Also, do your children wait until a room looks like a tsunami hit it and then decide to play right in the middle of it? (Mine are usually the cause of the tsunami – but I have to take the blame on this one!
Disclosure: This post may contain affiliate links.
