

Let me start by saying that I am not a professional photographer. In fact, I’ve never even taken a photography class. (Although that will change in October! Just signed up for one.) Everything I’ve learned has been self-taught with the assistance of other bloggers, Google searches, photography websites, the Kristen Duke e-book, and the Shoot Fly Shoot/The Lettered Cottage session at the Haven Conference. Oh, and good ol’ trial and error. Luckily I live with two cute little models who happily (and sometimes not-so-happily) oblige when I ask to snap their photo for practice. I do not consider myself a great photographer by any means; but I am learning and I think it’s fair to say that I have improved since my blogging days started earlier this year, and since I invested in a quality camera and learned how to use it on manual mode. (But that’s an entirely different post altogether!)
I shoot with a Canon Rebel T2i![]() . (After talking to several other bloggers and photographers, I opted for the T2i rather than the newer T3i for a few reasons. Mainly the price of the T3i is not worth the few “upgrades” you get, such as a flip-out screen, which I didn’t want anyway because it would get broken off, no question. Just personal preference there.) The photos in this post were shot with my 50mm lens.
. (After talking to several other bloggers and photographers, I opted for the T2i rather than the newer T3i for a few reasons. Mainly the price of the T3i is not worth the few “upgrades” you get, such as a flip-out screen, which I didn’t want anyway because it would get broken off, no question. Just personal preference there.) The photos in this post were shot with my 50mm lens.
 |
| Source |
Today, I want to share why a tripod can be your best friend when photographing interior spaces. I live in the South, and it is HOT with a capital “H” down here, so for that reason I am very thankful that our house is shrouded in trees. The fact that our house gets so much shade keeps us cooler, but it isn’t the best thing for interior photography. Obviously natural light is the best for any type of photography. I never ever use my flash unless it is absolutely necessary, and NEVER for blog photos. However, in a house with few rooms that receive good, bright natural light, photographing is difficult. This would explain the many photos you see of my projects sitting on the dining room floor, since that is the room that receives the best natural light.
 |
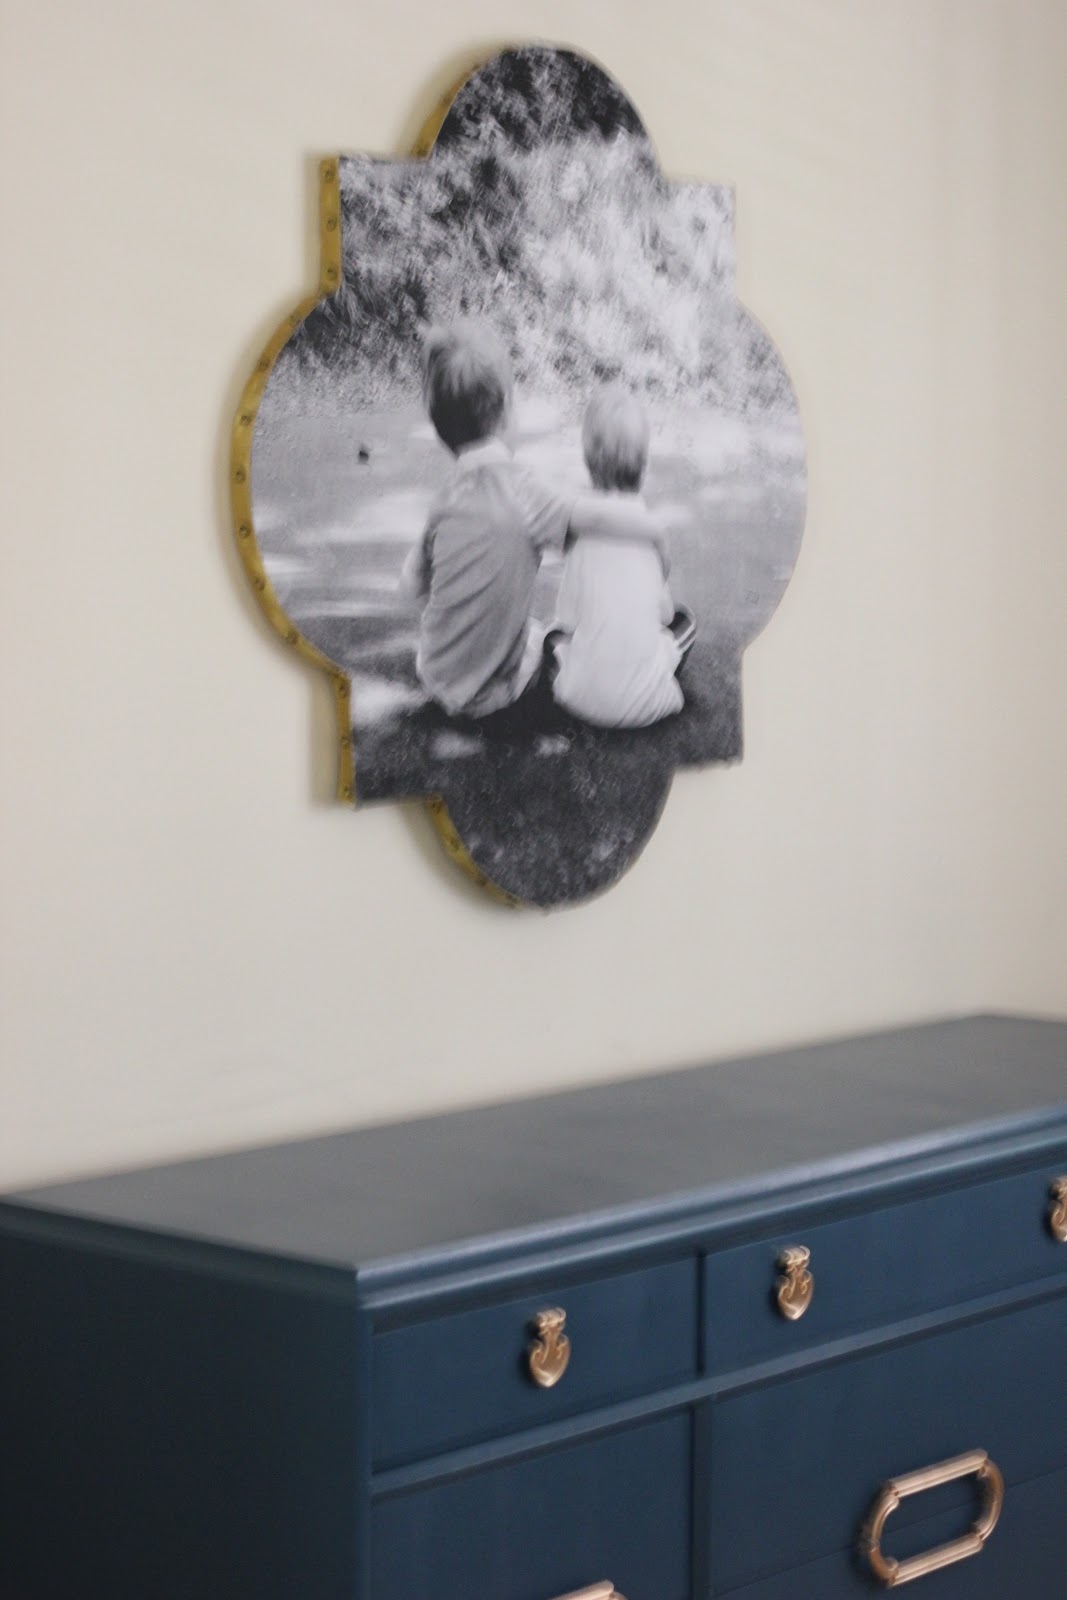
| This was shot with a very slow shutter speed on a tripod in a dark room. (Check out the post on my Quatrefoil Wall Art here.) |
Now, let me explain why the tripod is so vital. When you are shooting pictures in manual mode, you control ISO (camera’s sensitivity to light), aperture (the opening that allows light in), and shutter speed (exposure time, or how long your shutter stays open and allows light in). If I am shooting in a dark room, I can’t shoot with a slow shutter speed because just the simple act of breathing or barely moving will shake the camera enough to result in a blurry image. But, in a dark room, your camera needs to allow a lot of light in or you will end up with a dark image. This is where the tripod comes in handy. If you stick your camera on a tripod, with a remote (which can either be wireless or plug into your camera), you can set it to an extremely slow shutter speed which will keep your aperture open long enough to flood your camera with light, and it will stay perfectly still so you get a clear image. The remote is necessary because even the act of pushing the button will shake your camera enough to create a blurry image. (Note: this post does not apply to photographing people. If you shoot with an extremely slow shutter speed, any movement the person makes will create a blurry image.)
 |
| Shot with a fast shutter speed. This is how dark the room really was. |
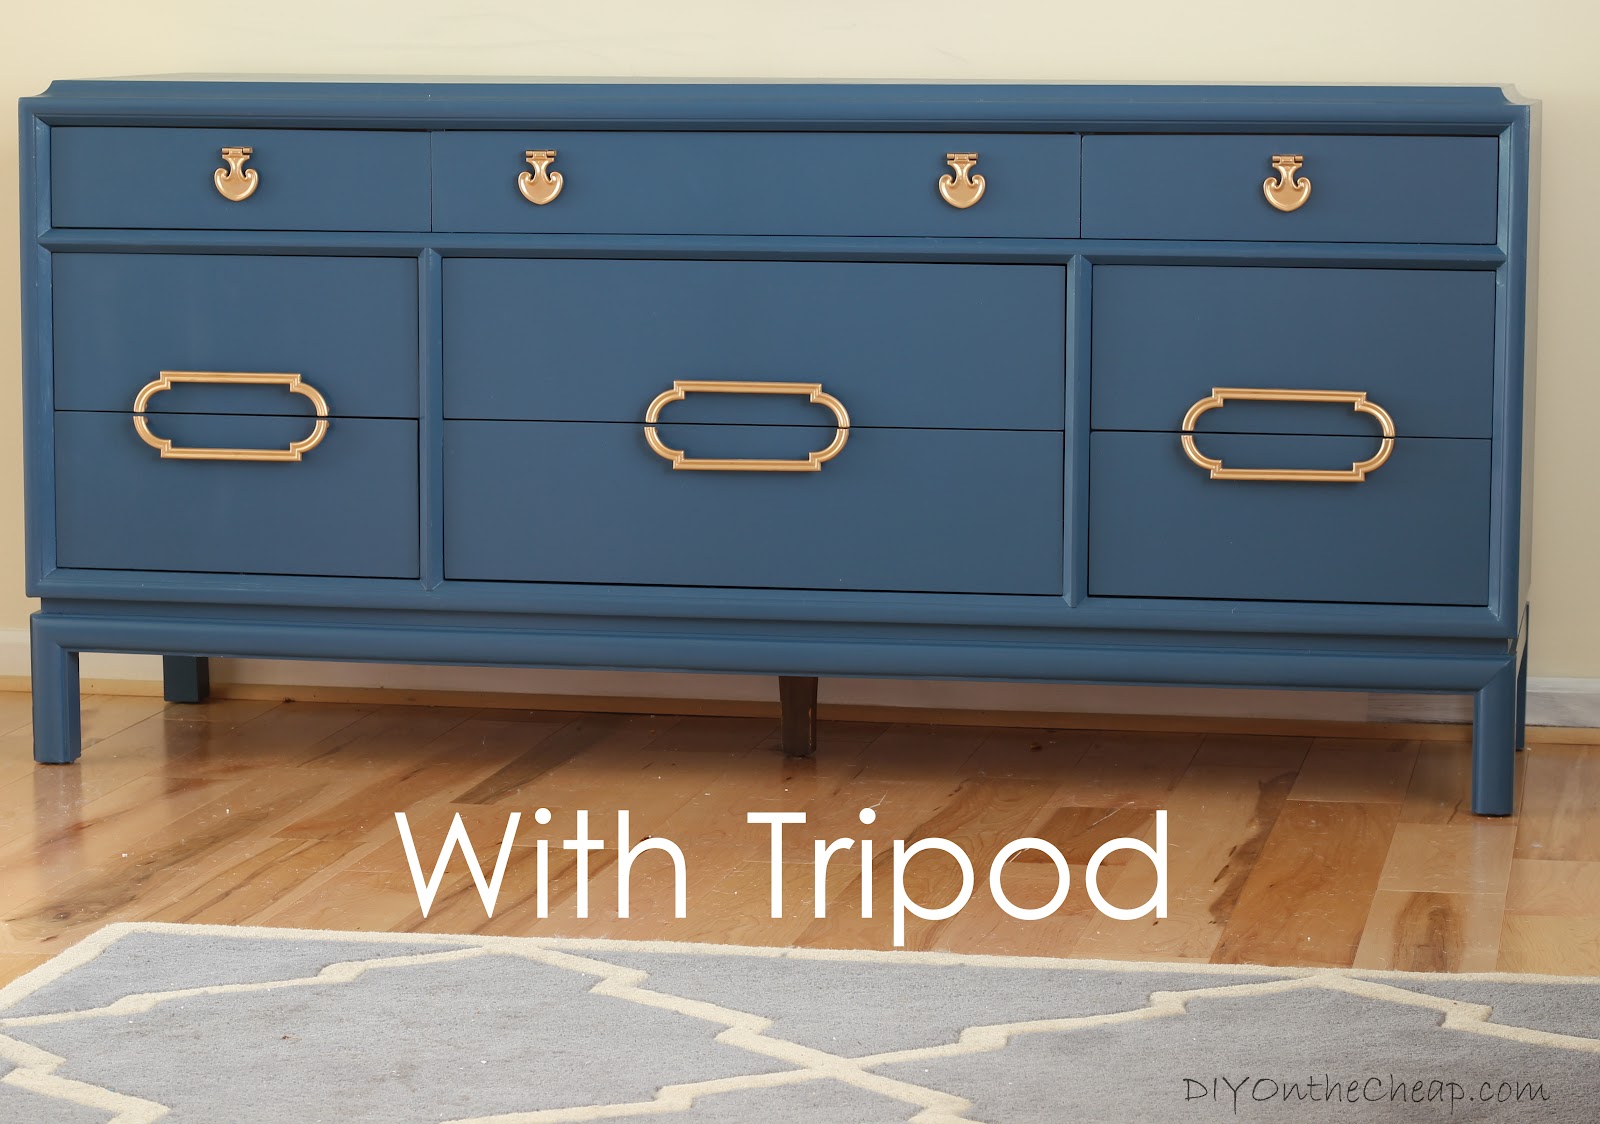 |
| Shot on a tripod with slow shutter speed. The room was really still as dark as in the top photo, but the photo turned out light due to slow shutter speed. |
Here is an example (see above). The first photo was shot with a faster shutter speed, and that is exactly how the room really looked. That room gets very little natural light, so with all of the lights turned off, it is very dark. (I turn off all lights when photographing to avoid artificial light sources, which results in a better image.) The second photo was shot on a tripod with a very slow shutter speed, allowing for tons of light to enter the camera. The room really wasn’t that light, but the photo is. I didn’t change a thing at all except the shutter speed. Amazing, right? Without the tripod, I would’ve never been able to slow down my shutter speed enough to allow that much light to enter my camera. It would’ve resulted in an extremely blurry image. I should also add that aside from cropping and adding text, I did not edit either photo in any way.
You can raise your ISO to make your camera more sensitive to light, but the higher you raise your ISO, the more grainy your image will be (like the photo below, for example). I shot the above photos at an ISO of 100. (The lowest possible.) This creates the clearest, best quality image. In this particular room, I would have to significantly raise my ISO to achieve an equally light photo without a tripod, but I would compromise photo quality in the process and end up with a more grainy-looking photo.
 |
| Here’s an example of a photo that was taken with artificial light (light on in neighboring room) and with a higher ISO. See how it is a little more grainy and lower quality than the photo above? I think I shot it with an ISO of 800, along with the added light source coming in from the dining room. |
 |
| Here’s an example of a photo I attempted to take with a slower shutter speed (but no tripod) since the room was dark and I needed the photo to be lighter. See how blurry it is? Now scroll back up and see the shot I took with the tripod. Major difference. |
If your room is already flooded with natural light, the tripod isn’t so crucial. You can shoot with a faster shutter speed and get clear, well-lit photos without the aid of a tripod. But it is a nice little helper if you want to be sure to get crystal clear photos.
This is the tripod kit that I purchased, in case you are interested in getting one too: Tripod Accessory Kit.![]() It’s not expensive or top quality, but it’s a great basic tripod and it meets my needs. I’d like to give a shout-out to Homes.com, because they made my new tripod purchase possible. I won their Haven Twitter chat giveaway and was awarded with an Amazon gift card, which I used to purchase my new tripod. It will make it so much easier to get good pictures of rooms and projects, and it will allow me to use my DSLR for video tutorials instead of my handy dandy iPhone. So thank you, Homes.com!
It’s not expensive or top quality, but it’s a great basic tripod and it meets my needs. I’d like to give a shout-out to Homes.com, because they made my new tripod purchase possible. I won their Haven Twitter chat giveaway and was awarded with an Amazon gift card, which I used to purchase my new tripod. It will make it so much easier to get good pictures of rooms and projects, and it will allow me to use my DSLR for video tutorials instead of my handy dandy iPhone. So thank you, Homes.com!![]()
Do you ever use a tripod for photography? Did you know it could make such a difference? What are your thoughts? I’d love to hear from you!
Disclosure: This post contains Amazon affiliate links.

