Erin Spain

Home, DIY, & Photography

  • Home
  • About
    • Press
    • Advertise
    • Podcast
    • Disclosure & Policies
  • Project Gallery
  • YouTube
  • Photography
  • TRAVEL
  • Contact

DIY Painted Vase Using Elmer’s Painters Paint Markers

May 7, 2012 By Erin Spain 39 Comments

I recently had the opportunity to try out a fun product called Elmer’s Painters Paint Markers, and I am so excited to share my experience with you. I purchased them from Walmart, and they are very reasonably priced and come in a variety of colors. The great thing is, you can use them on virtually any surface! They are so versatile, and the creative possibilities are endless. The best part is that they are extremely easy to work with.

As you can see, they are inexpensive! Only $1.97 for the individual markers which are newly available at Walmart. With the individual Painters Paint Markers, there is an expanded selection of colors and tip sizes.

They also come in packages. Here are the different package options. More photos from my shopping trip can be found in my Google+ album.

I opted to buy a package of the Sherbet Swirl colors, along with white, silver and gold individual Painters Paint Markers.

For this project, I thought it would be really fun to customize a few vases with different designs. I picked up the vases from Walmart for just a couple bucks each, and also used a small glass which I now use as a bud vase. I’m excited to show you how to make your own painted vase.

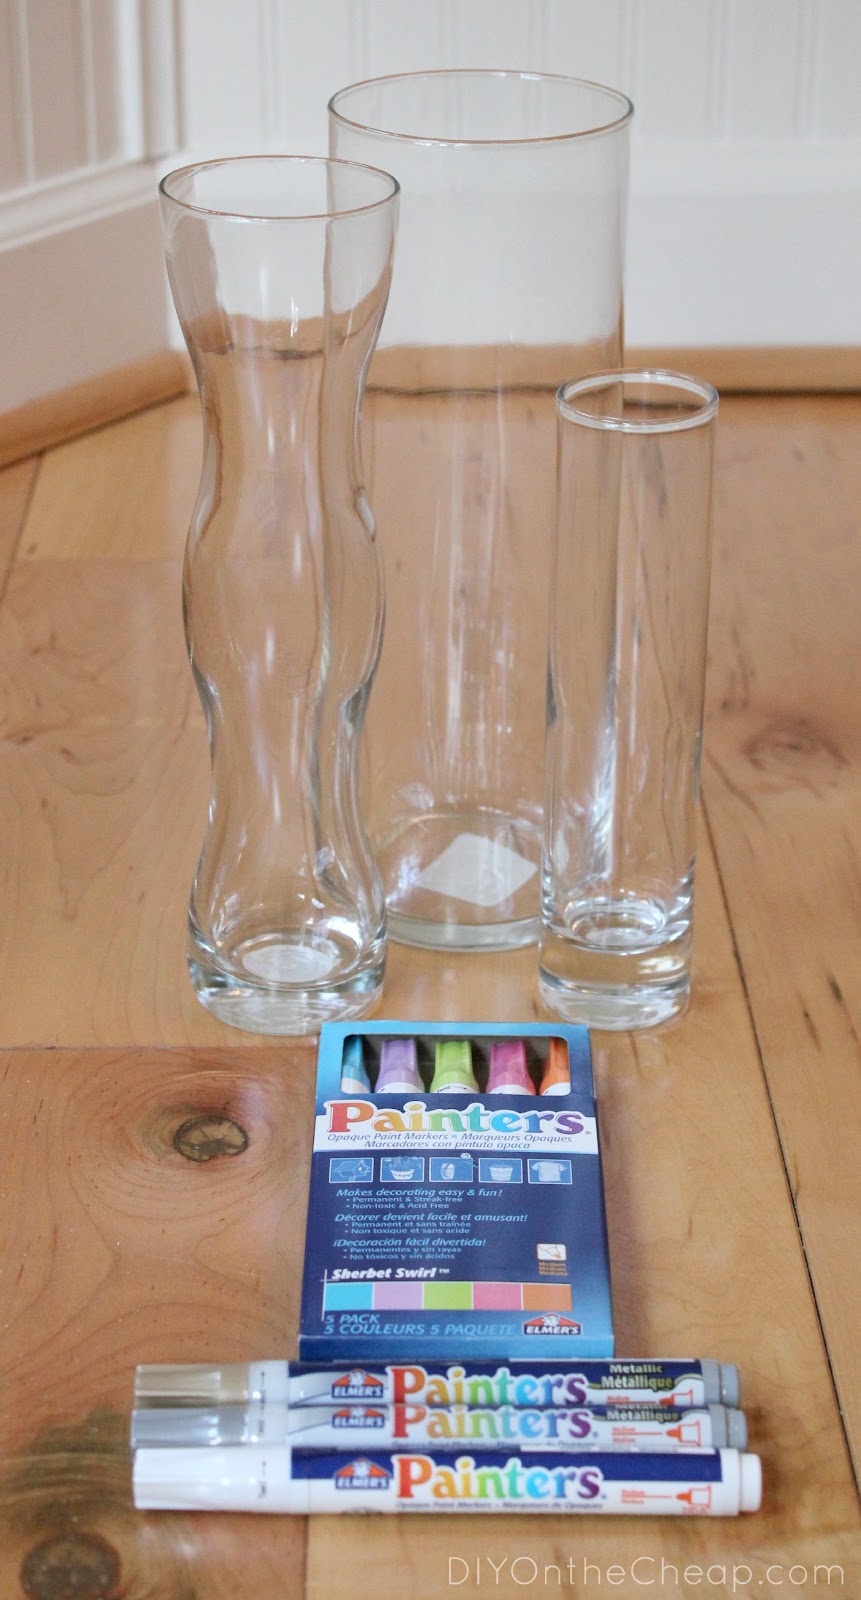
Here are my Walmart purchases.

To use these markers, you simply shake them well before opening, and then press it down for a few seconds. Then, you’re good to go!

Press marker down on a piece of paper for a few seconds until paint reaches the tip.
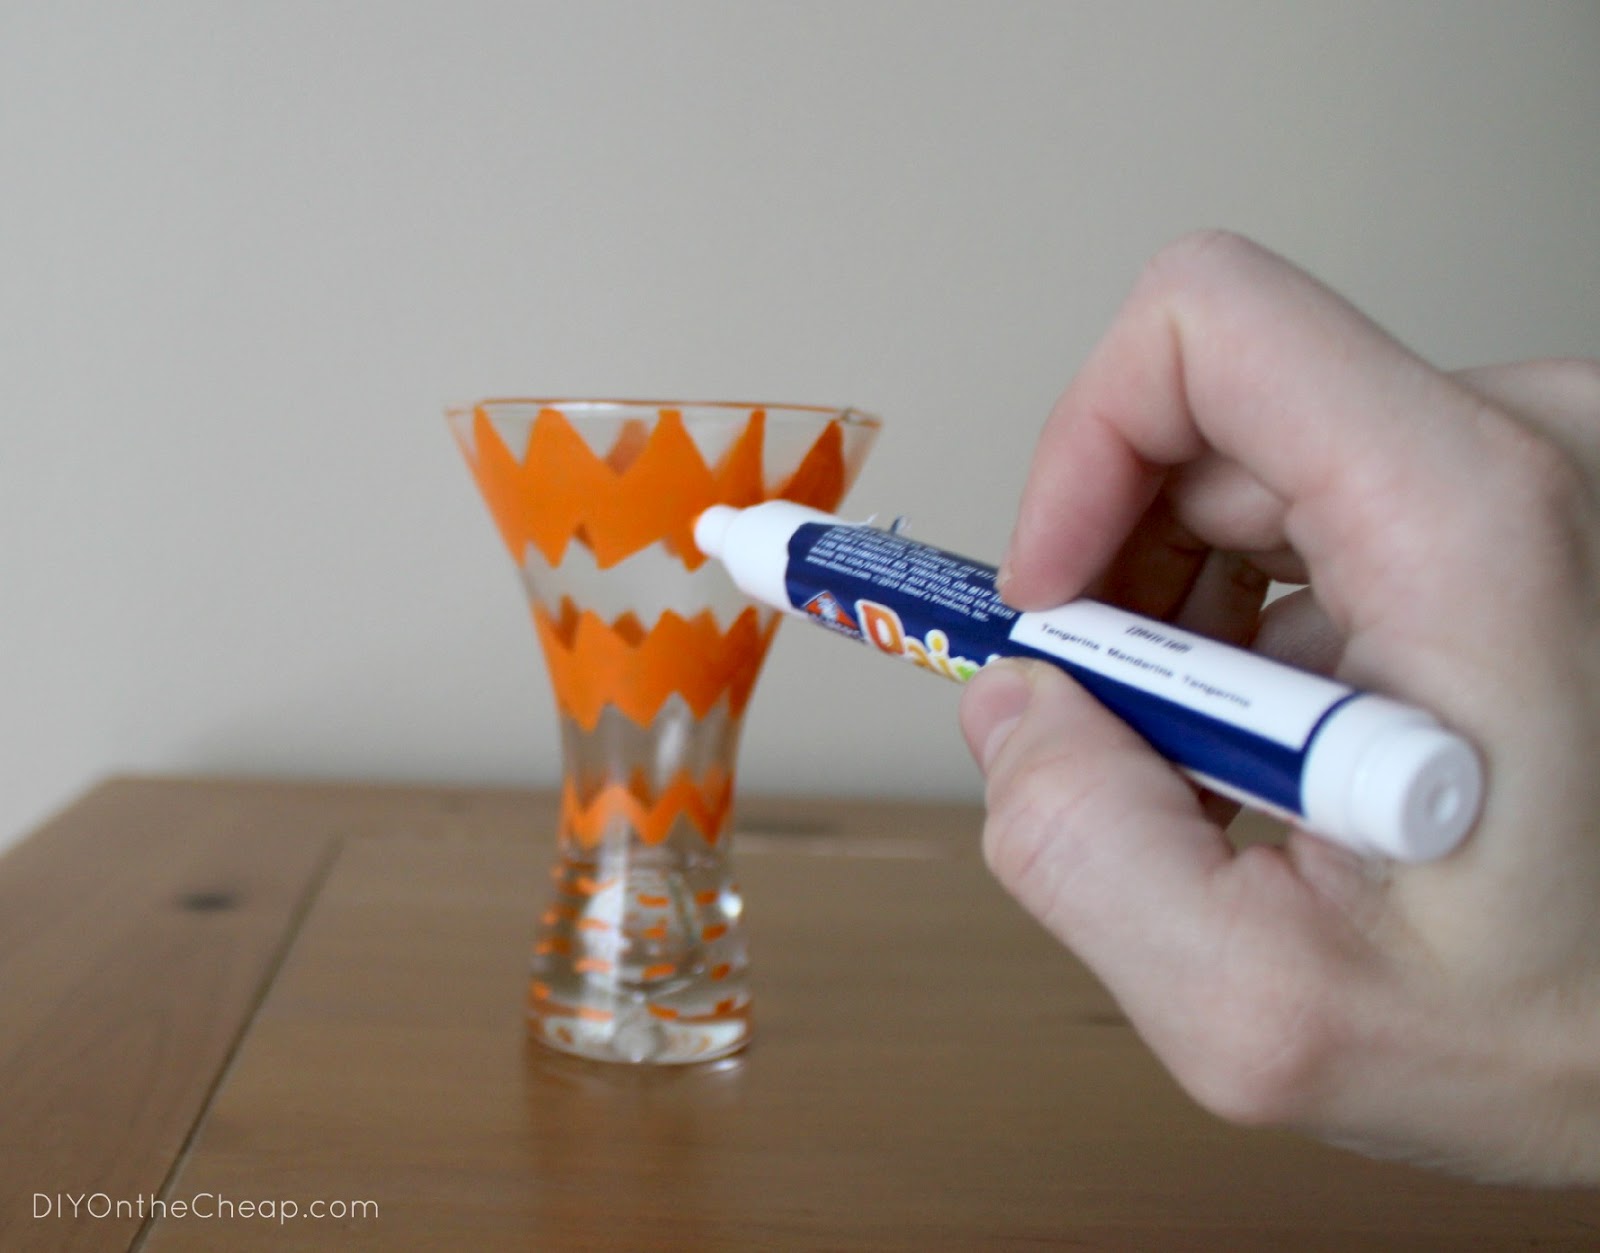
Then, paint away! It’s easier if you hold the vase (or whatever you are painting) with one hand while you paint/draw with the other, but I had to take this picture somehow!

Now, don’t judge – I opted to draw free-hand designs on these vases, and I am definitely not an “arteest.” But I think they turned out pretty cute. They dry quickly in just a matter of minutes. And a bonus for my fellow moms: they’re non-toxic and acid free.

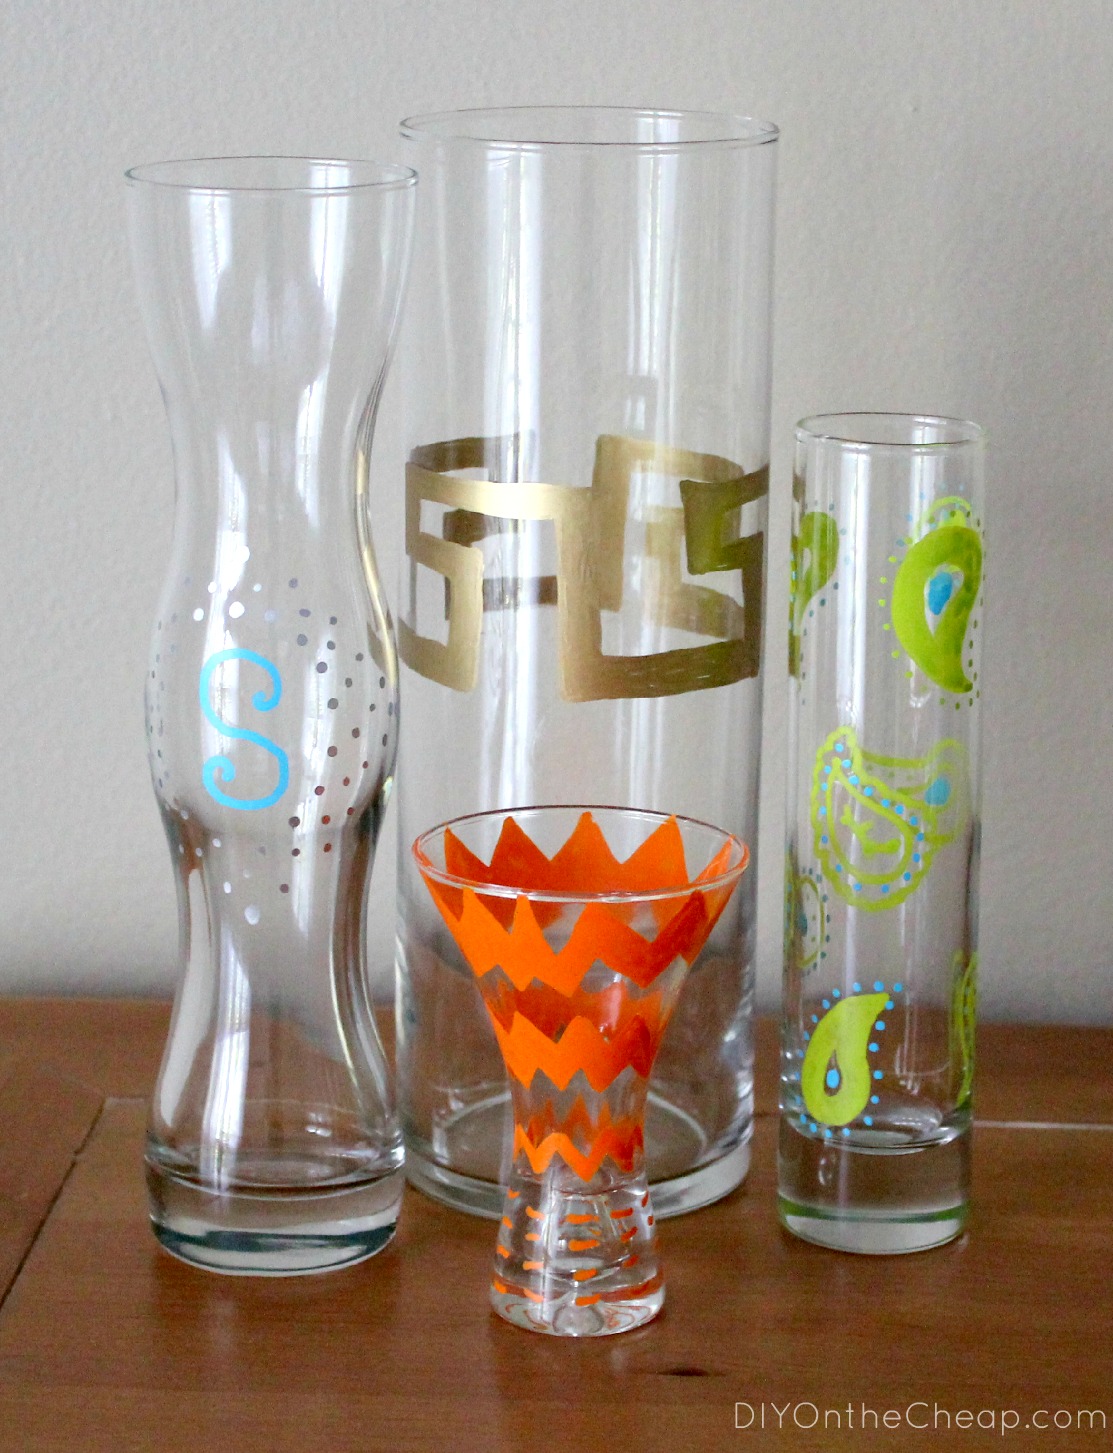
Painters Paint Markers would be really fun to use for writing cute messages or names on drinking glasses, vases or candle holders, particularly for special occasions. Or you could use stencils and create a pretty design on whatever type of surface you choose. These not only work on glass, but also on wood, plastic, pottery, ceramic, metal, paper, fabrics and more.

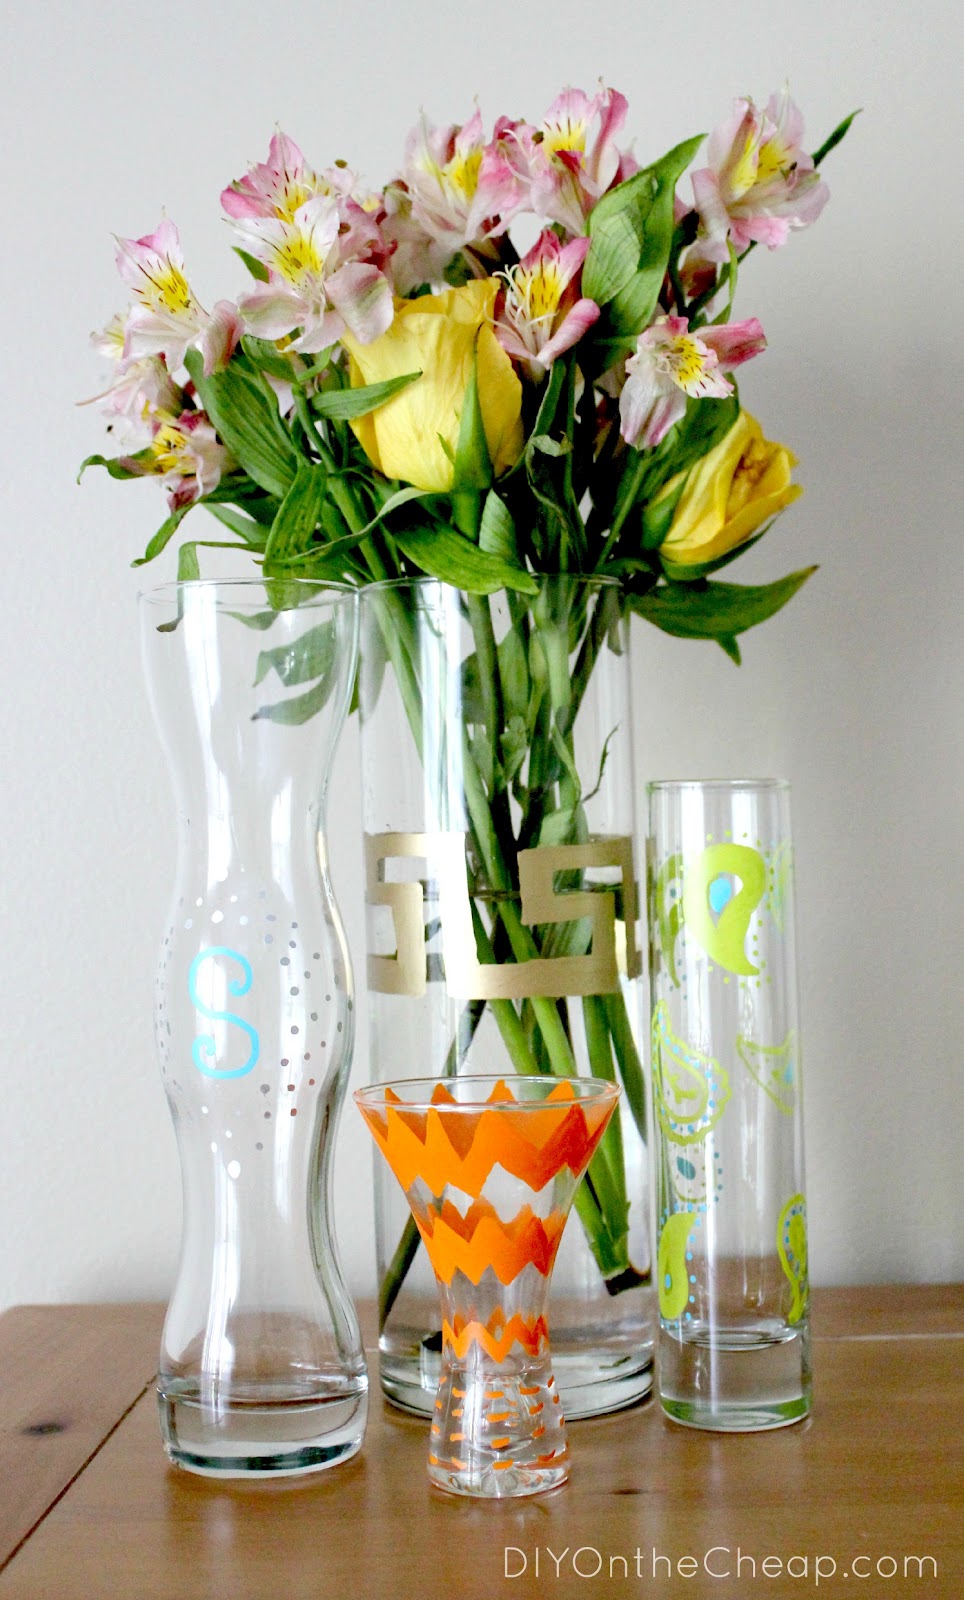
And literally as I was making these, my husband and one of my kiddos came home with flowers for me! Perfect timing. (Yes, I’m a lucky wife and momma.)

#ExpressYourself with Elmer’s! Also, be sure to check out Elmer’s on Twitter and Facebook.

I am a member of the Collective Bias™ Social Fabric® Community.  This shop has been compensated as part of a social shopper insights study for Collective Bias™. #CBias #SocialFabric. All opinions are 100% my own.

Filed Under: Crafts, Home & DIY Blog, Tutorials

« Saturday Project Swap Link Party – Week of 5/5
Dancing Zebras Etsy Giveaway »

Comments

  1. @monicabenavidez says

    May 7, 2012 at 1:03 am

    These are so pretty! I love the greek key design. Great way to spruce up those cheap vases from Goodwill/garage sales. 🙂

    Reply
    • Erin Spain says

      May 10, 2012 at 1:22 am

      Thank you!

      Reply
  2. Andrea Kruse says

    May 7, 2012 at 1:33 am

    Adorable! What a great idea. I can’t wait to try those paint pens out myself.

    Reply
    • Erin Spain says

      May 10, 2012 at 1:22 am

      Thank you! They are so easy to use. I love them!

      Reply
  3. Amy F says

    May 7, 2012 at 1:40 am

    I love Elmer’s Painters…I use them on everything.

    Reply
    • Erin Spain says

      May 10, 2012 at 1:22 am

      I love them too! Can’t wait to use them on something other than glass.

      Reply
  4. Courtney O'Dell says

    May 7, 2012 at 3:20 am

    These look fabulous and so easy! Great job!

    Reply
    • Erin Spain says

      May 10, 2012 at 1:23 am

      Thanks so much, Courtney!

      Reply
  5. Kathy Murphy says

    May 7, 2012 at 1:34 pm

    What a creative way to personalize a vase… so creative. They turned out great.

    Reply
    • Erin Spain says

      May 10, 2012 at 1:23 am

      Thanks, Kathy!

      Reply
  6. Megan says

    May 7, 2012 at 2:09 pm

    They look great! It looks like those work nicely on glass. I definitely want to try them out on glass.

    Reply
    • Erin Spain says

      May 10, 2012 at 1:23 am

      They worked great!

      Reply
  7. Mallery says

    May 7, 2012 at 2:12 pm

    I just learned that if you don’t set them with a sealer that you can wash the paint off and change your decor! Such a thrifty idea.

    Reply
    • Erin Spain says

      May 10, 2012 at 1:23 am

      Good to know! Thanks for the info.

      Reply
  8. Angie CountryChicCottage says

    May 7, 2012 at 2:32 pm

    These are adorable Erin!! 🙂 Thanks for the how to!

    Reply
    • Erin Spain says

      May 10, 2012 at 1:24 am

      Thank you Angie!

      Reply
  9. Jenn "Rook No. 17" says

    May 7, 2012 at 8:26 pm

    Your vases came out beautifully Erin! I’m always thrilled with how easy Painters are to work with, how long they last, and how they work on so many different types of surfaces!

    Reply
    • Erin Spain says

      May 10, 2012 at 1:24 am

      Thanks so much! I love them. They are so easy to use!

      Reply
  10. Steph @ The Silly Pearl says

    May 7, 2012 at 10:19 pm

    Wow cool! These are totally my style! The paints look like they worked great on glass. Enjoy the flowers, lucky mama!

    Reply
    • Erin Spain says

      May 10, 2012 at 1:25 am

      Thanks Steph! They were very easy to use on glass.

      Reply
  11. Ann Marie Heasley says

    May 8, 2012 at 4:14 am

    Oh my gosh, love the paisley one! Reminds me of a peacock. I’m amazed that they work so well on different surfaces. Great project! 🙂

    Reply
    • Erin Spain says

      May 10, 2012 at 1:25 am

      Thanks, Ann Marie!

      Reply
  12. Designing Domesticity says

    May 8, 2012 at 7:11 pm

    These are really cute. Love the greek key motif. Thanks for sharing, liz

    Reply
    • Erin Spain says

      May 10, 2012 at 1:25 am

      Thanks so much!

      Reply
  13. Diane N - Philzendia says

    May 9, 2012 at 1:38 am

    The vases came out really nice!

    Reply
    • Erin Spain says

      May 10, 2012 at 1:25 am

      Thank you, Diane!

      Reply
  14. Theresa says

    May 9, 2012 at 7:06 pm

    Great job on your vases! They turned out lovely. Visiting from @DearCreatives on twitter & DearCreatives.com I’ll send you a SF friend request. Glad to meet you & see your project. Theresa

    Reply
    • Erin Spain says

      May 10, 2012 at 1:26 am

      Thank you, Theresa!

      Reply
  15. Rachel {BubblyNatureCreations.com} says

    May 17, 2012 at 8:25 pm

    These turned out great!! I love the designs!

    Reply
    • Erin Spain says

      May 17, 2012 at 8:37 pm

      Thank you, Rachel!

      Reply
  16. Lyuba @ Will Cook For Smiles says

    May 17, 2012 at 9:36 pm

    Those are very cute!! You did great with free-handing it ;):)

    Reply
    • Erin Spain says

      May 22, 2012 at 10:45 pm

      Thanks so much!

      Reply
  17. Anna Allred says

    July 31, 2012 at 2:16 pm

    How can I seal the marker paint?

    Reply
    • Erin Spain says

      January 10, 2013 at 10:00 pm

      I believe you can bake it on as with other glass paints, but I have not done this. If you try it, be sure to start it in a cool oven (don’t preheat!) to make sure that it heats up gradually and does not shatter.

      Reply
  18. Anonymous says

    January 10, 2013 at 6:25 pm

    When I use the markers on glass, it rubs off easily! Is there anyway to prevent this?

    Reply
    • Erin Spain says

      January 10, 2013 at 10:02 pm

      If you are looking to make the paint permanent, I believe you can bake it on. I have not tried this though! But most glass paints are ok to bake in order to seal it. Just start with a cool oven to be sure that it heats gradually and does not shatter.

      Reply
      • Nikole says

        December 3, 2013 at 6:57 am

        I just made my boyfriend a personalized coffee mug for christmas, i baked it ar 30o F for 30 mins ( what i read on line to do) then let it cool for 2 hours..
        i looks great, kind of gave off a weird smell while in the oven though, so make sure to open a window near by,
        I am worried that it will still scratch off. I tested it a little with my finger nail and it was still able to scratch.. so now im now so positive it will last long after her uses/washes it.
        i heard some people use just a sharpie or theres sharpie paint markers…
        i wonder if those would bake on better and not scratch off… hmmm?
        if anyone knows please let me know

        Reply
        • Nikole says

          December 3, 2013 at 7:00 am

          that was suppose to say 300 degrees fahrenheit **

          Reply
        • Erin @ DIY on the Cheap says

          December 3, 2013 at 1:21 pm

          Hmm, did you use these paint markers? Bummer if they didn’t bake on right! I’ve heard that Martha Stewart glass paint works on ceramic. These paint markers work really well but not sure about on things like coffee mugs.

          Reply

Leave a Reply Cancel reply

Your email address will not be published. Required fields are marked *

SHOP ERIN’S FAVORITES

SPONSORS & AFFILIATES

CATEGORIES

ARCHIVES

Copyright © 2025 Erin Spain. Log in | Privacy Policy