Disclosure: This post is sponsored by The Home Depot. All opinions are my own.
I recently mentioned that I will be partnering with The Home Depot throughout the year and hosting a few of their Do-It Herself Workshops. The first workshop is this Thursday, April 16, and I will be hosting at the Cumberland location here in Atlanta. The workshops are happening nationwide, so you can REGISTER HERE at a store near you! The first project we will be building is a paver planter.

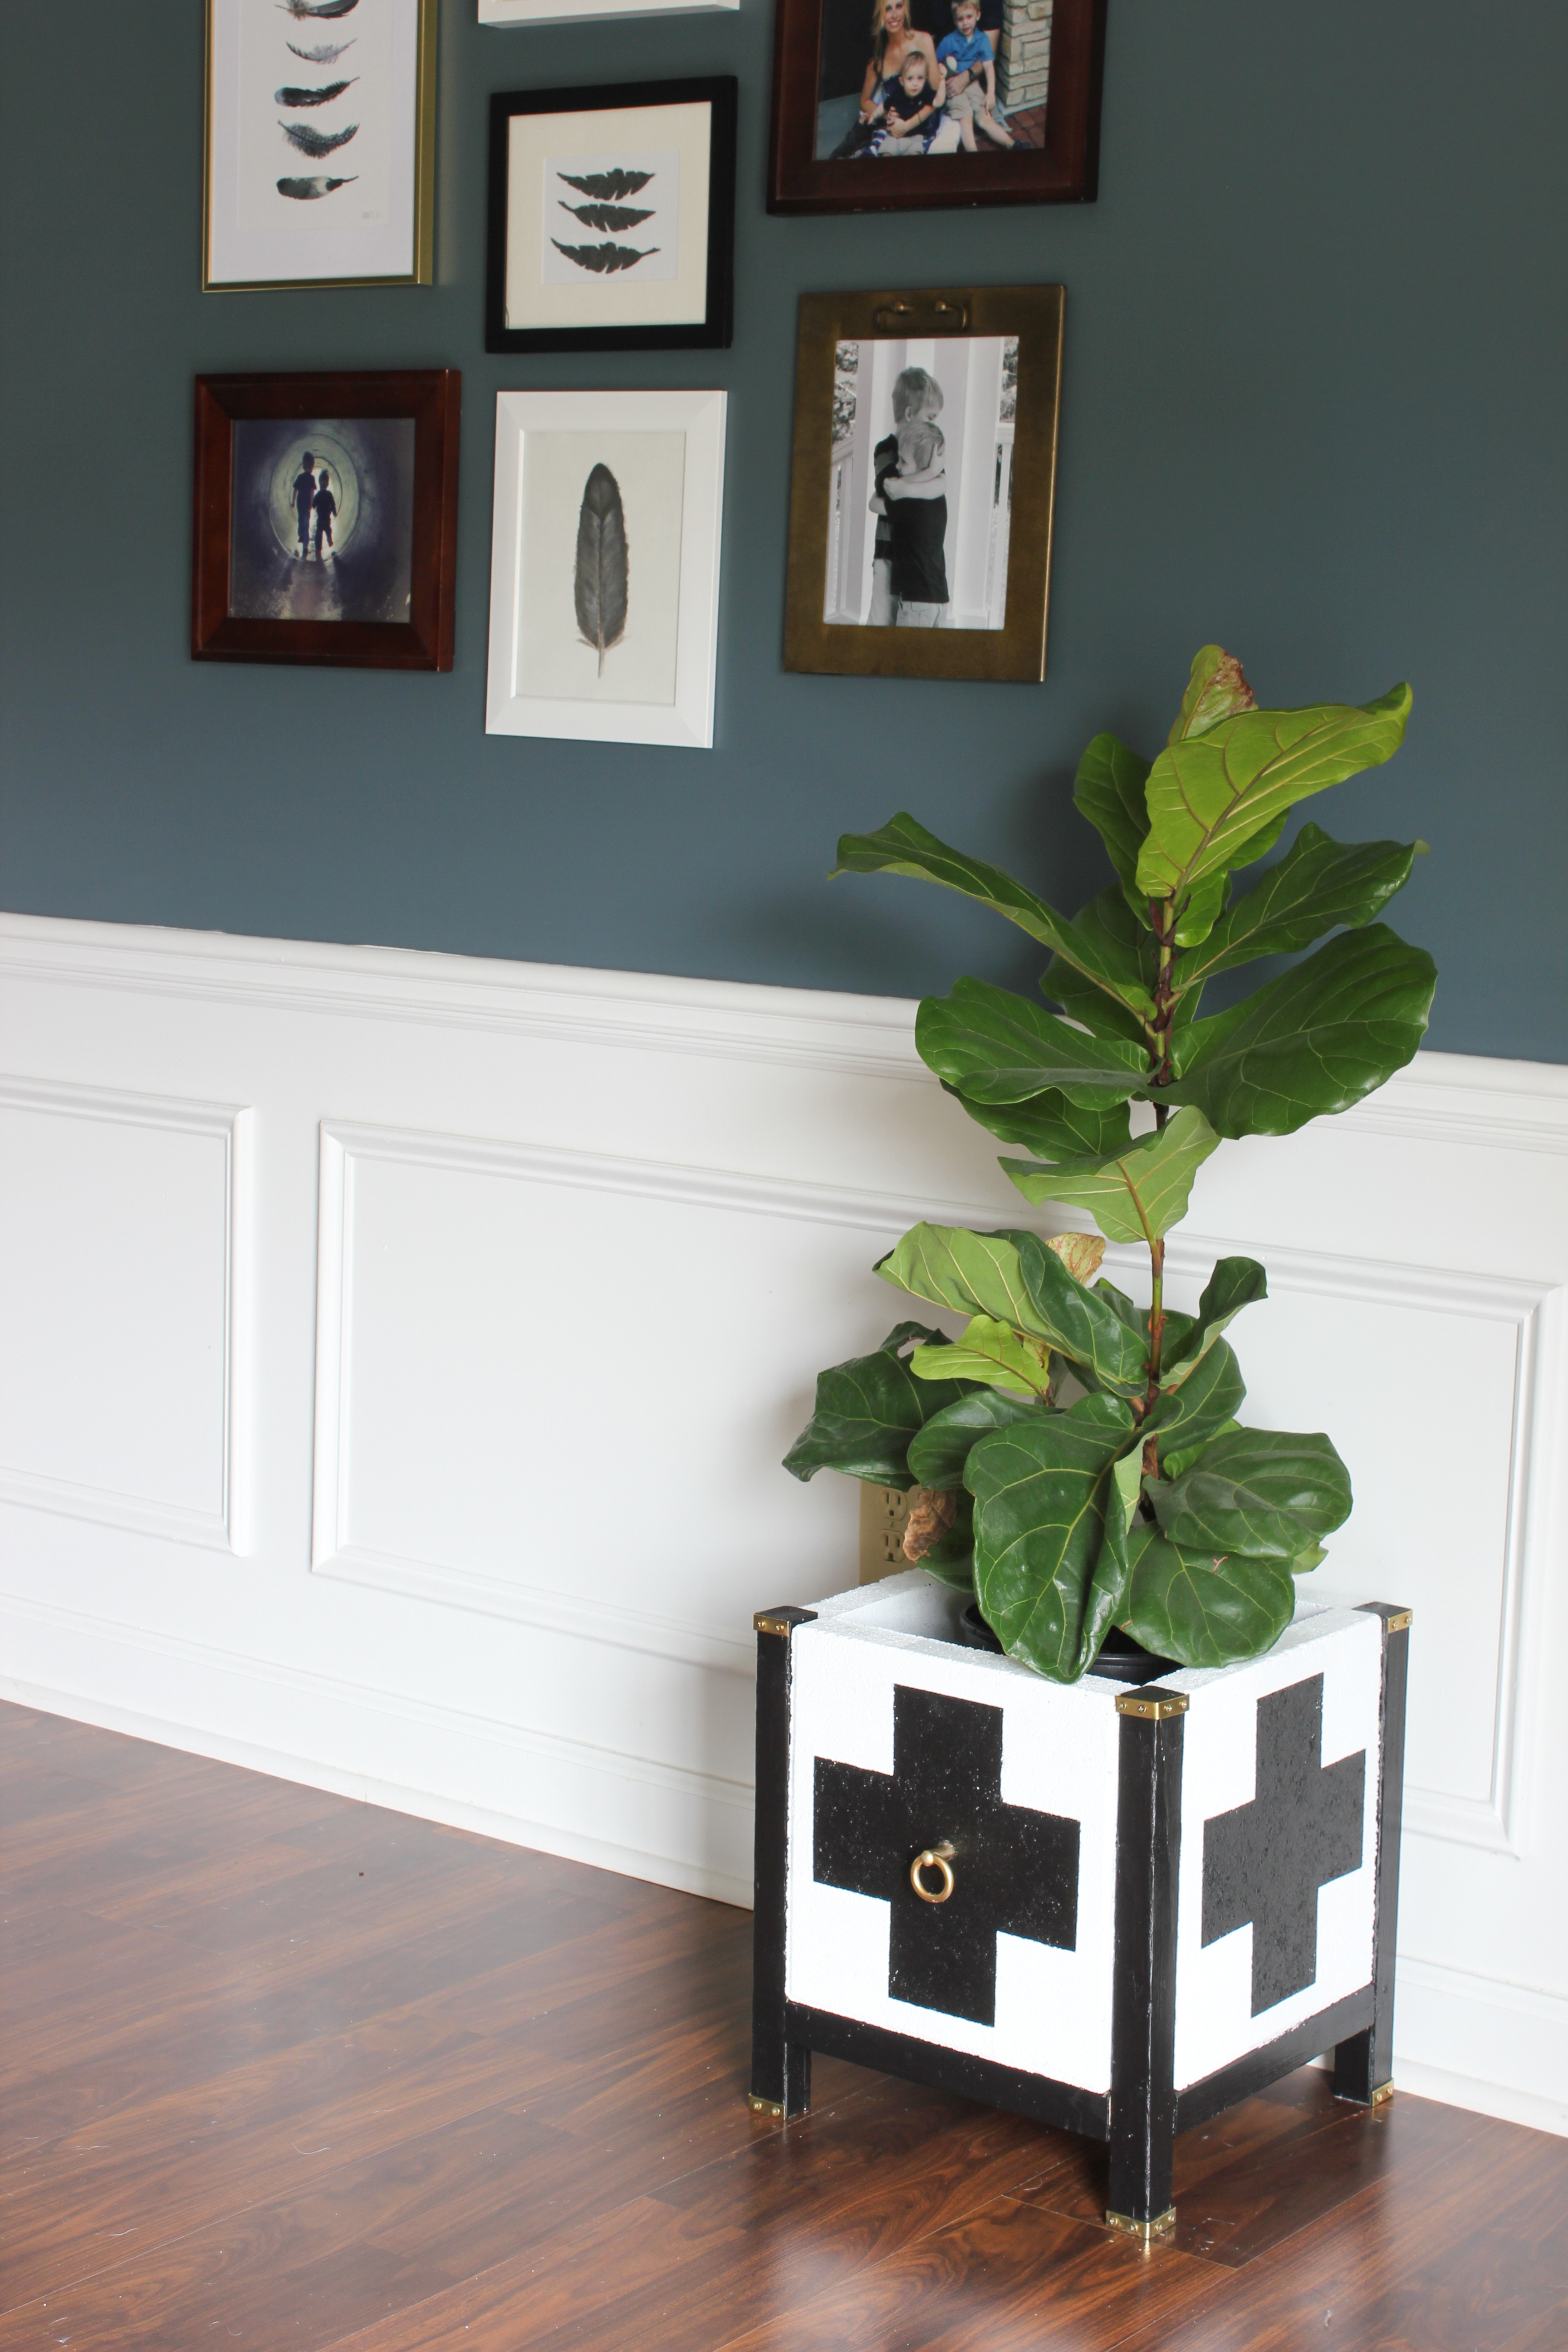
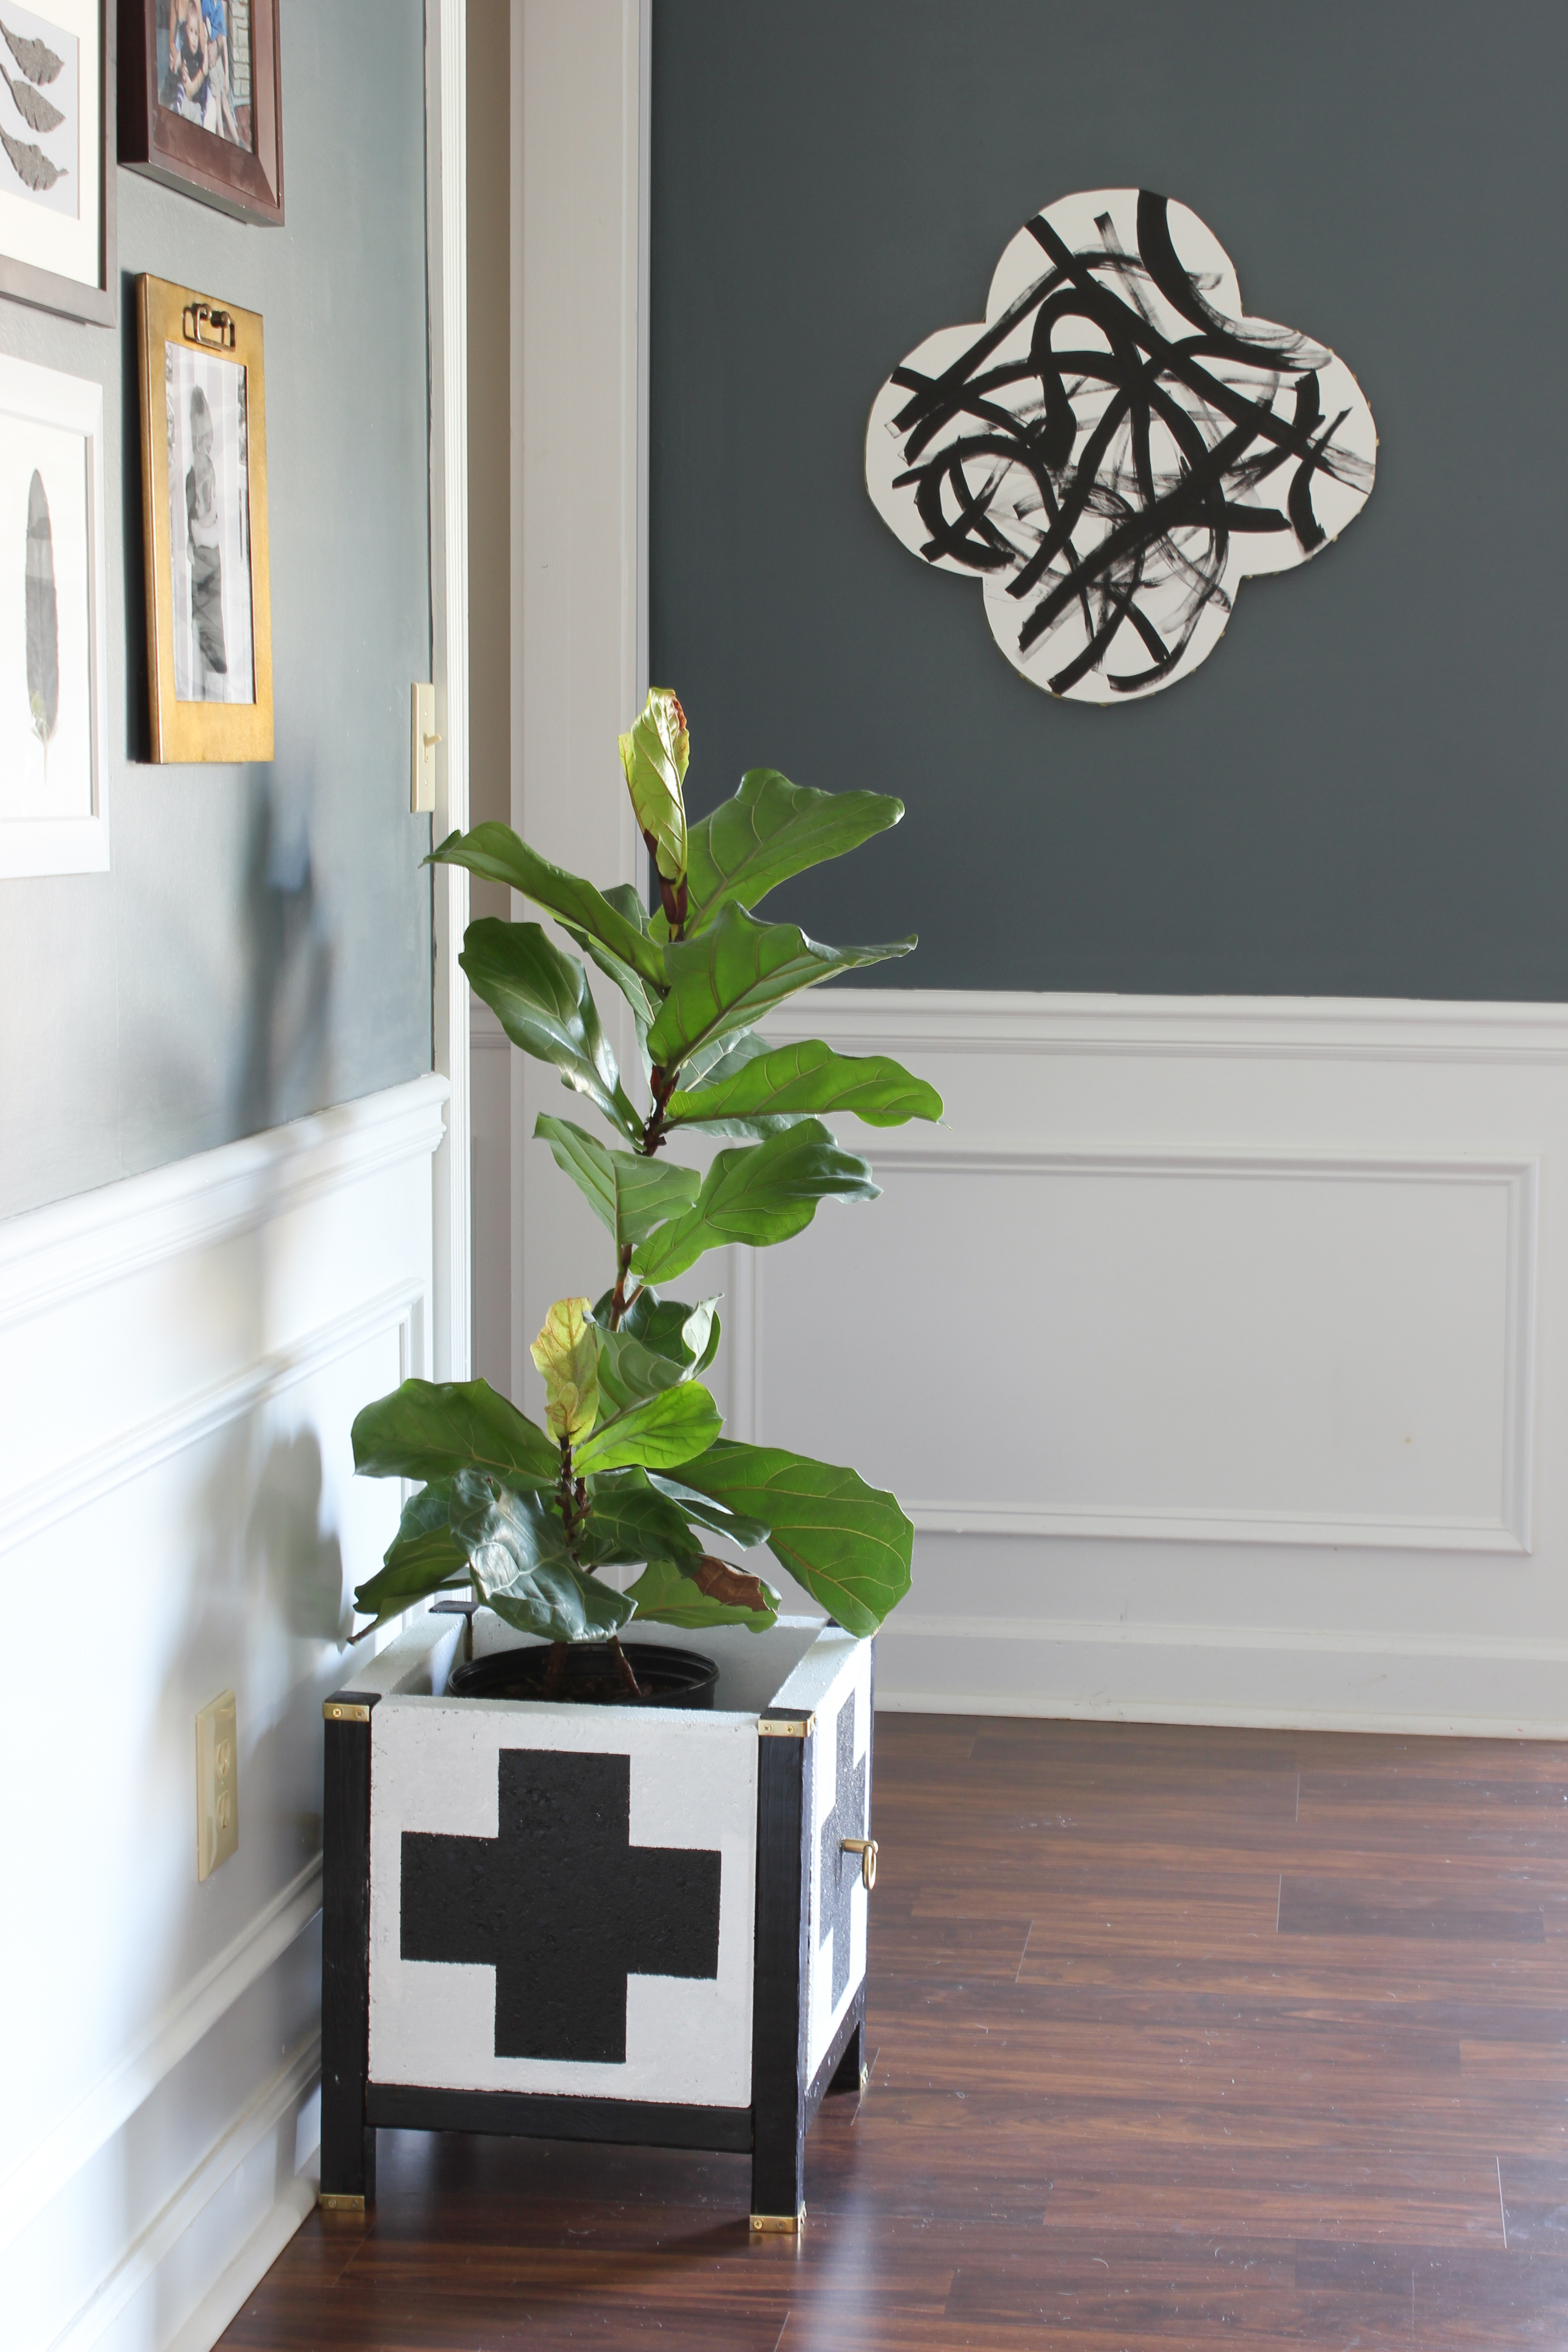
I put my own design spin on the original build plans, and I made a DIY Swiss Cross Paver Planter. I went with black, white and gold — one of my favorite color combos right now; and I love the modern looking design of the Swiss Cross/plus sign. This planter can be used indoors or outdoors, and I opted to keep it inside to hold my fiddle leaf fig plant.
Here are the supplies you will need:
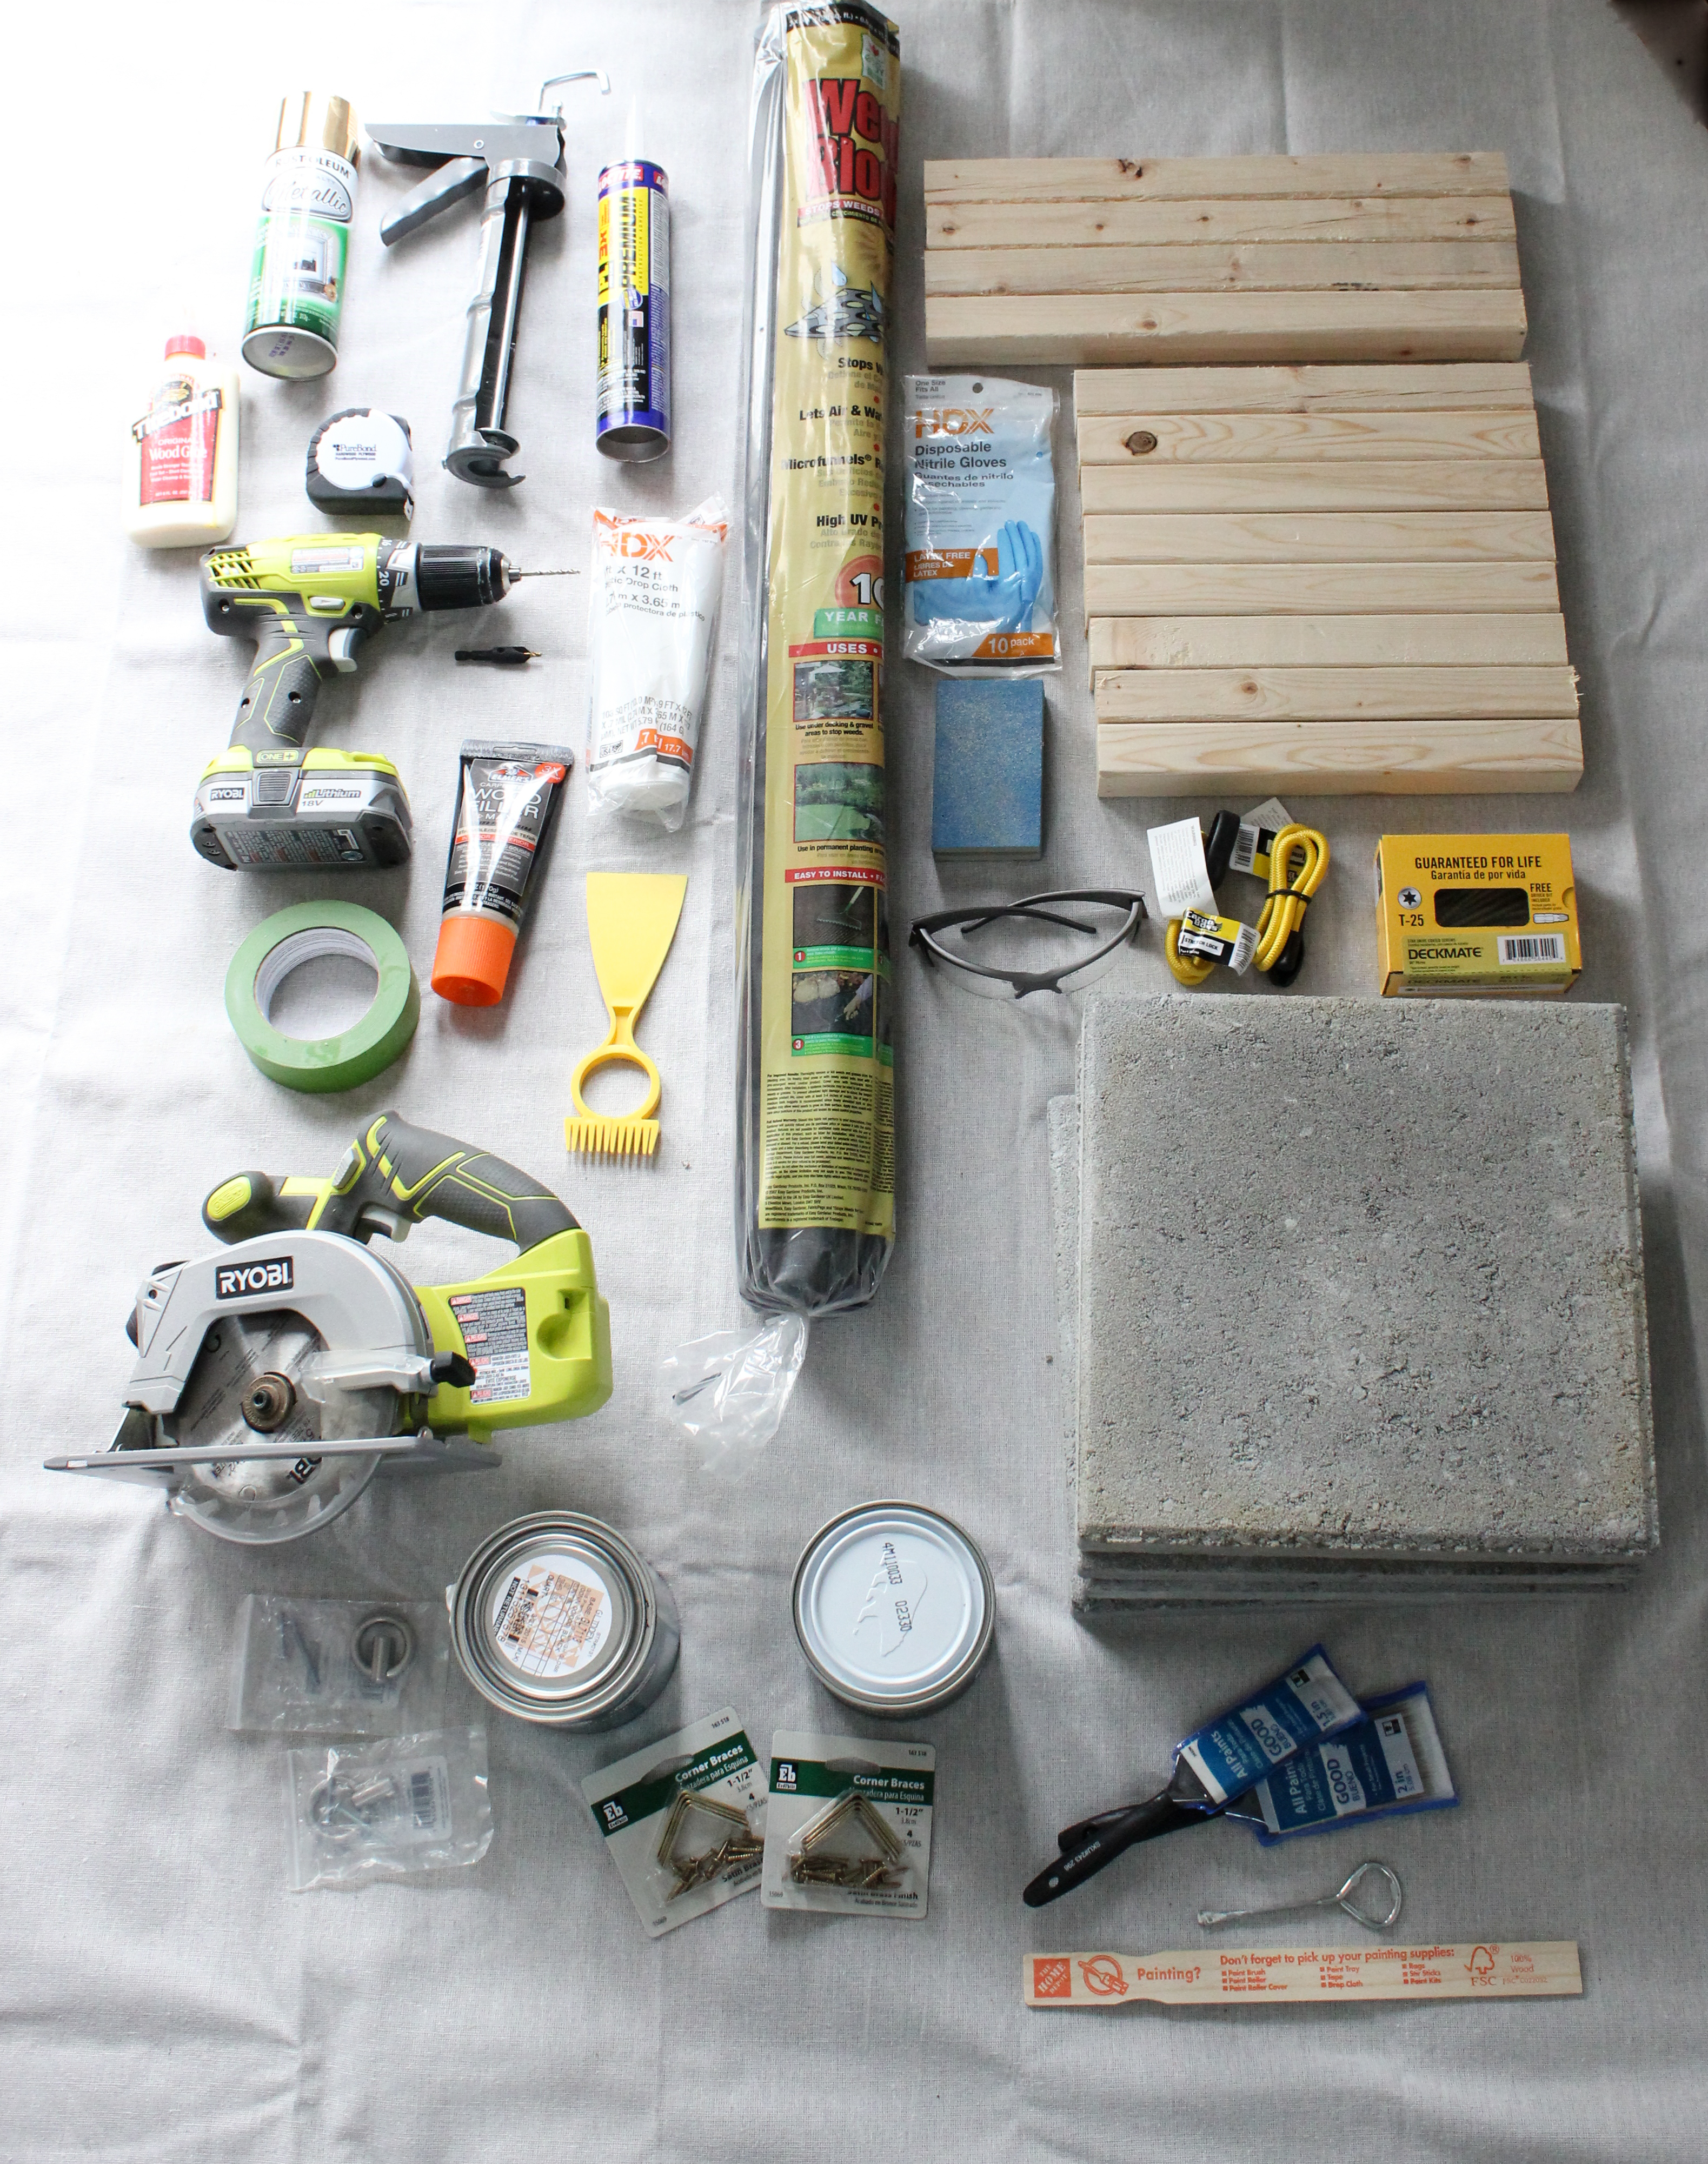
- 4 – 2×2 pieces cut to 16″ each
- 8 – 2×2 pieces cut to 12″ each
- 4 – 12″ Pavers
- Circular Saw or Miter Saw
- Drill
- Caulk Gun
- Loctite Adhesive
- Gloves
- Safety Glasses
- Bungee Cords
- 3″ Deck Screws
- Putty Knife
- Wood Filler
- Painter’s Tape
- Tape Measure
- Wood Glue
- Countersink Drill Bit
- Sanding Block
- Primer and paint (I used White Masonry Paint for the pavers and High Gloss Black Exterior Paint for the wood.)
- Ring Pulls (optional)
- Brass Corner Braces (optional)
- Spray Primer and Metallic Gold Spray Paint (for hardware; I used Rust-Oleum.)
- Paint Brushes
- Drop Cloth
- X-Acto or Utility Knife
- Landscape Fabric
- Potting Soil
- Plant(s) of your choice
Now, the great thing about being a blogger is that you get to learn from my trial and error. This project was almost a bust, but I saved it in the end! (More on that shortly…)
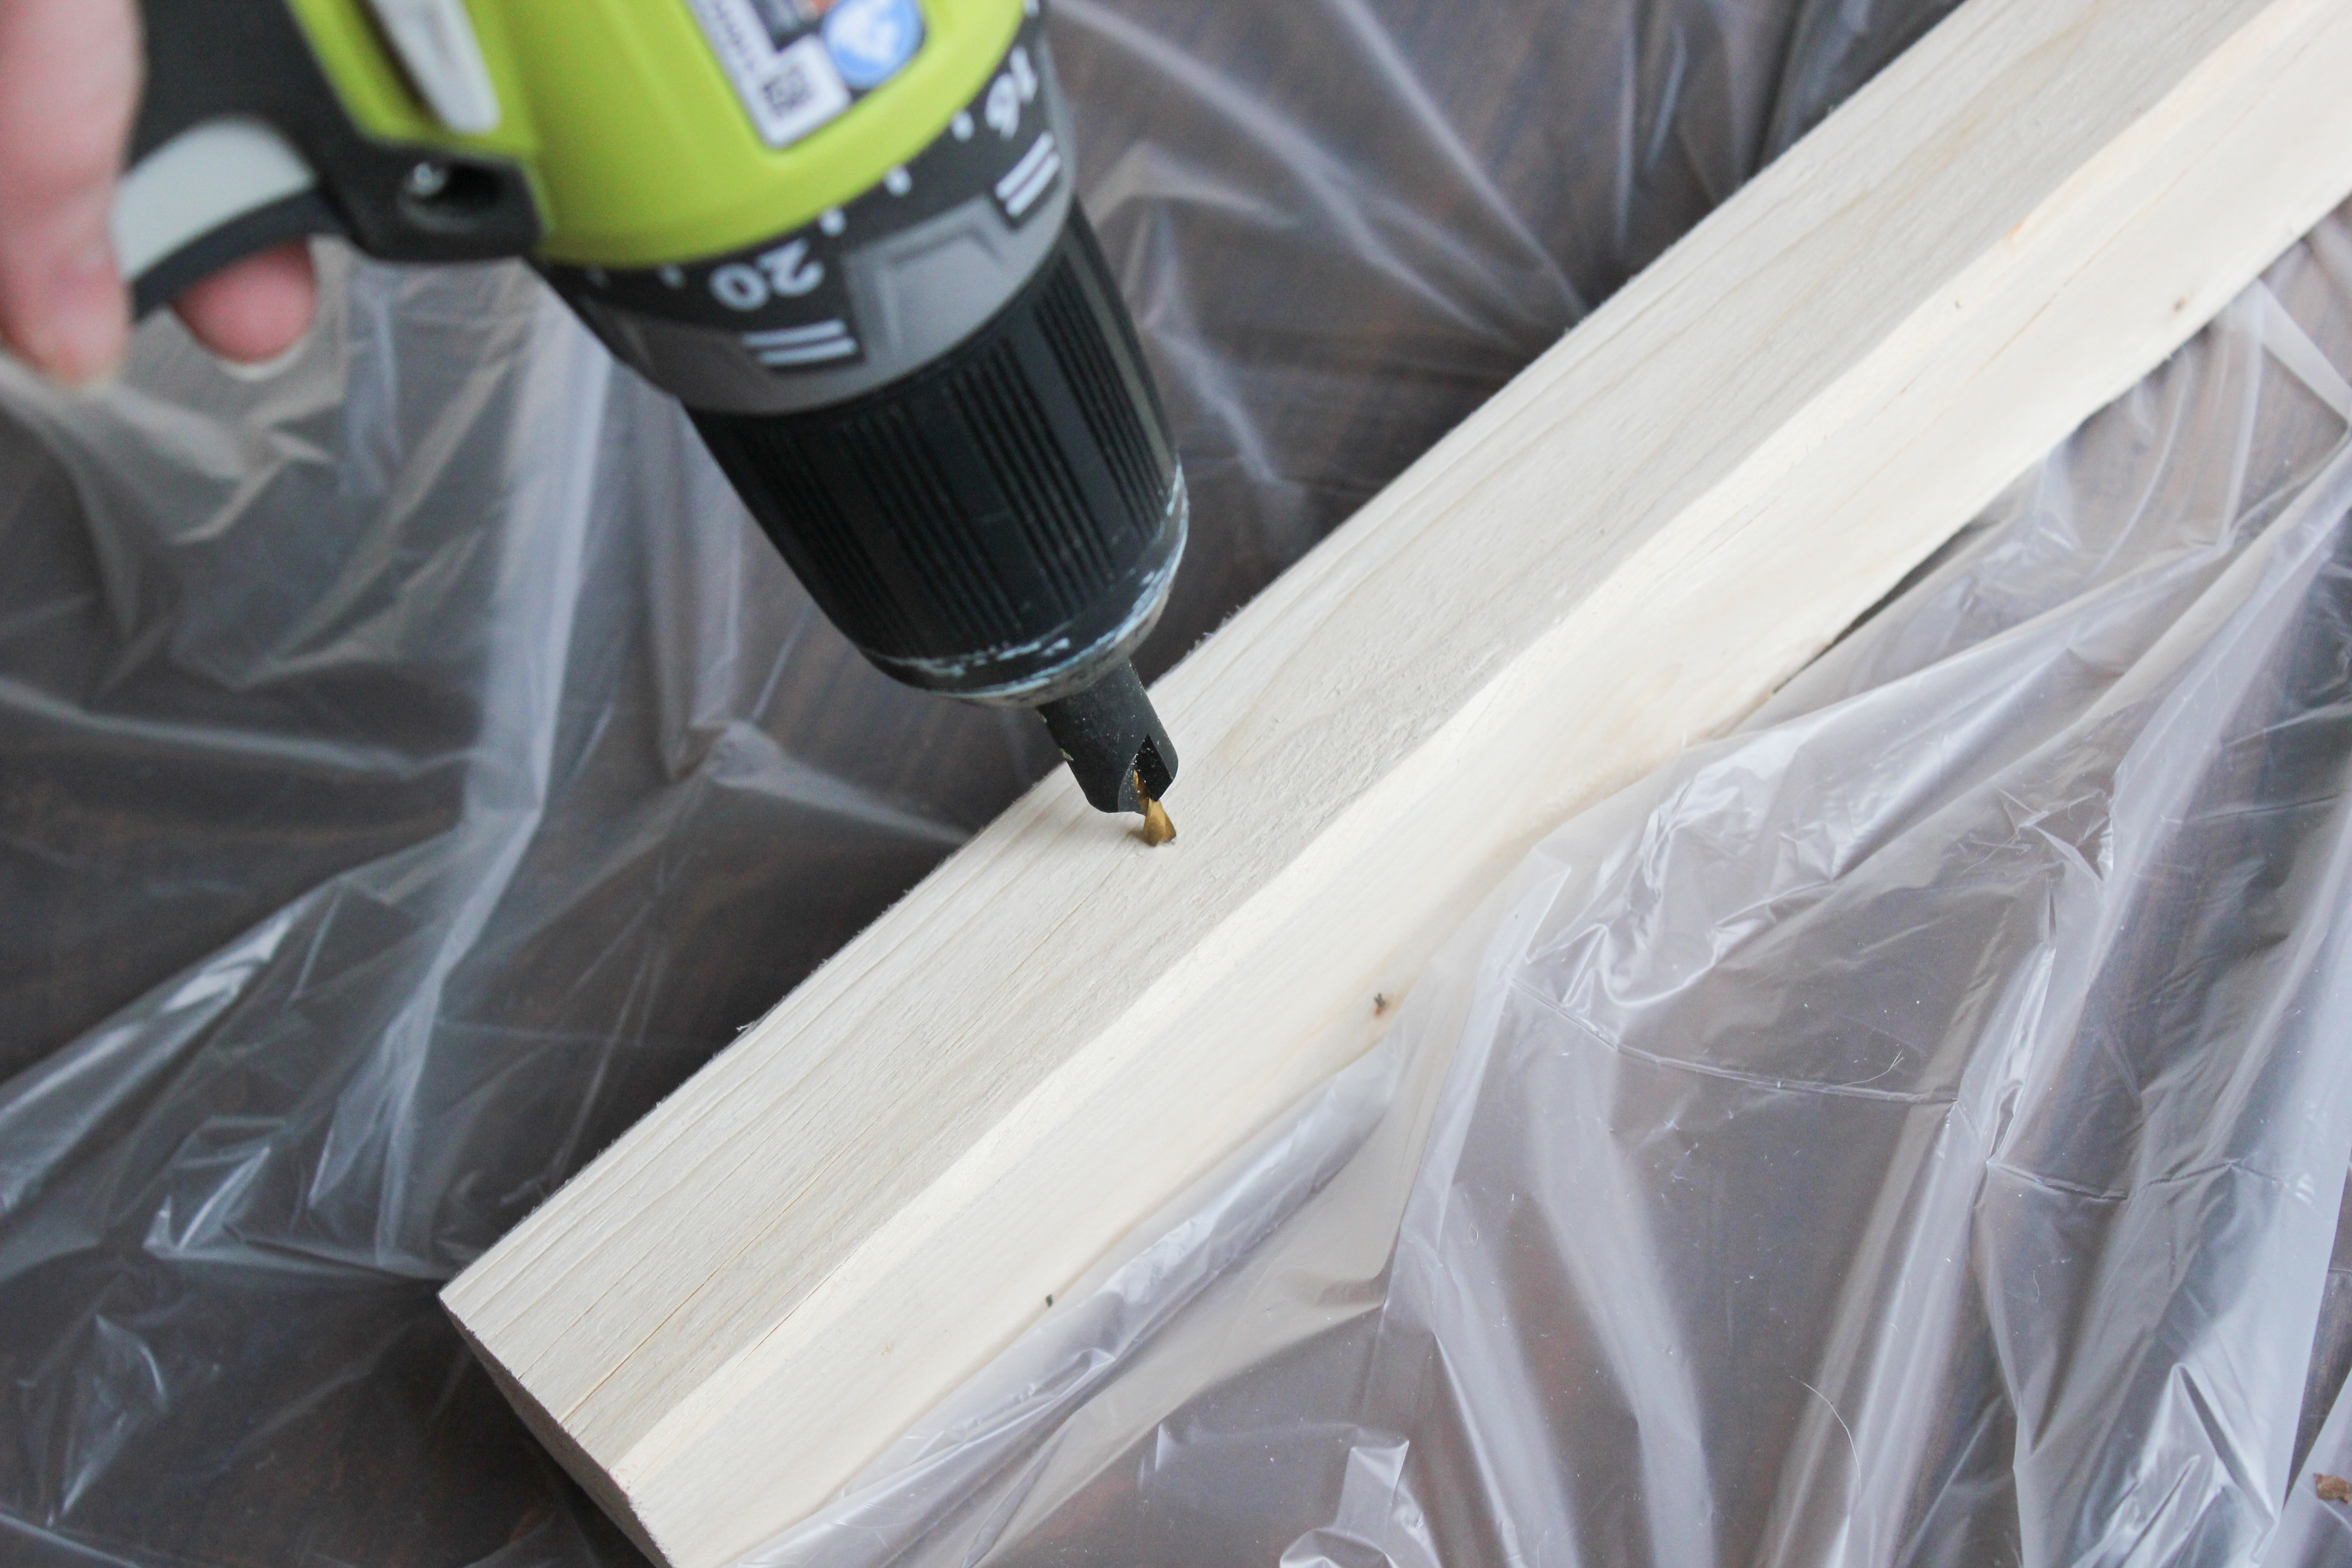
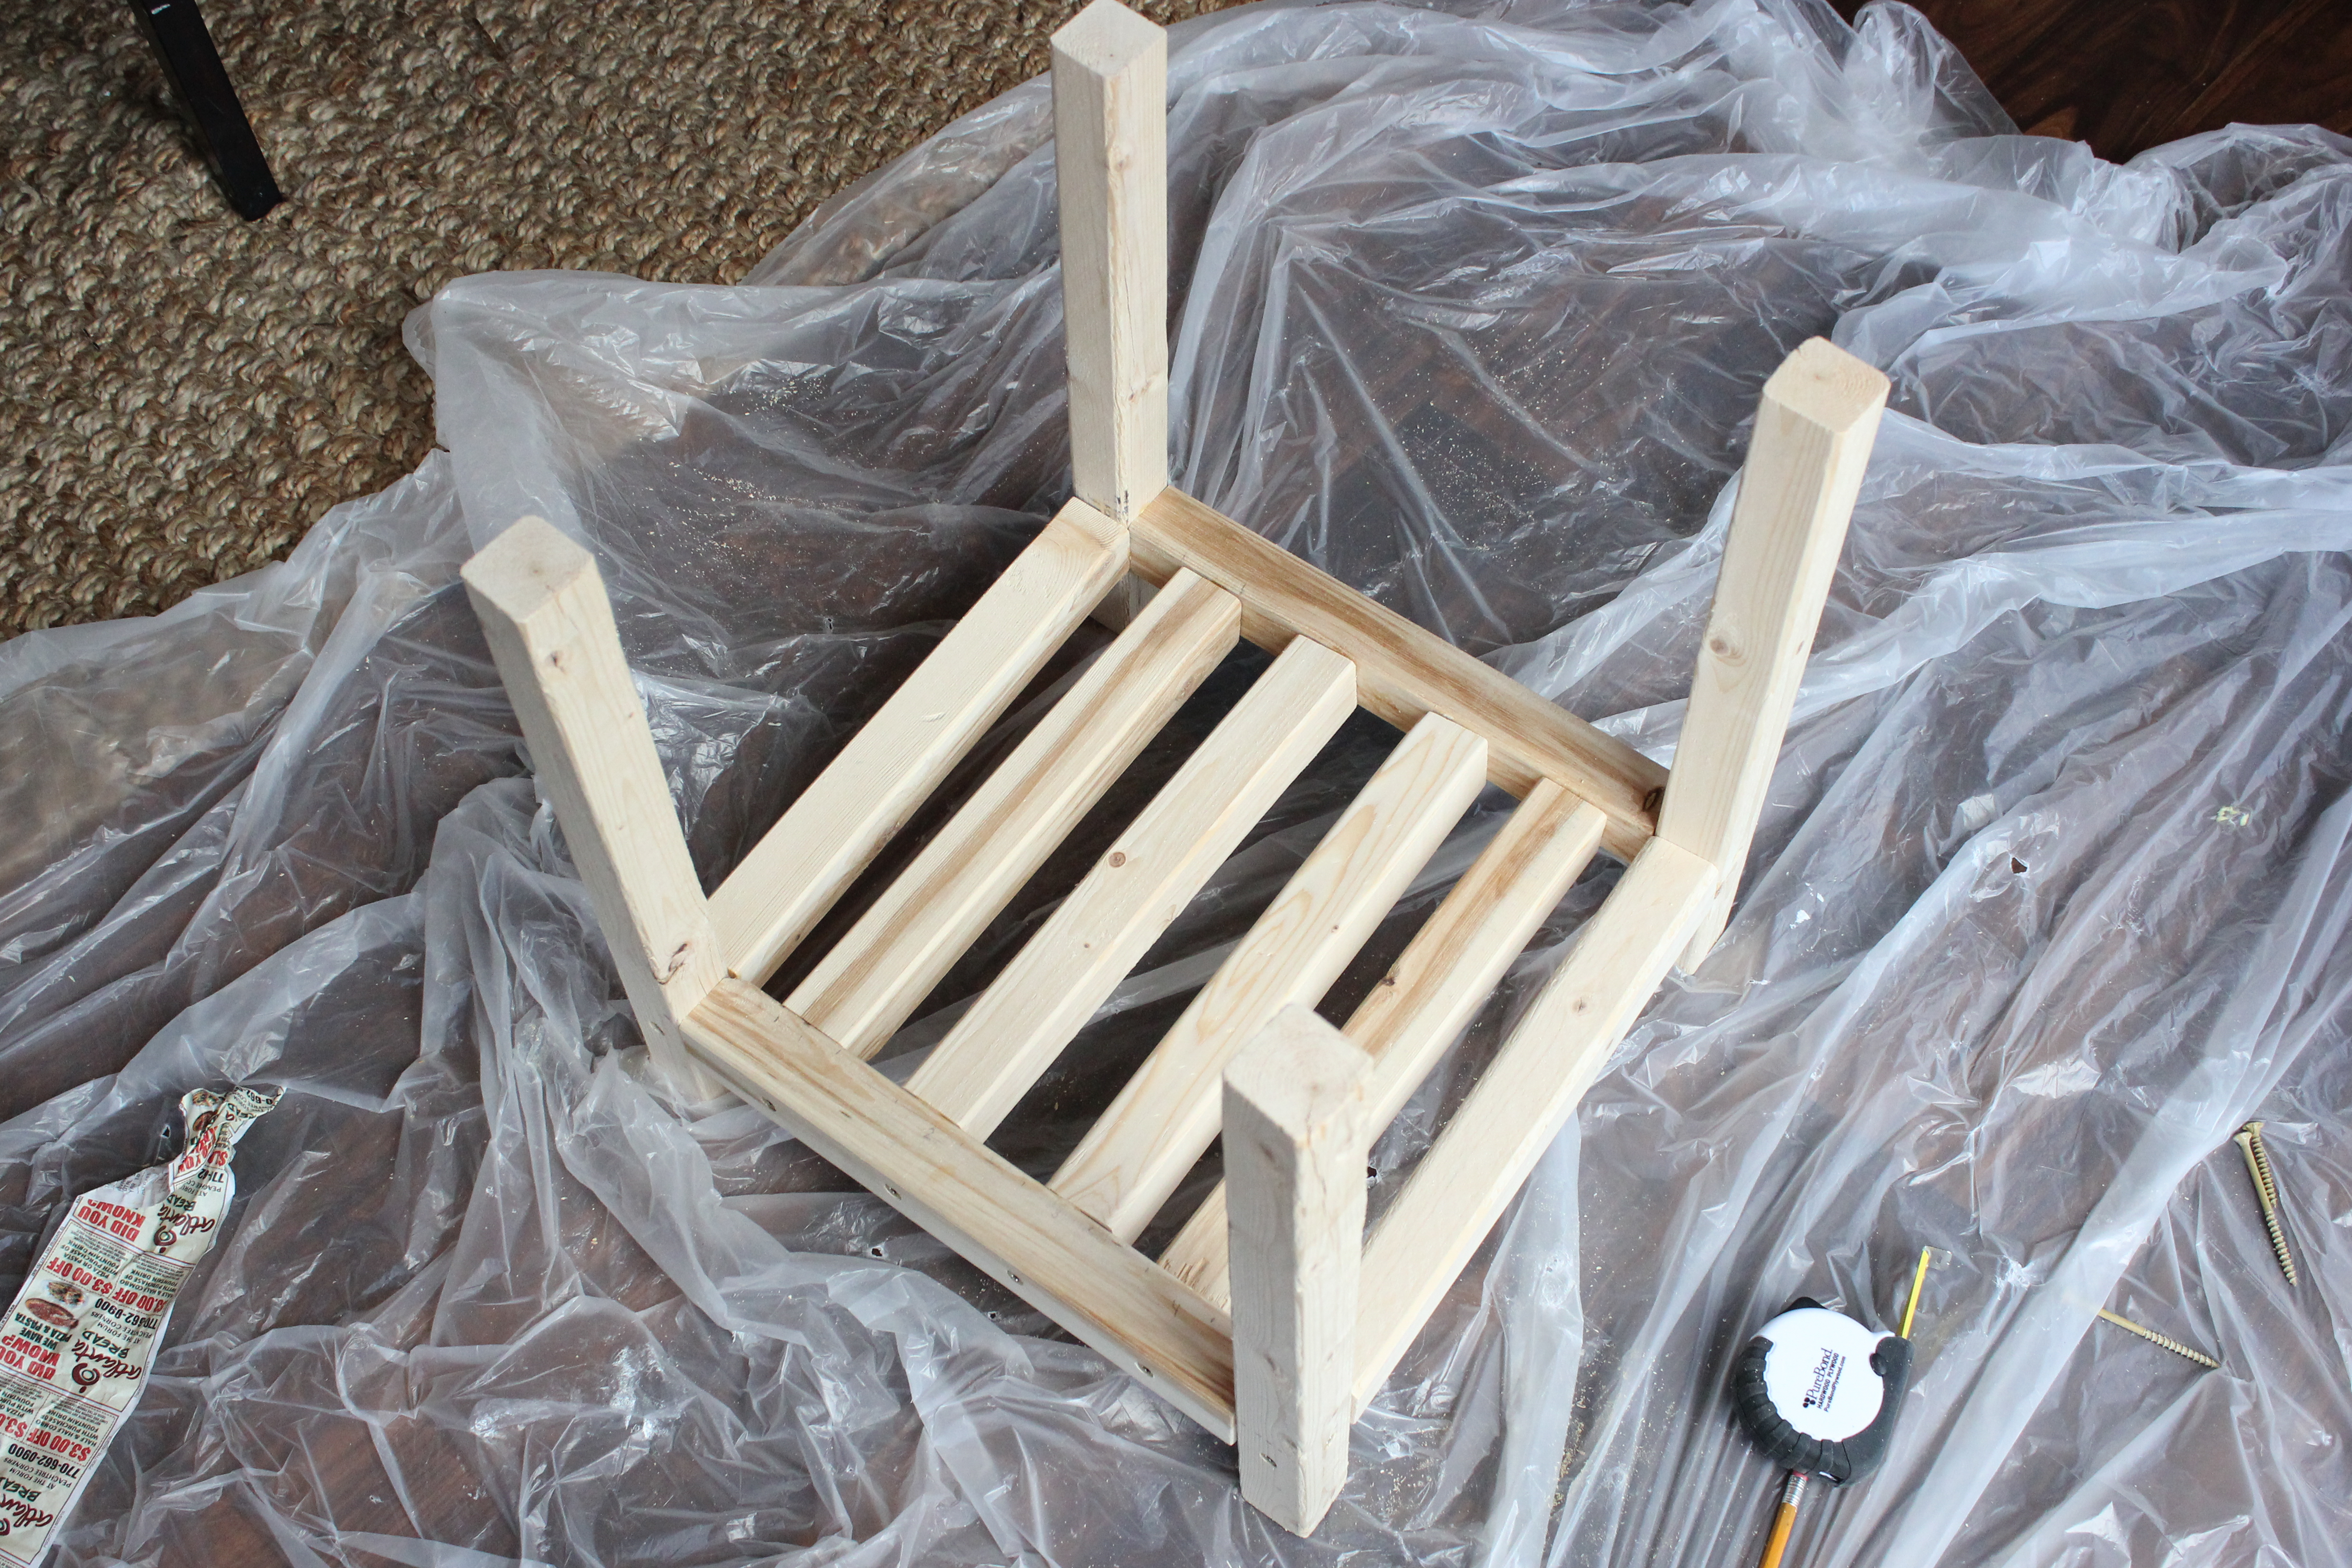
First, cut your 2x2s into (4) – 16″ pieces and (8) – 12″ pieces. I used my miter saw, but a circular saw works great too and it is a great saw for a beginner if you don’t have a lot of power tool experience. I love my RYOBI cordless circular saw.
Sand your wood, then pre-drill your holes using a countersink bit.
Use wood glue and 3 inch deck screws to attach all of your pieces. The 16 inch pieces will be the legs, and the 12 inch pieces will connect perpendicular to the legs. Position them 12 inches down (to leave room for the pavers to rest on top).
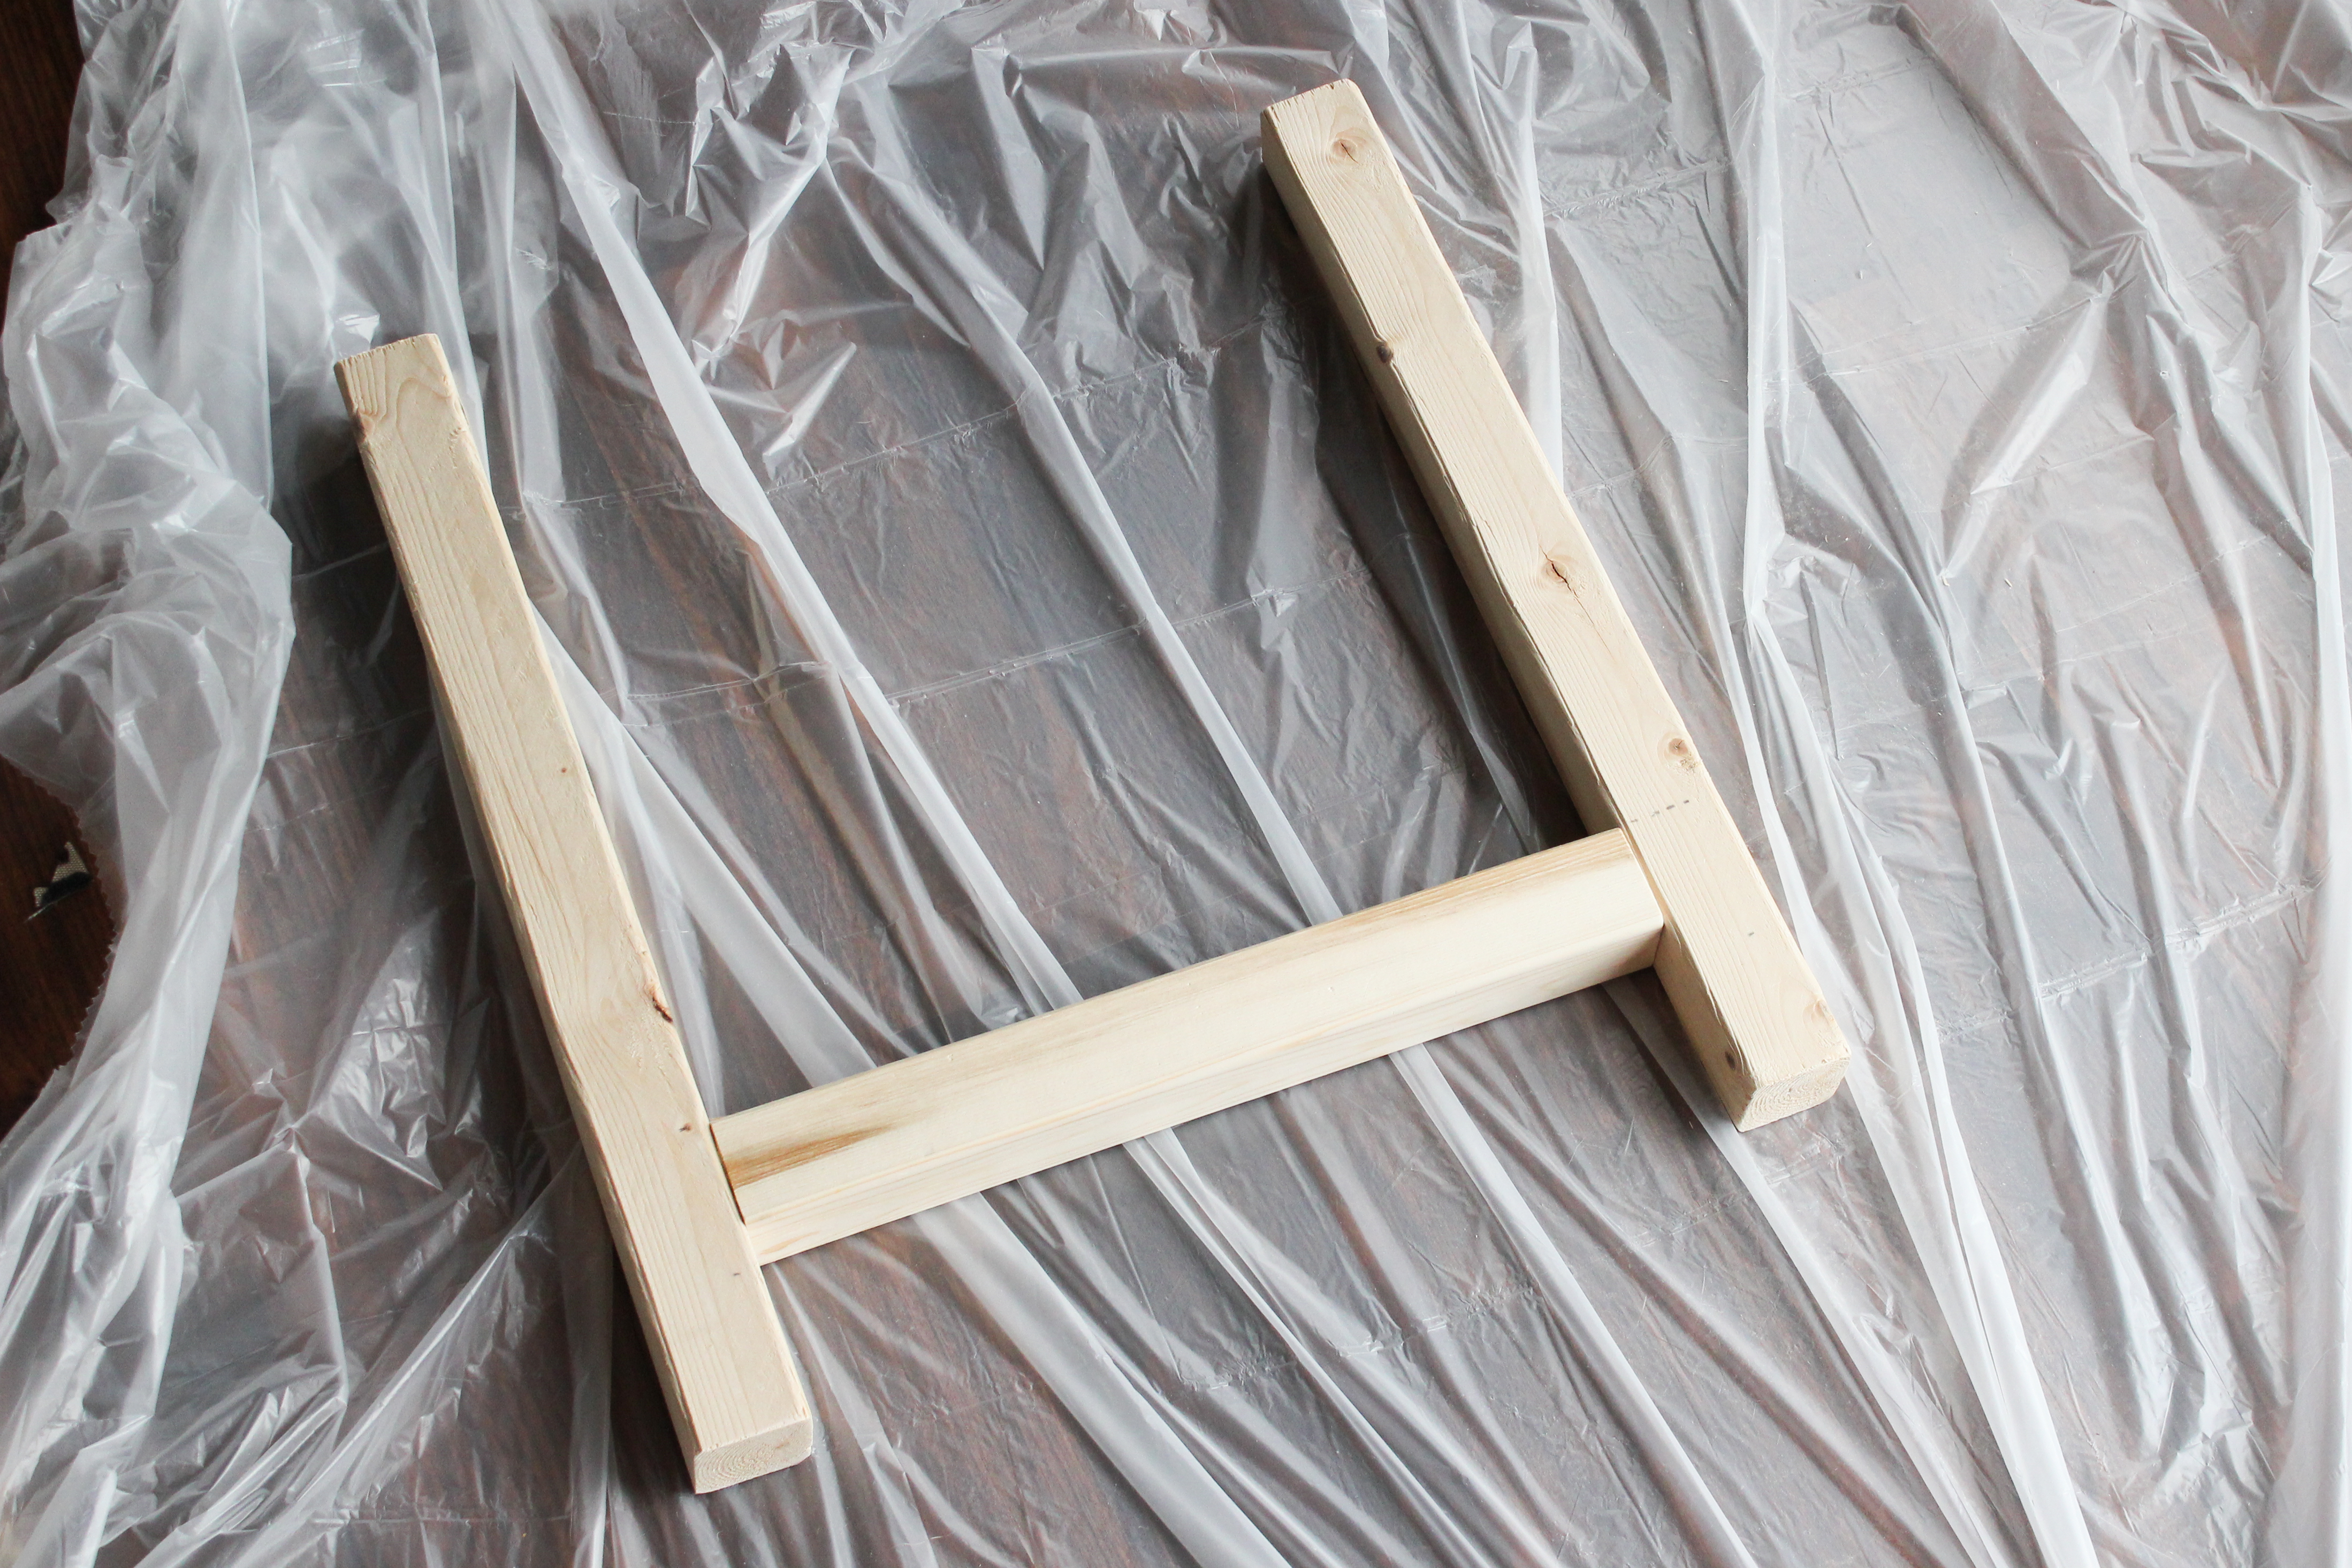
Attach all of the legs to the 12″ pieces using 3″ deck screws like this:

Evenly space the remaining 12 inch pieces across the bottom, also attaching with wood glue and 3 inch screws. (I measured and used a pencil to mark where each piece should go.)
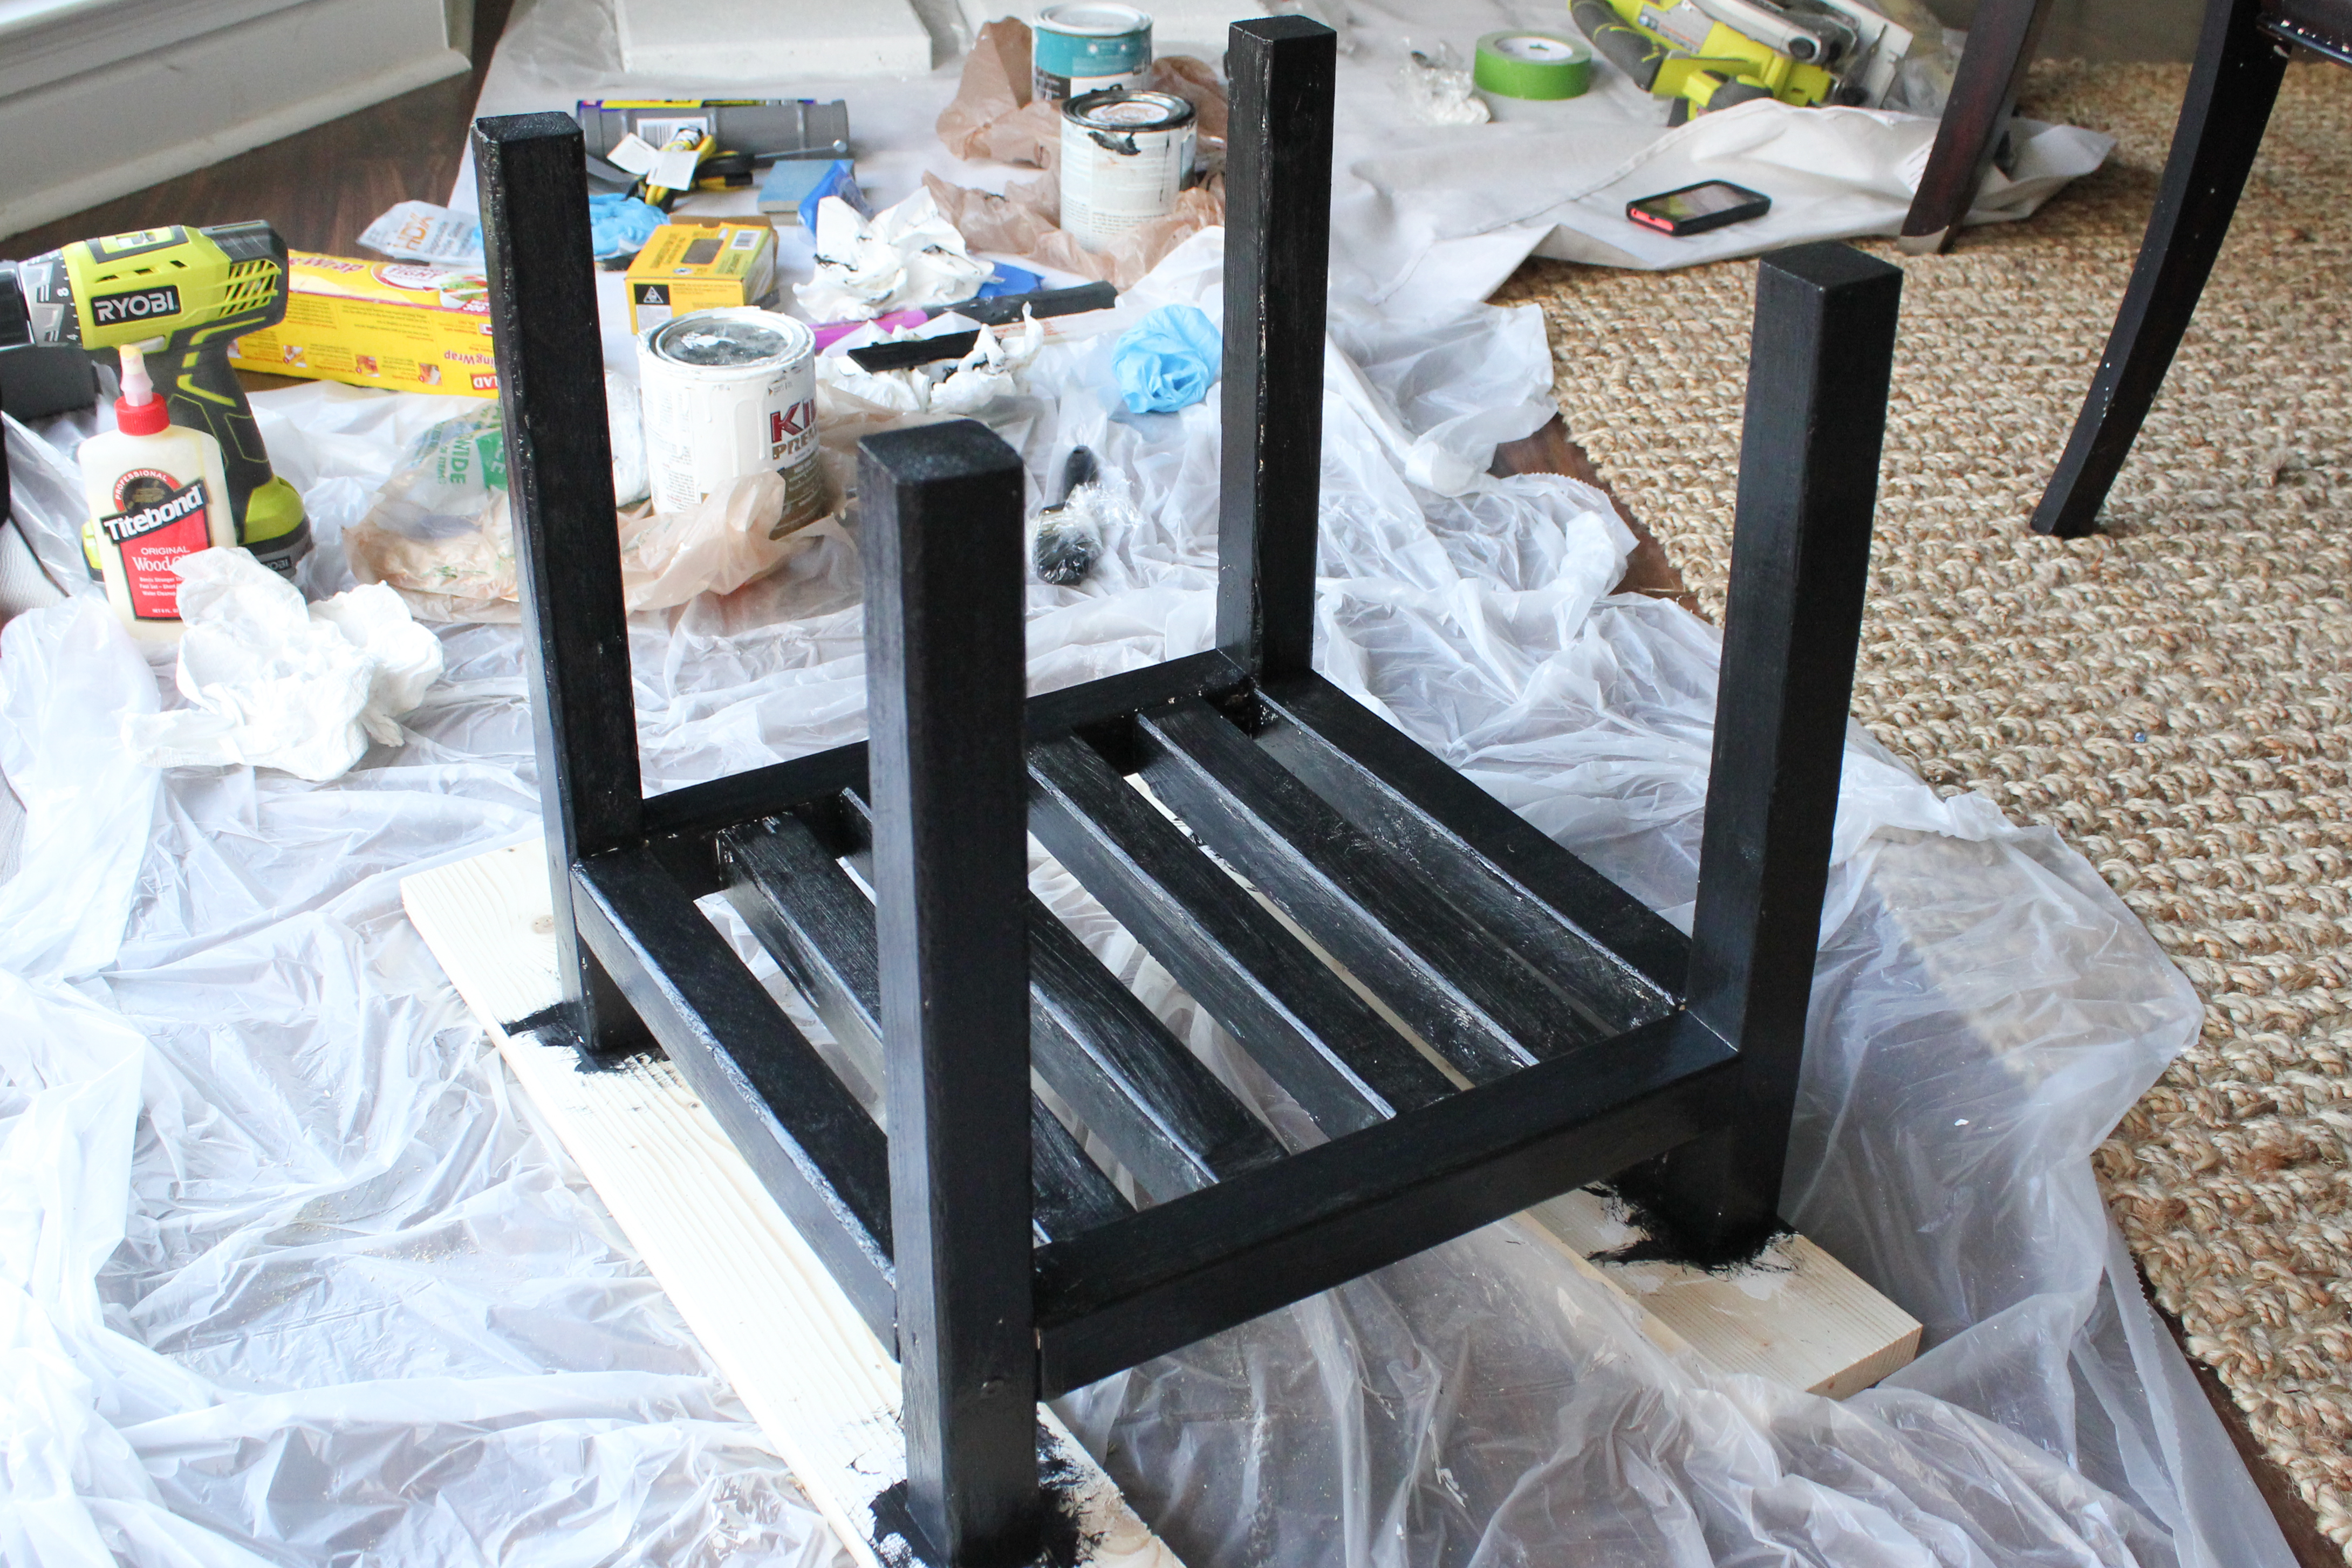
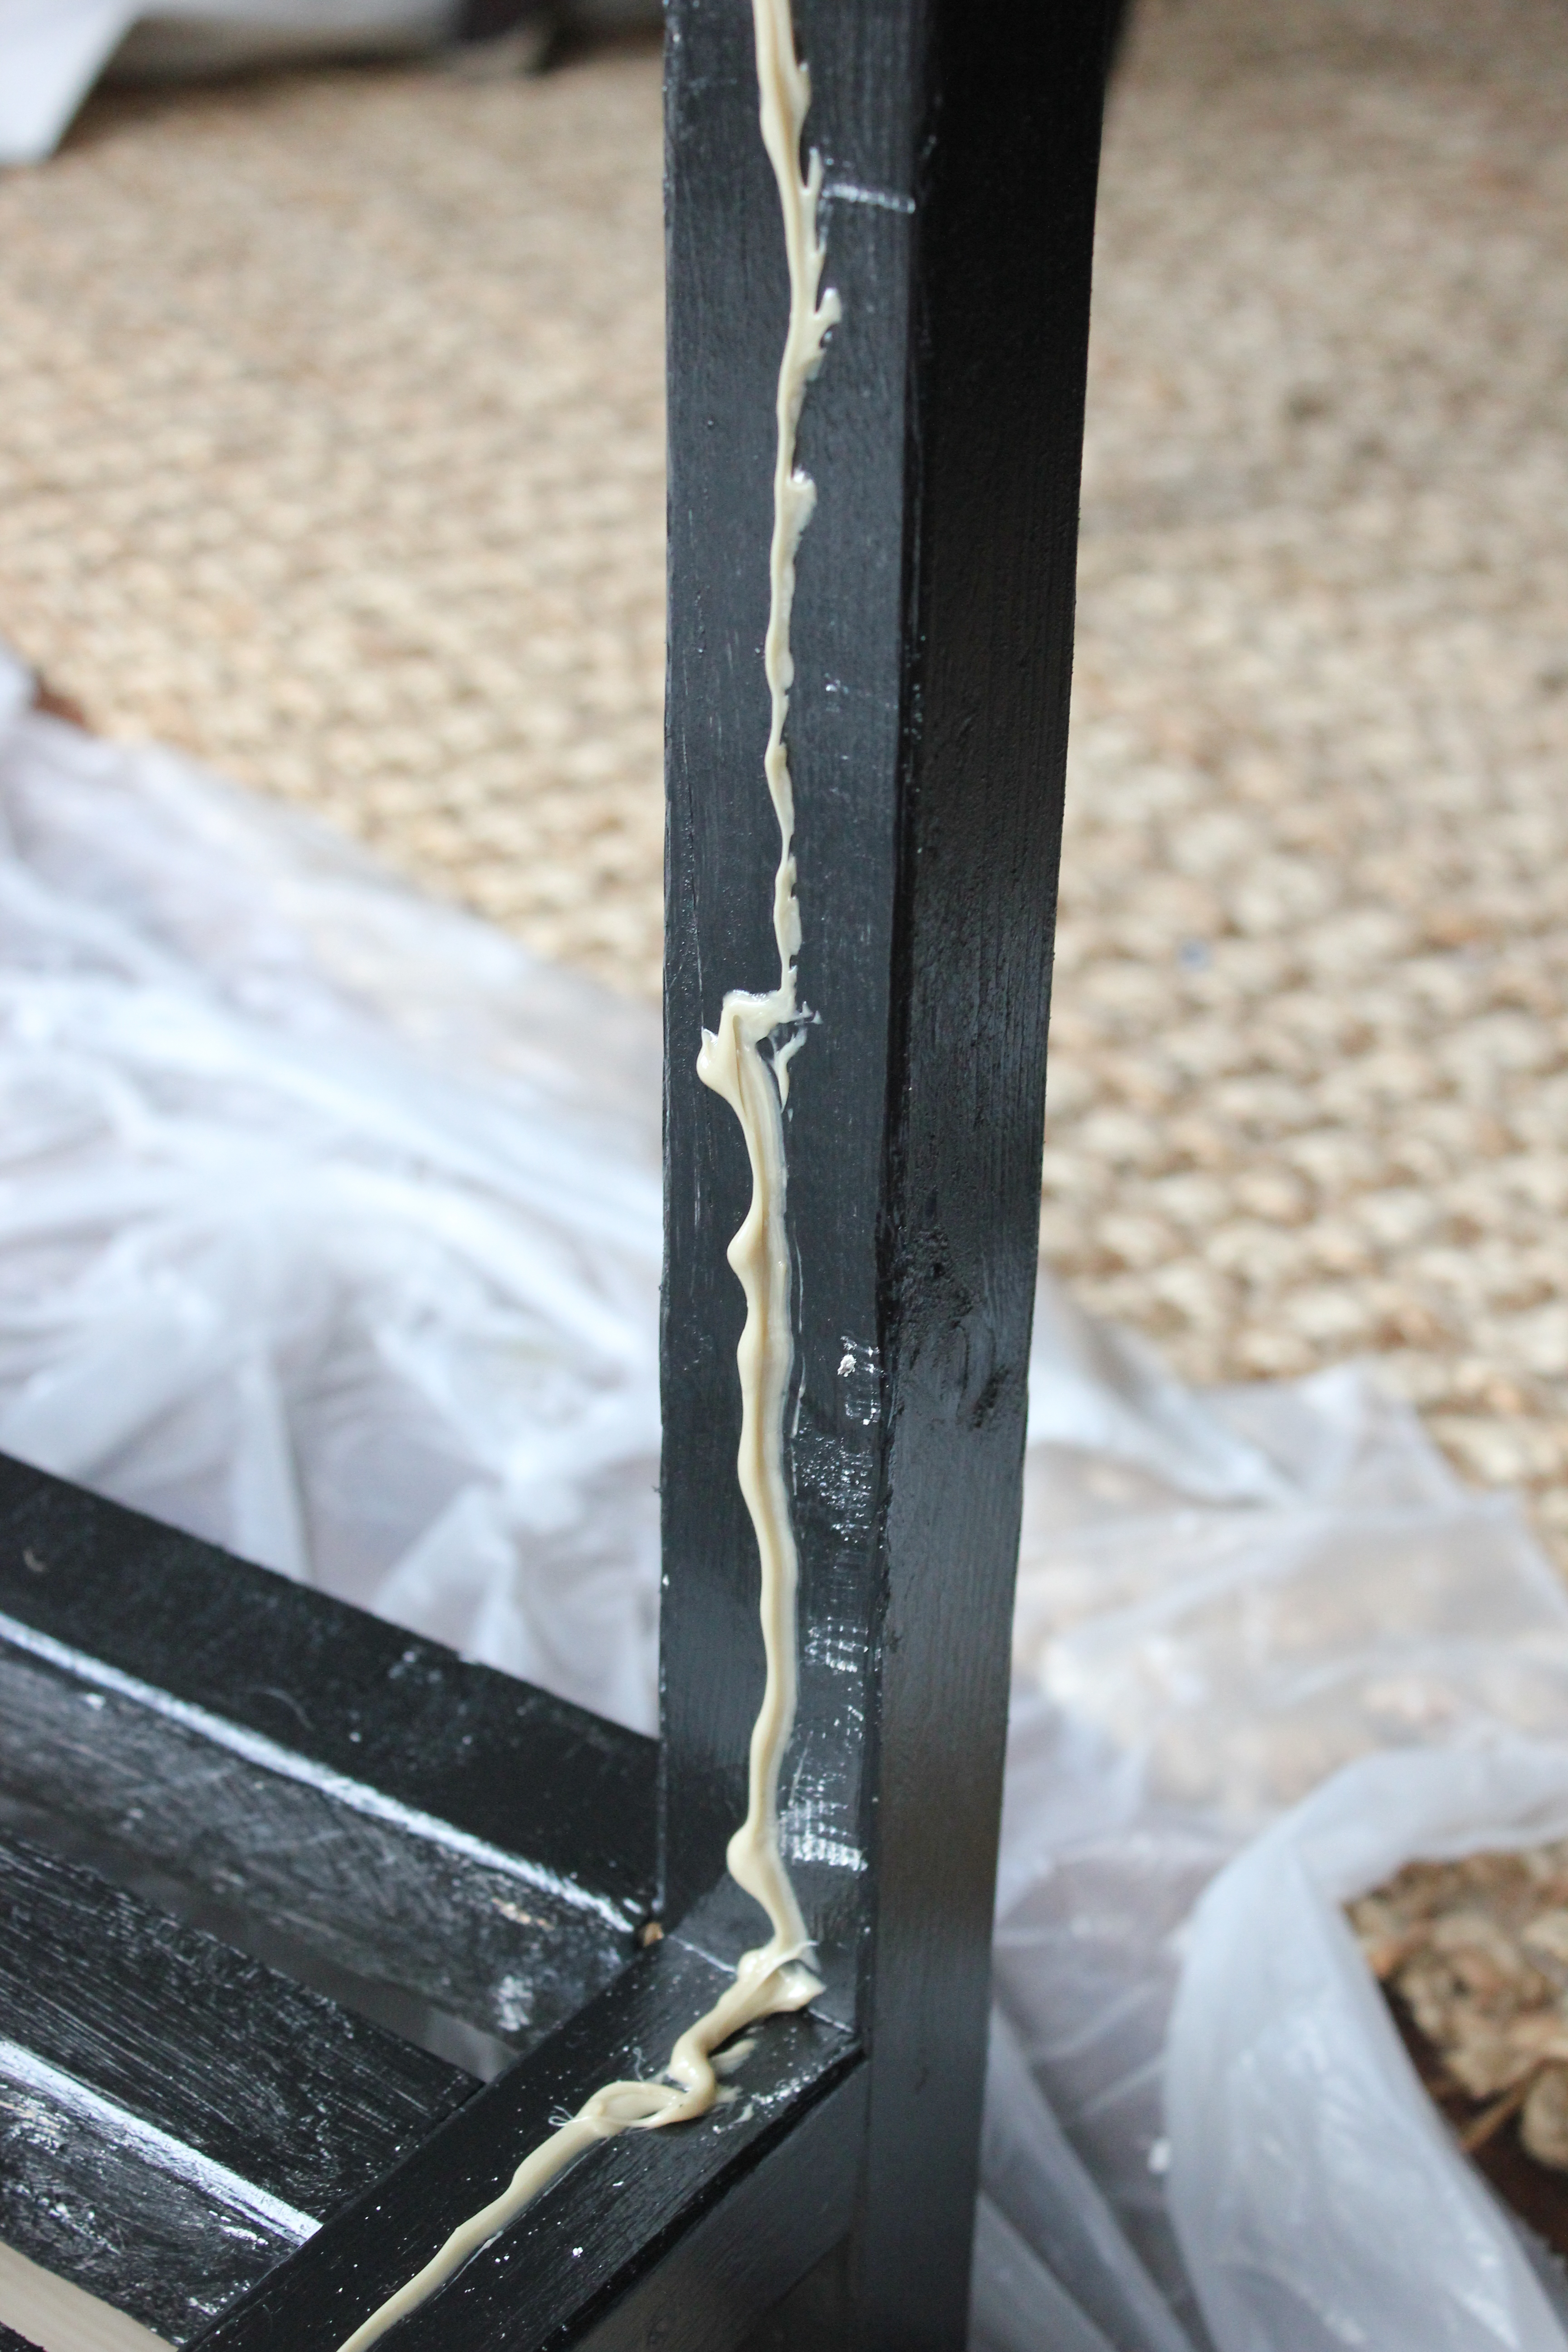
Use wood filler and a putty knife to patch over your screws so they will no longer be visible. Prime and paint your wood planter base. I used two coats of Glidden high gloss exterior black paint. (Or you could stain the base — there are so many possibilities to customize and make this planter your own!)
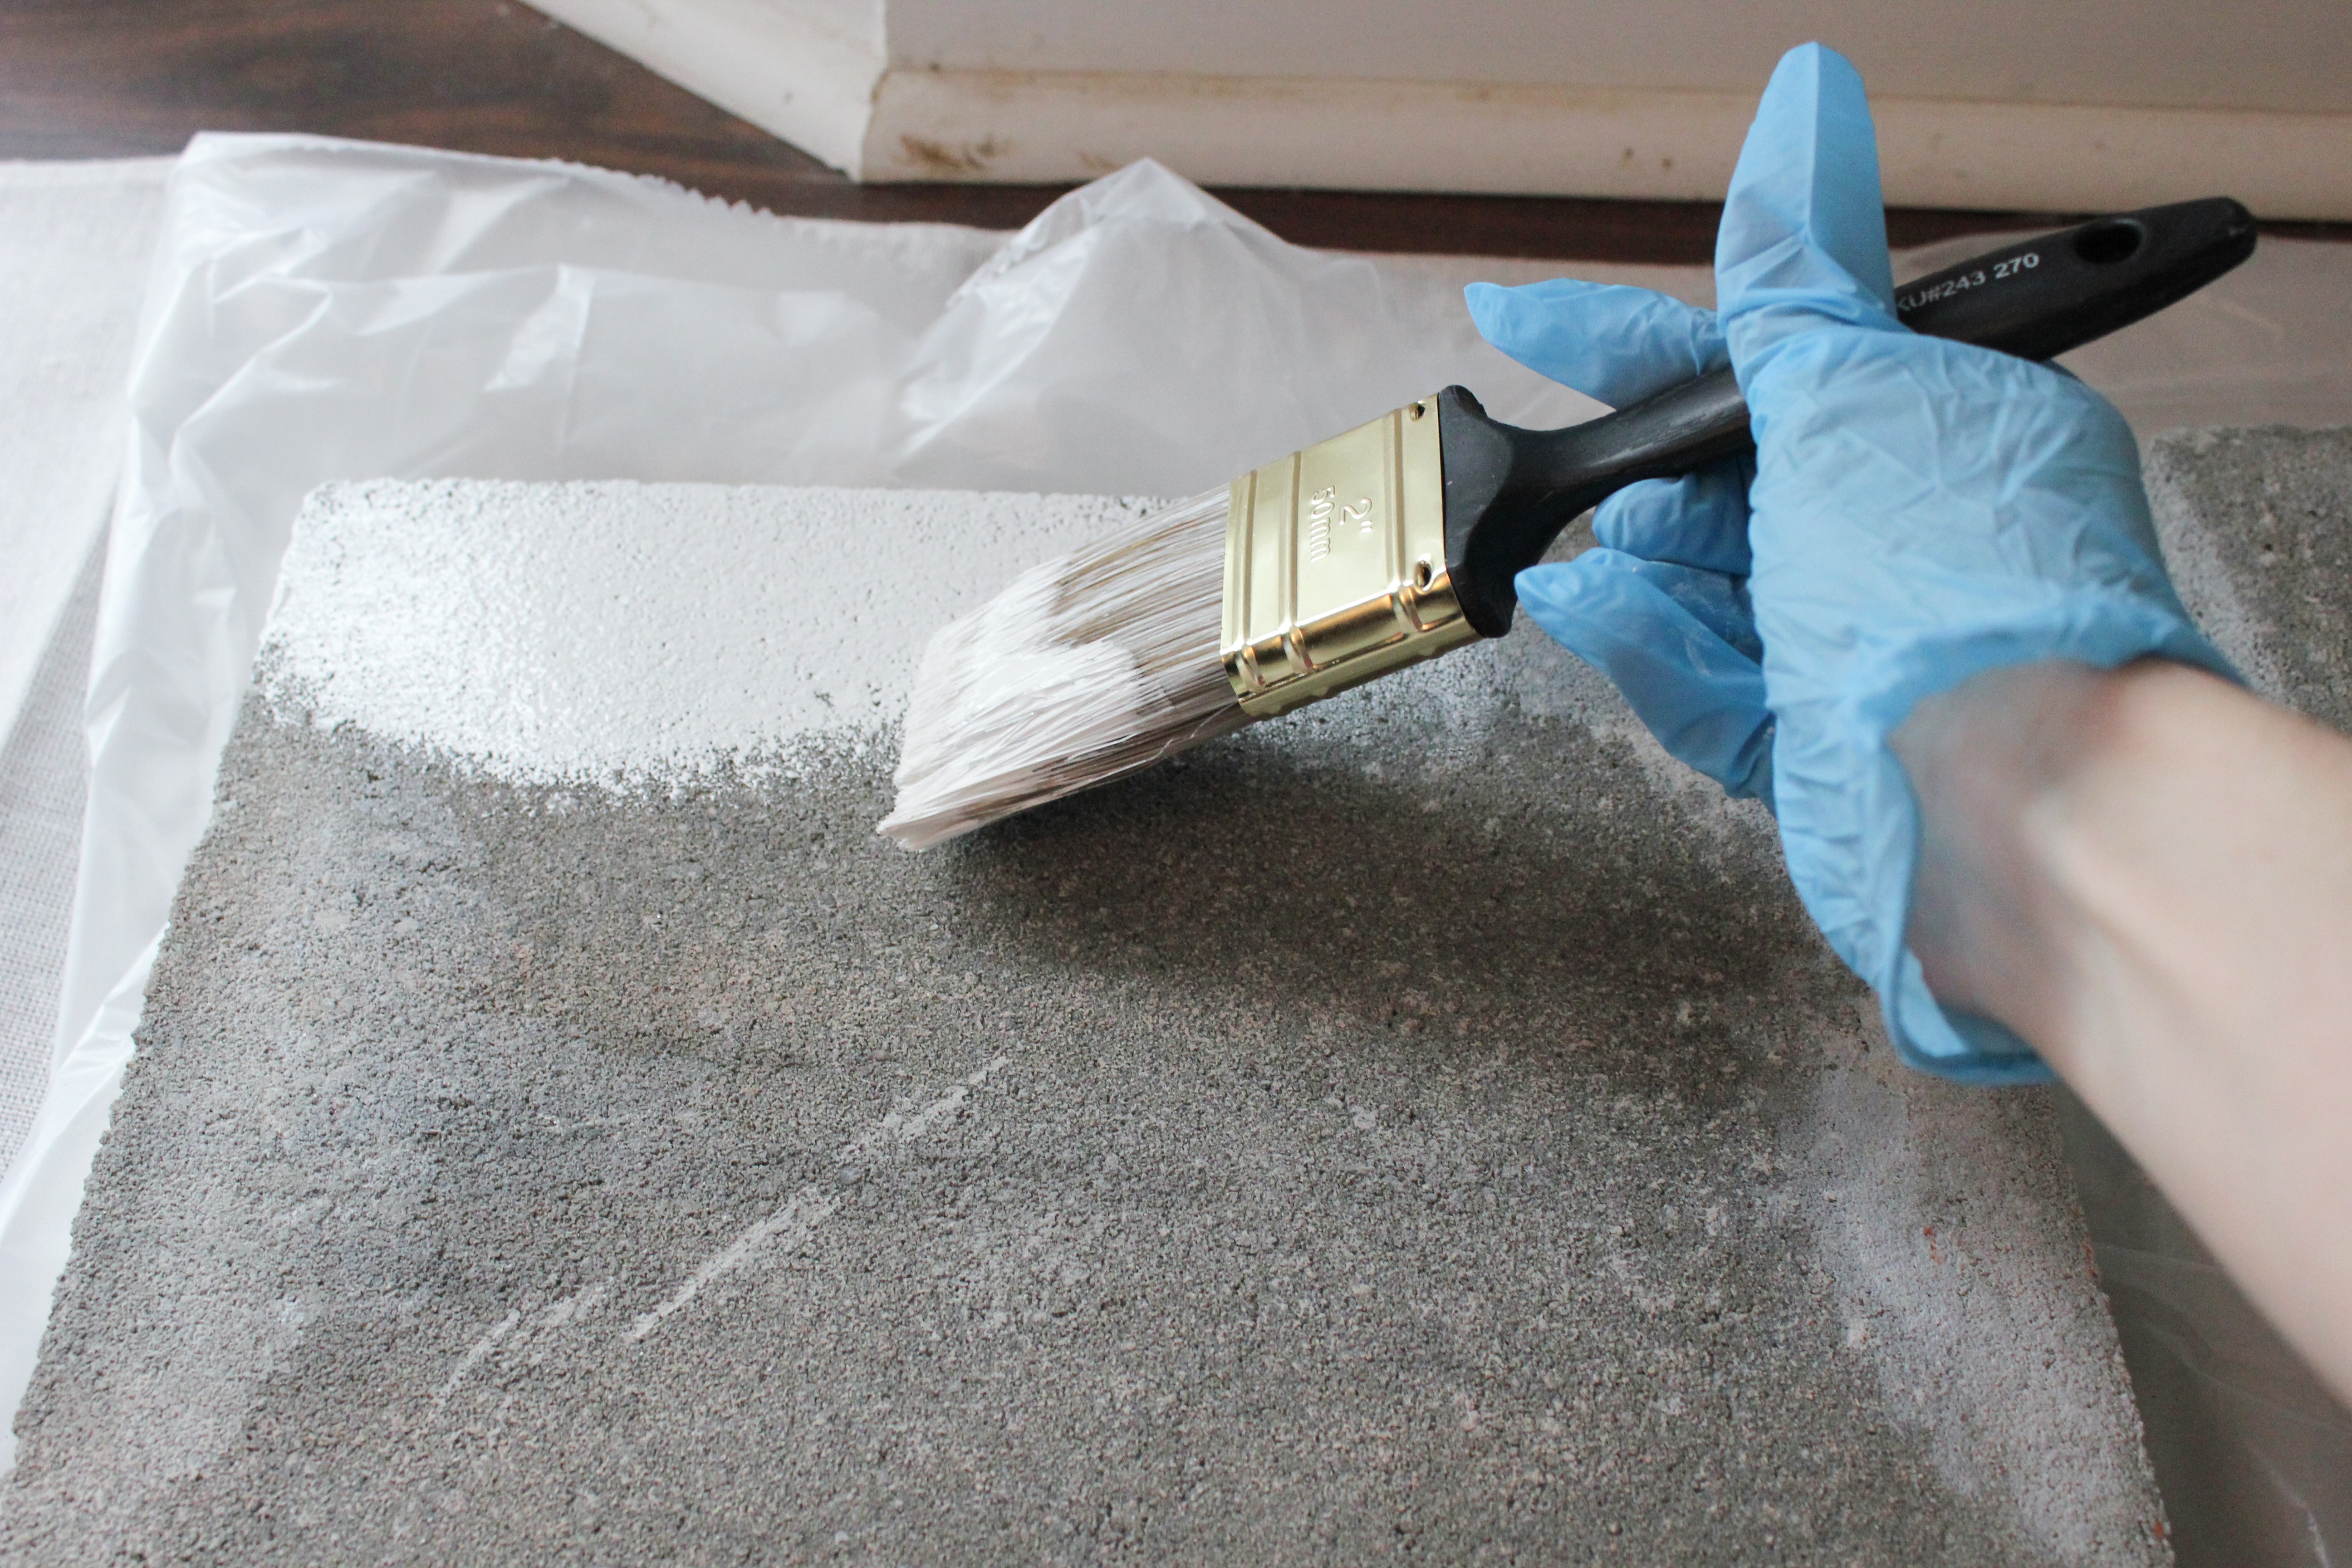
Paint your pavers. Here is where I messed up at first! I originally made my Swiss Cross as large as the entire paver, but when I assembled it, the planter looked a bit “Christmas presenty.” (The crosses ended up looking like ribbon wrapped around a present.) I’ll show you how I fixed this later. First, paint the entire paver white using masonry paint. (I recommend priming first, especially if you will use your planter outside.) Allow it to dry, then flip over and paint the other side.
After your paver is dry, use painter’s tape to create your Swiss cross. Originally I just measured, marked with a pencil, and taped every 4 inches. Do this, but then add a one inch border of tape all the way around your cross. This will avoid the problem and prevent it from looking like a present. Use an X-acto knife to cut your tape, forming the cross shape.
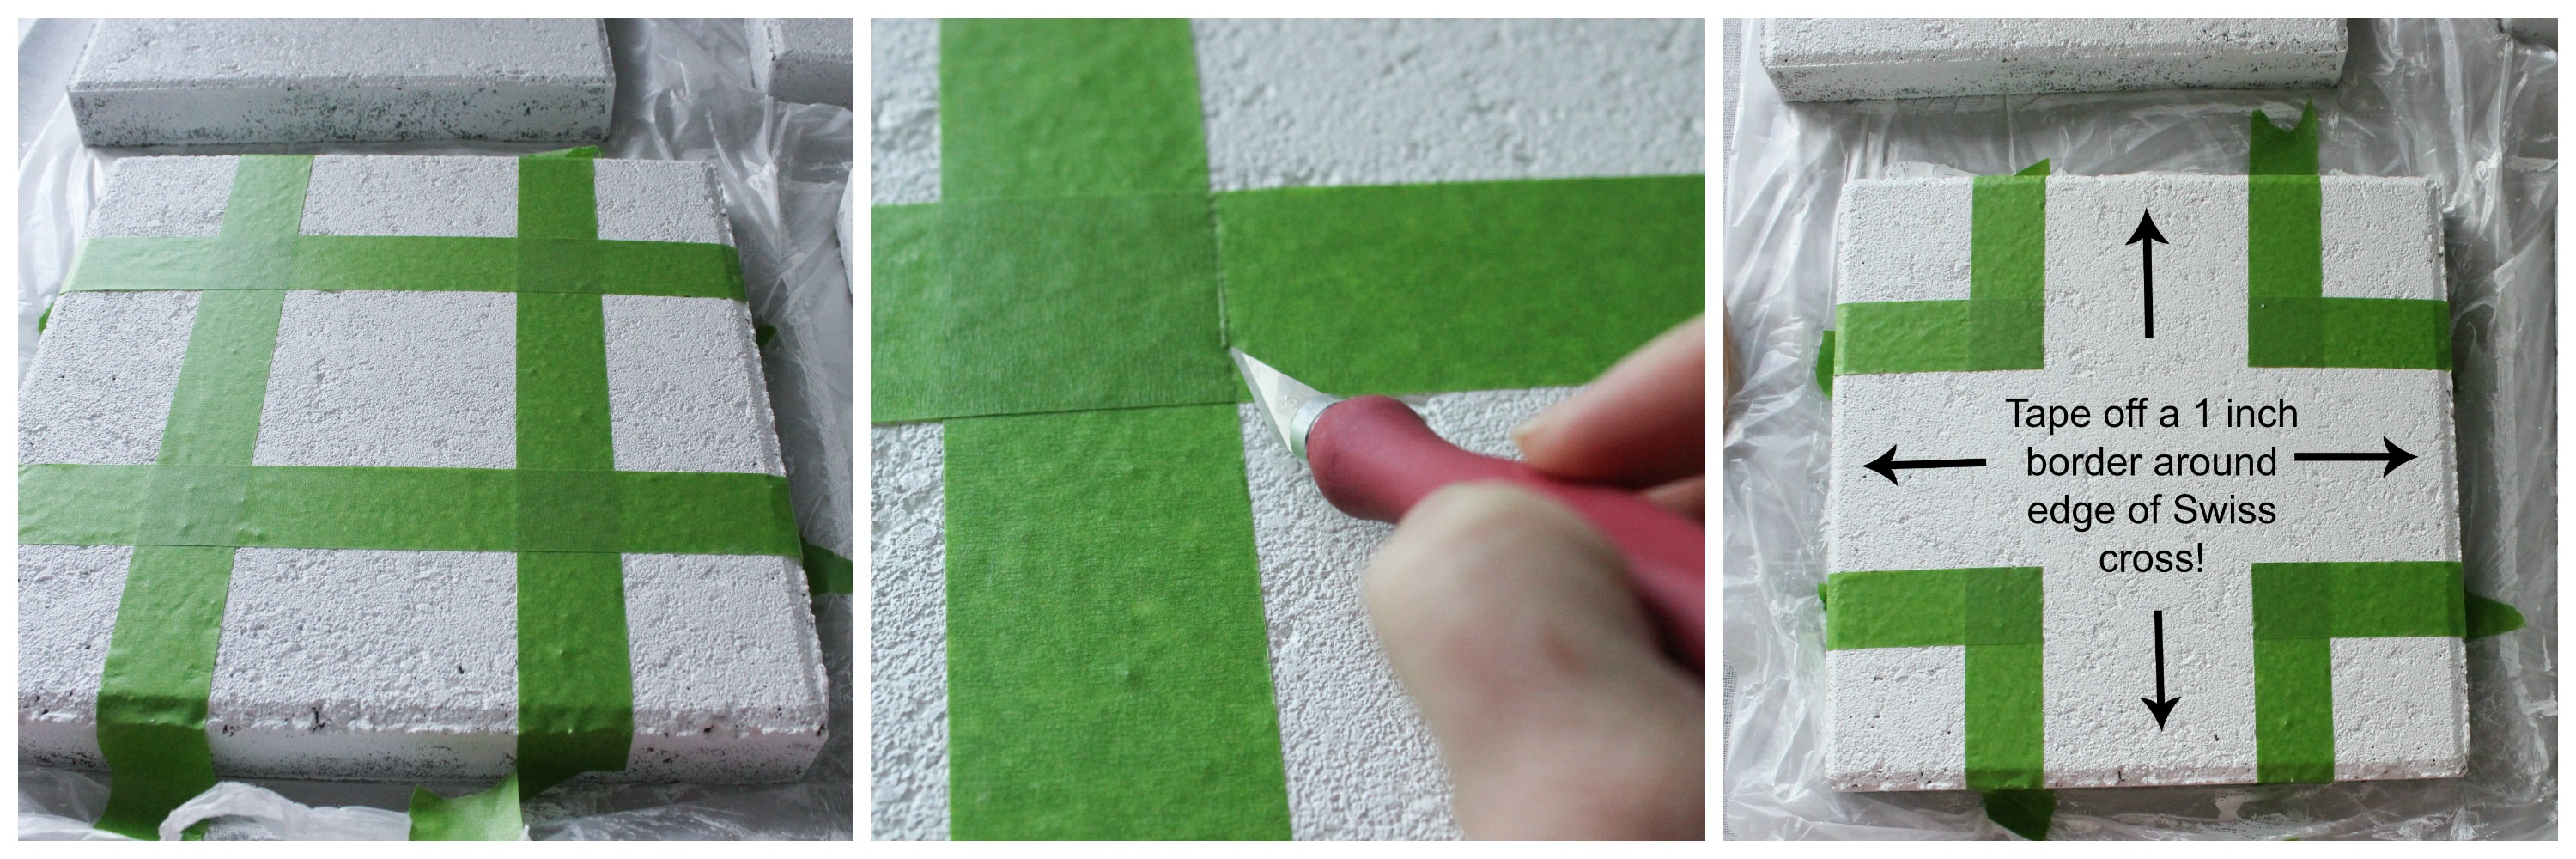
Paint it black (or your choice of color). I used exterior high gloss, but masonry paint is best. (This is before I went back and added the border around the edges to fix the “Christmas presenty” look. Tape it off beforehand and you won’t run into this problem!)

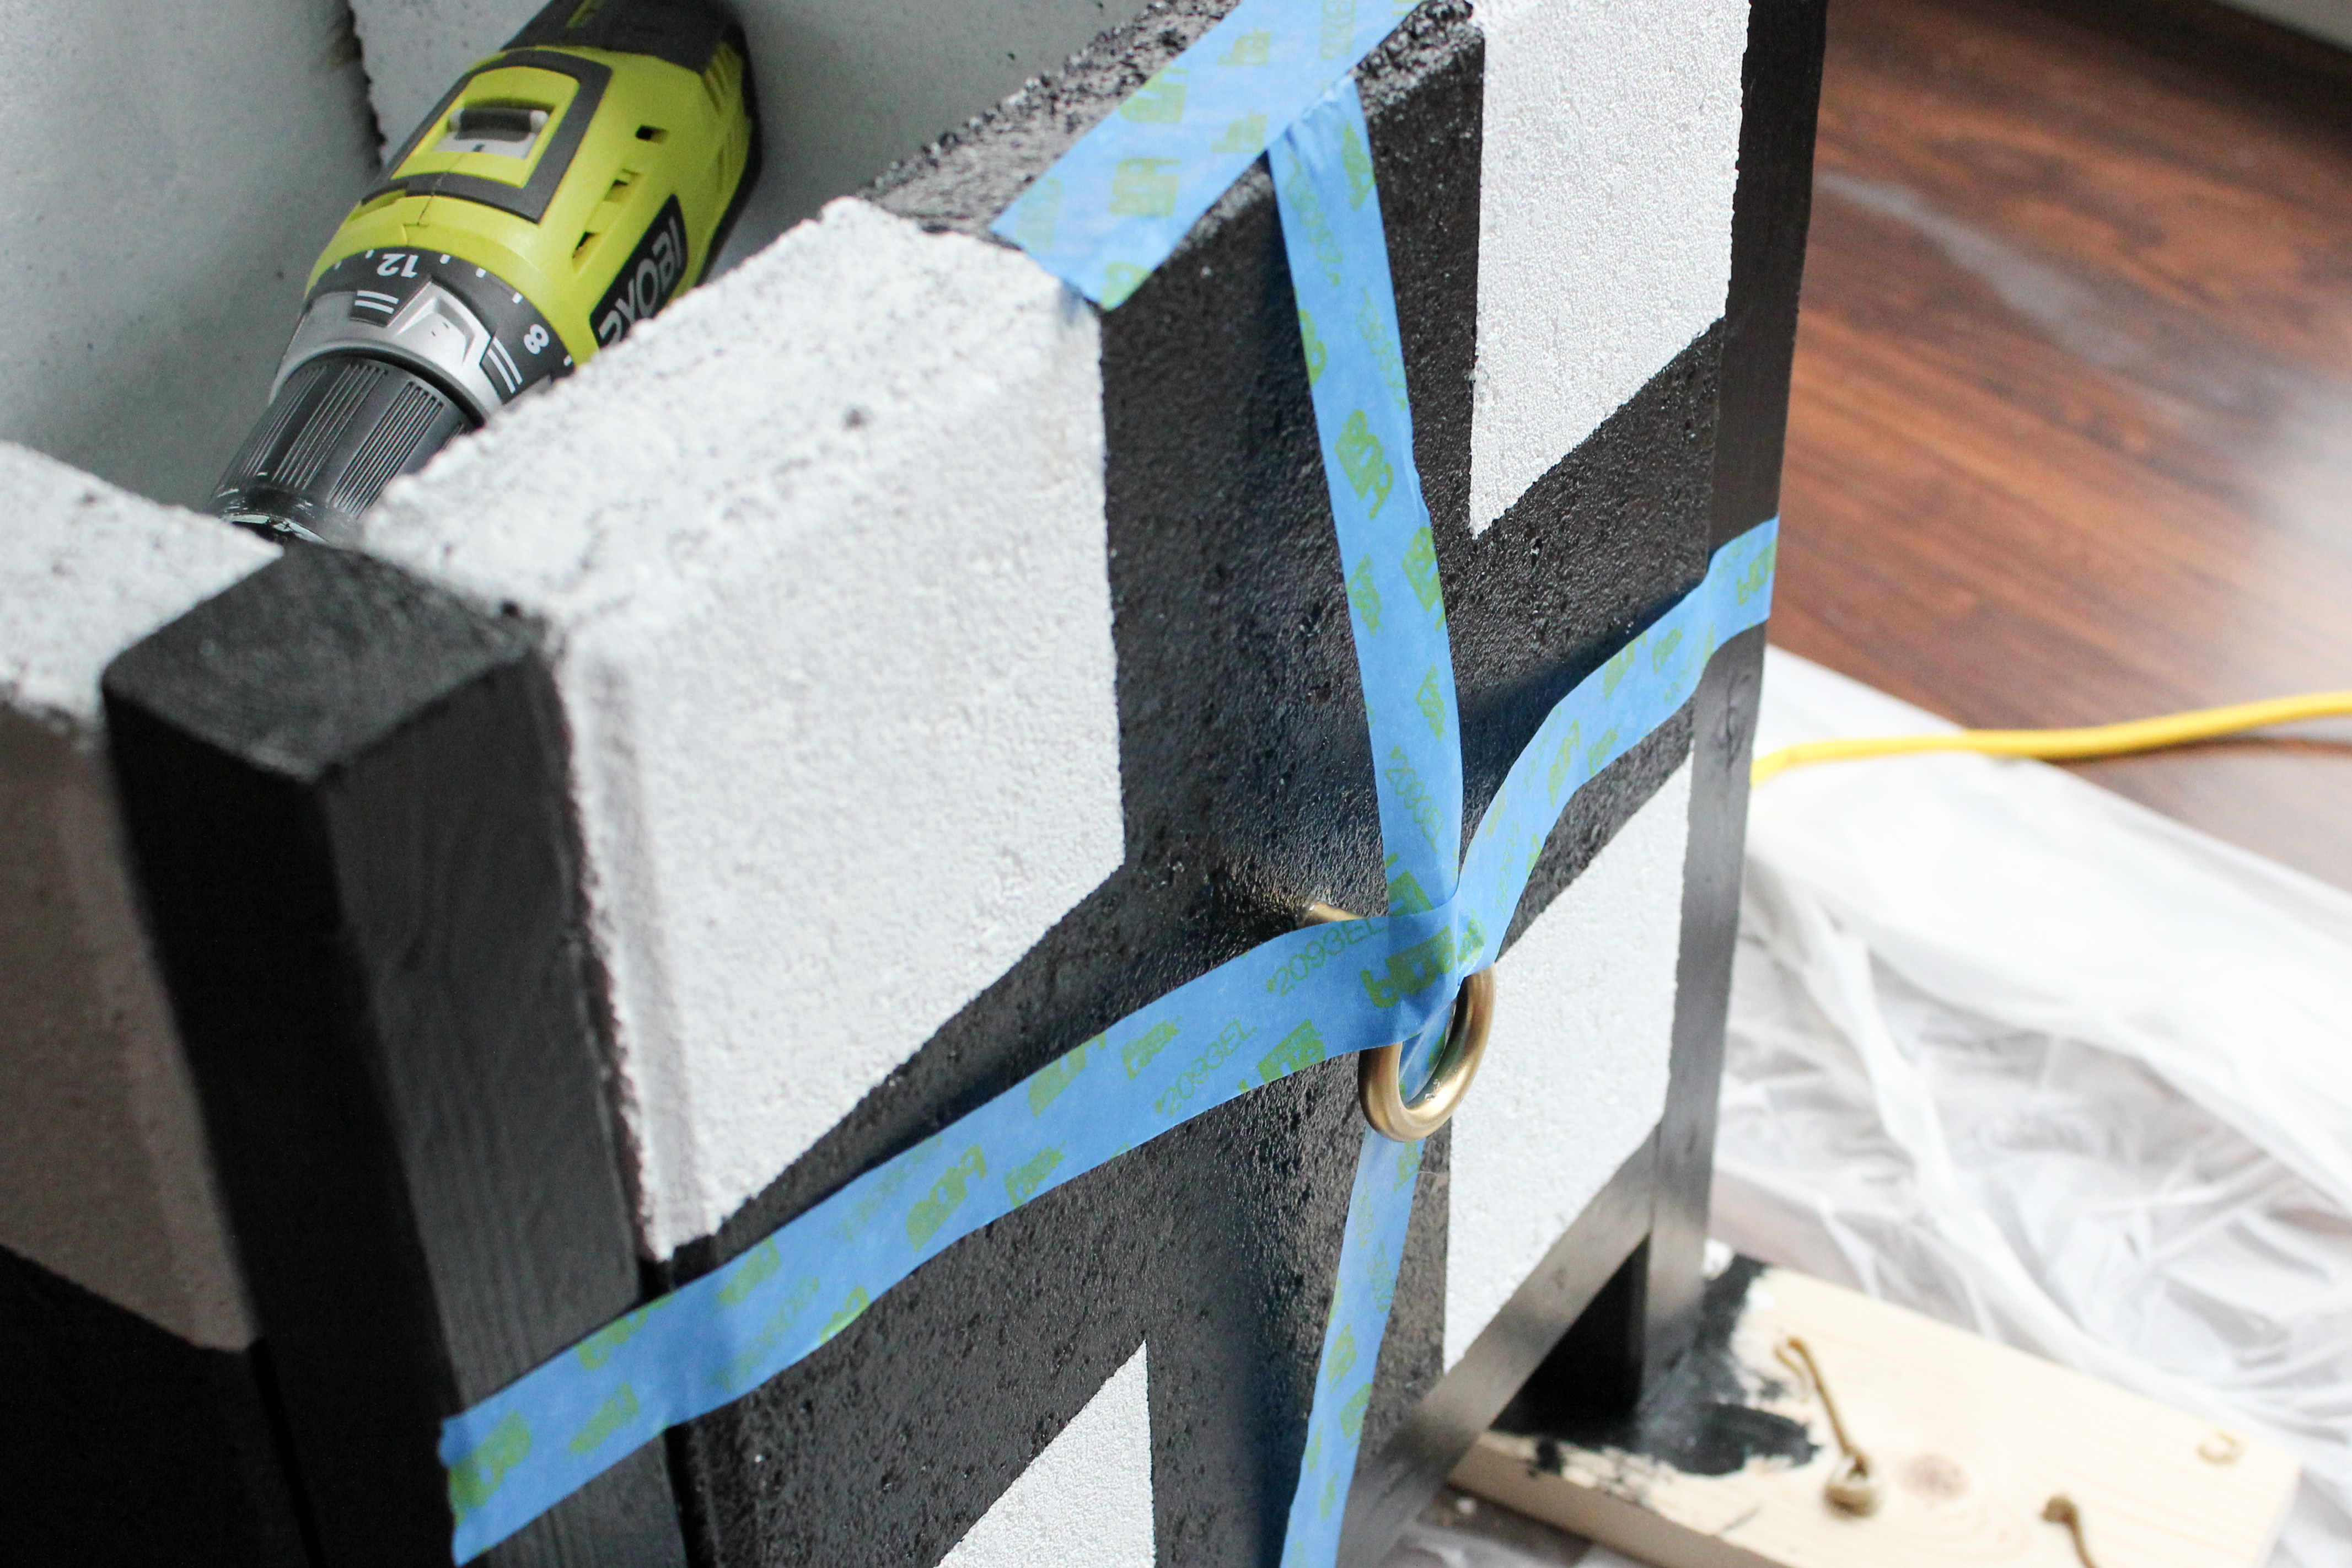
Using a caulk gun, run a thick bead of Loctite (be careful! — this is powerful adhesive) along the inner edge of the wood and carefully place your paver inside.
Most of my pavers wedged in pretty tightly, but one of them needed extra support while the adhesive formed a bond overnight. I used bungee cords and propped my drill behind it to make sure it stayed in place.

I picked up two ring pulls at The Home Depot and sprayed them with primer and then Rust-Oleum metallic gold spray paint.
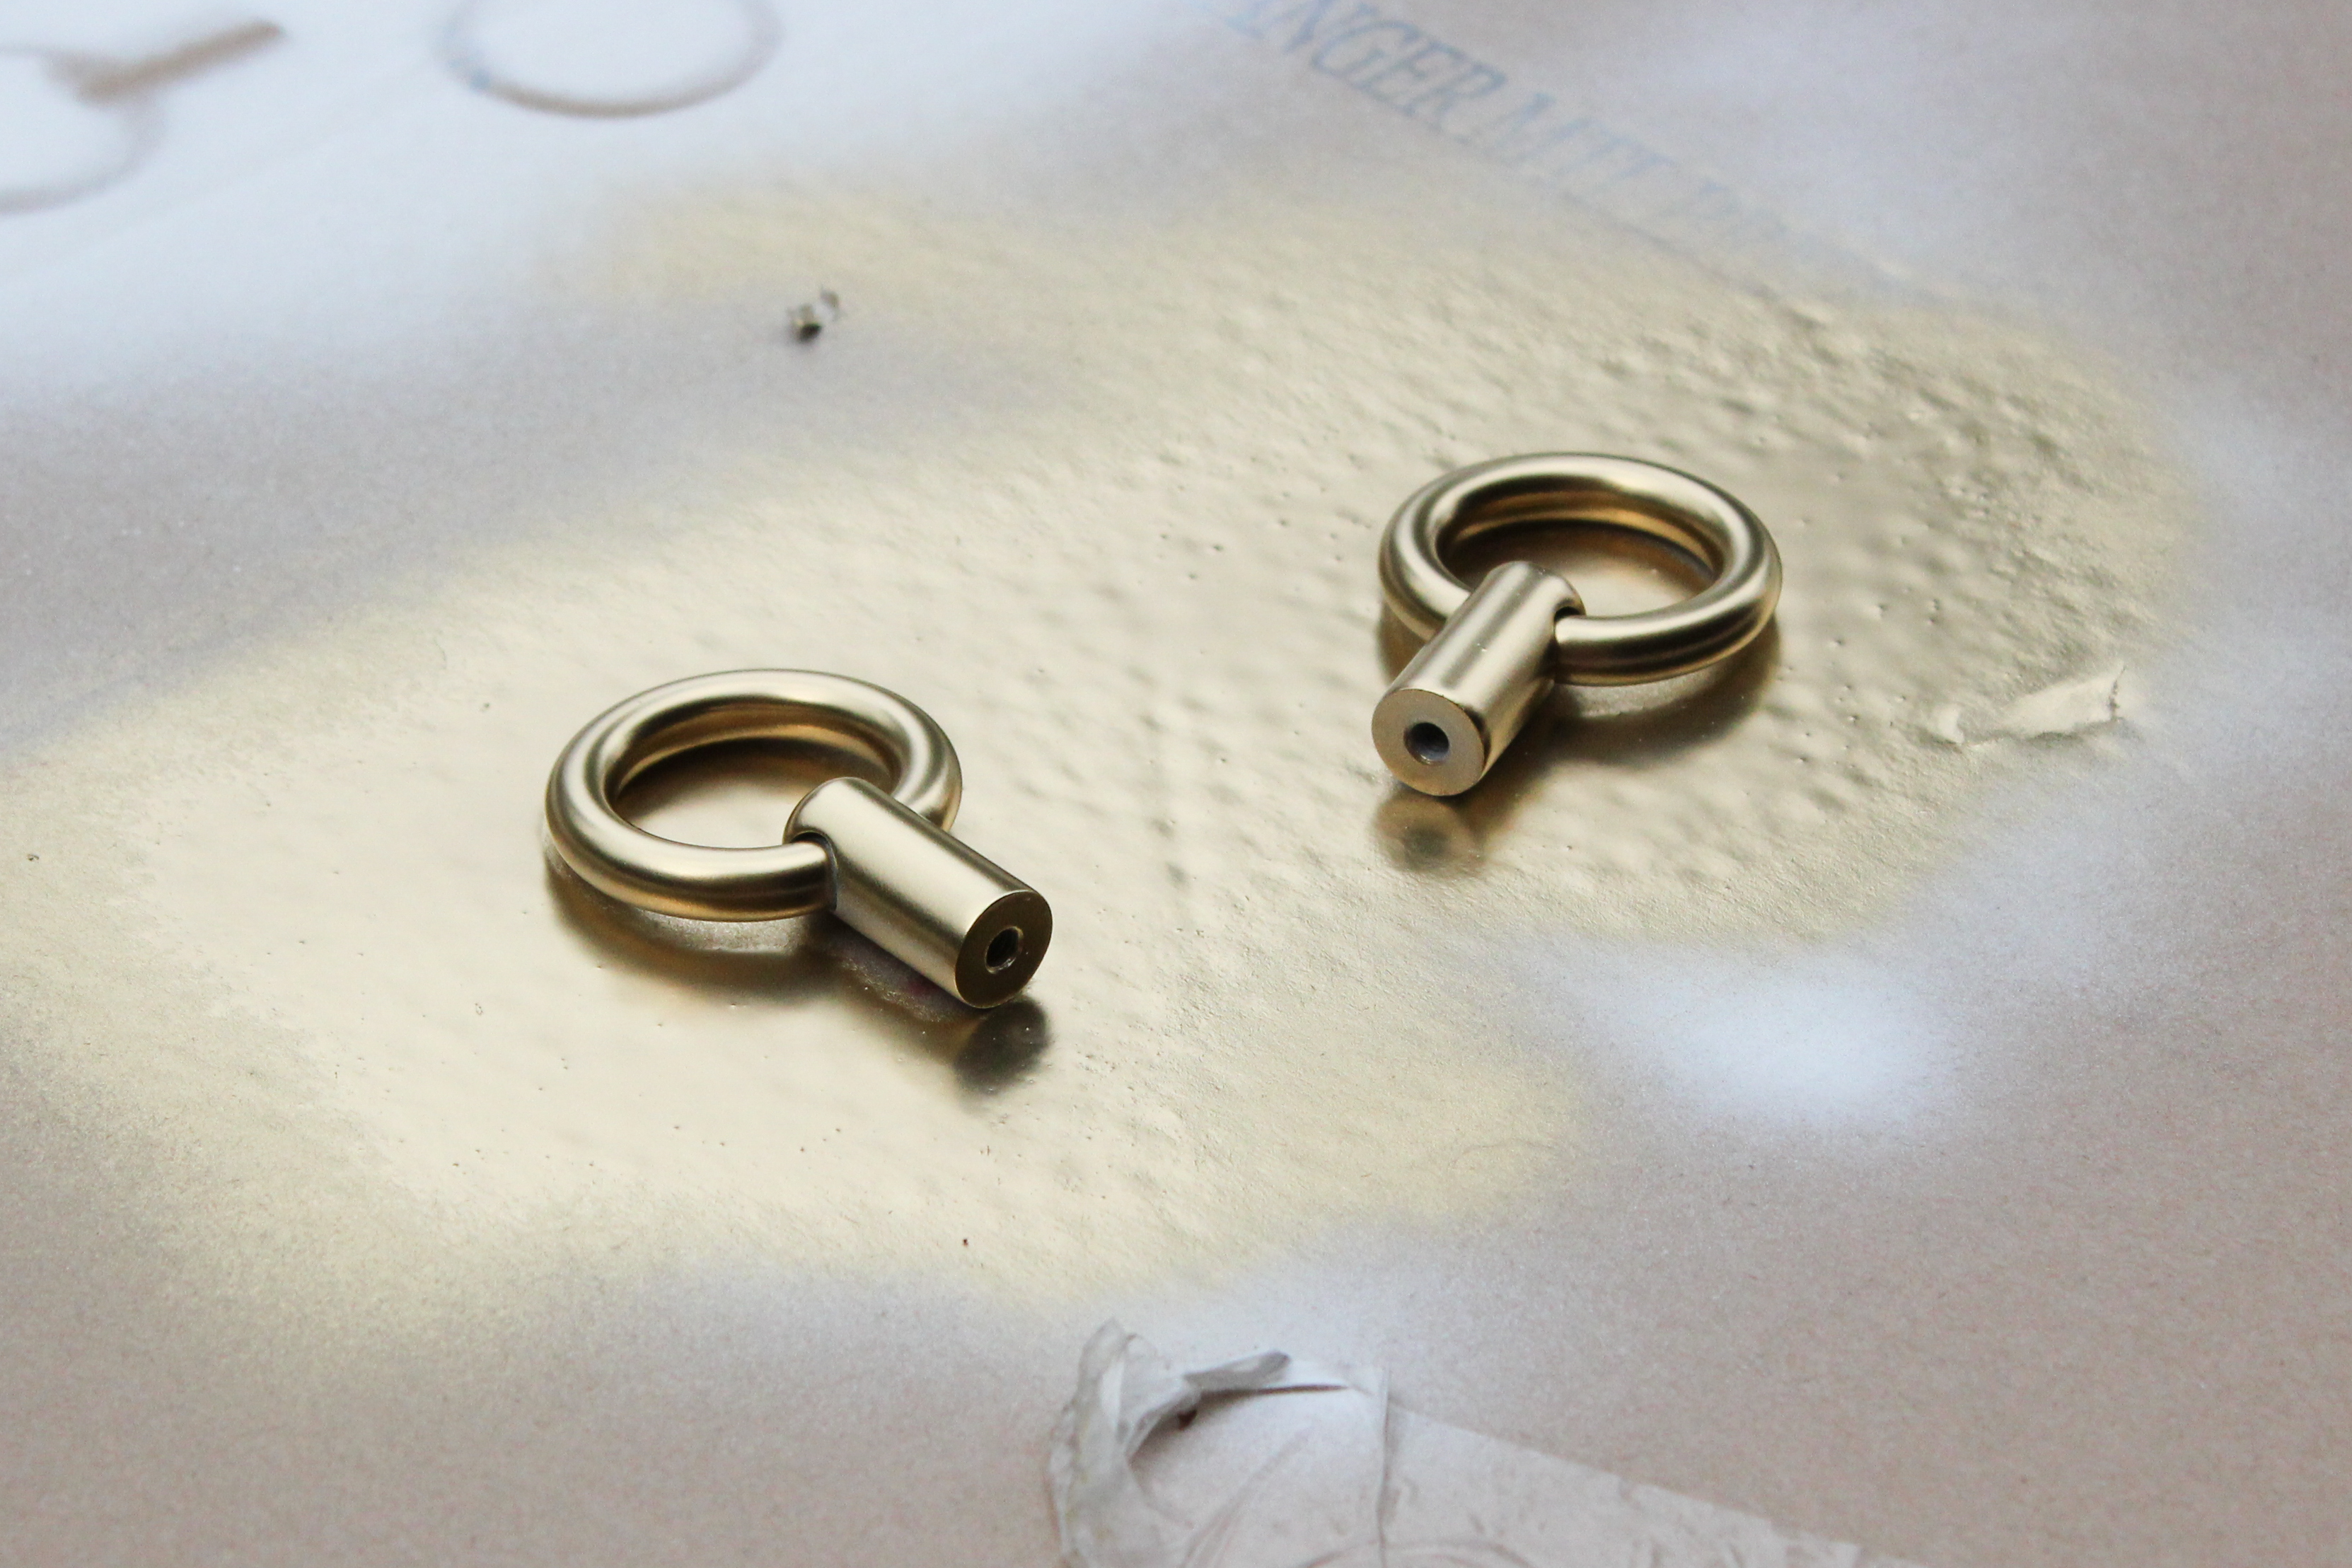
Use your Loctite to attach the pulls to the center of the cross on two opposite sides (or put them on all 4 sides if you’d like). I used painter’s tape to hold the handle in place while it bonded. These handles are purely decorative, by the way. They will break off if you try to use them for lifting your planter. This planter is extremely heavy!
I also picked up some brass corner braces, also for decorative purposes. I added these to the top and bottom of each leg.
I used my planter for my fiddle leaf fig, but you could line it with landscaping fabric and then plant whatever you like!

Hope to see some of you at the DIH Workshop this week! If you end up going to a workshop near you, or if you end up building your own planter, I would love to see pictures! Be sure to post on social media using hashtag #DIHWorkshop. I will be posting too! (You can follow me on Instagram here.)
For more blog posts, check out my project gallery here.
Connect with me here:
![]()
![]()
![]()
![]()
![]() >
>![]()

Leave a Reply