Erin Spain

Home, DIY, & Photography

  • Home
  • About
    • Press
    • Advertise
    • Podcast
    • Disclosure & Policies
  • Project Gallery
  • YouTube
  • Photography
  • Contact

Furniture Makeover: Console Turned Buffet Table

May 14, 2012 By Erin Spain 32 Comments

A few weeks ago, I posted about my adventure to the Scott Antique Market. While I was there, I found this old dusty cabinet that I’m assuming was intended to be a console table of some sort. I loved the shape and detailing, and I knew it had potential, so for $30.00 it was mine.

Here’s what it looked like when I brought it home:

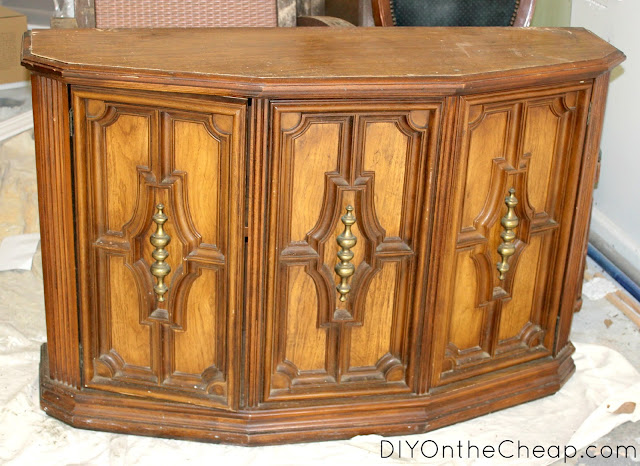
I decided this would look good in our dining room as a little buffet table. Our dining room isn’t very big, so we needed something pretty narrow. This was the perfect size.

Here it is now:

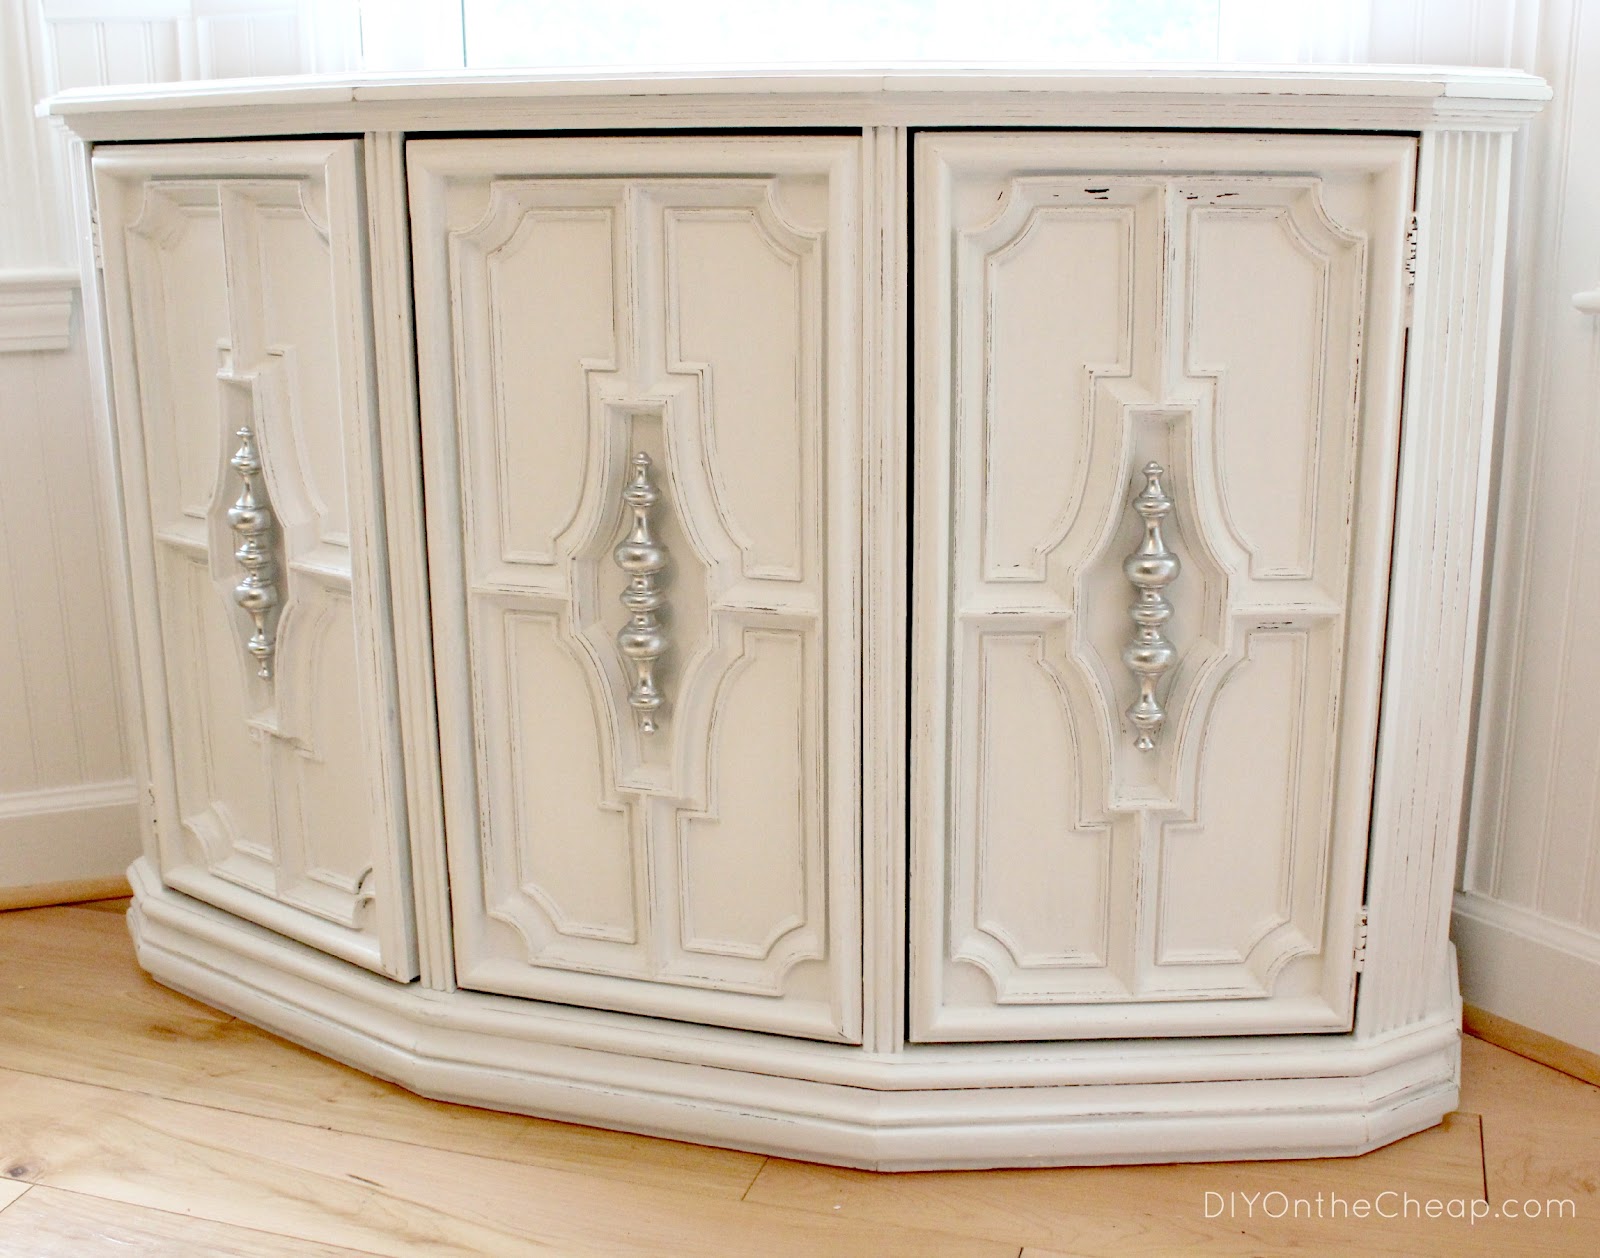
I’ve actually moved it to a different wall now (away from the windows), but it fits perfectly in the room. I may eventually add little bun feet or something to make it a few inches taller, but for now it’s fine. I love how it turned out. (I will show you more photos of it tomorrow in the new location with the little display I created on top.)
I had the paint left over from my dresser project, so after sanding it and priming it with some Kilz, I gave it two coats of Benjamin Moore White Diamond. I slightly distressed it, then I coated it with Minwax Finishing Paste for protection. I spray painted the handles with Krylon Chrome.
This project took a lot of time just because of all of the little crevices, but it was worth it. And for $30 total (I already had all of the supplies), it was worth the time spent on it!
I loved the original hardware. It just needed to be spruced up with a coat of spray paint.
Another shot of the detailing on the doors.
I debated adding a color to the inlaid part on the doors, but once I saw it painted white, I liked it just as it was. Now we have a new custom piece of furniture for hundreds (or thousands) less than we may have paid at a furniture store. Saving money makes me oh so happy!
Feel free to leave a comment! I’d love to hear from you!
Linking this post to:
Miss Mustard Seed’s Furniture Feature Friday

subscribe box post footer

Filed Under: DIY, Furniture, Furniture Makeovers, Home & DIY Blog

« Saturday Project Spotlight – 5/12
Dining Room Buffet Table »

Comments

  1. HarlowsExclusive says

    May 14, 2012 at 12:54 am

    I absolutely love this! You did a beautiful job distressing. And the hardware is gorgeous. I love when the original hardware works out on furniture re-vamps.

    Darci
    Harlowsexclusive.blogspot.com

    Reply
    • Erin Spain says

      May 14, 2012 at 1:09 am

      Thanks so much, Darci!

      Reply
  2. Jessica Kielman says

    May 14, 2012 at 1:11 am

    Girly! You amaze me! I cannot believe you turned that ole dark console into such a beauty! I pinned this before I even saw the post!

    Jessica @ Mom 4 Real

    Reply
    • Erin Spain says

      May 14, 2012 at 1:50 am

      Thank you, Jessica!

      Reply
  3. Kathleen Weishaar says

    May 31, 2012 at 7:22 pm

    Yep ~ this is very cool. The ersatz Mediterraean style of the 60s was pretty bad and you’ve figured out how to do something quite nice with it! Thanks for sharing, Jessica.

    Reply
    • Erin Spain says

      May 31, 2012 at 9:29 pm

      Thank you!

      Reply
  4. leanncox says

    June 23, 2012 at 5:09 pm

    Ok, so I’m totally stalking your blog now! Love what you did with this console! You TOTALLY ARE a designer!! We need to make a weekend for me to come over and go to Scott’s with you!!!
    LeAnn @ This Southern Girl

    Reply
    • Erin Spain says

      June 23, 2012 at 5:34 pm

      You are so funny!! You can stalk my blog all you want! I enjoyed meeting you and having lunch, and YES come to Scott’s with me sometime! I’d love that.

      Reply
  5. mattress only says

    September 5, 2012 at 2:02 am

    Good thing I saw your blog, I really love re-modelling & reinventing something. It turned out as an elegant classy table. Very well done!

    Reply
  6. Anonymous says

    November 21, 2012 at 12:04 pm

    Getting a gooԁ ΗD ΤV has never been easiеr.

    Discover the right moԁel for you and your pocket wіth our
    review at http://rеviews.top-infoгmation.
    net/samsung-un40eh6000-rеview/
    Feel free to visit my website – sports research sweet sweat Jar

    Reply
  7. Anonymous says

    November 24, 2012 at 3:33 pm

    Really nice job! I am currently re-doing a white & gold french provincial bedroom suite for my teen. Using cabinet paint by Ace. They tinted it the color I wanted. The cabinet paint is a hard, durable finish.

    Reply
  8. Anonymous says

    December 28, 2012 at 6:18 pm

    Beautiful job! I’m about to start my first DIY project on a chest. I will be following your instructions on how to paint it, but could you tell me how you distress your pieces? I didn’t see instruction on that.

    Reply
    • Erin Spain says

      December 28, 2012 at 6:29 pm

      Thank you! To distress, I just use a sheet of fine-grit sandpaper and run it along the edges and corners. It is very easy and with the fine-grit, you have more control and can always go in and distress more heavily in some areas. I try to focus on the areas that would naturally distress over time, which is why I only do the corners and edges. Hope this helps!

      Reply
  9. Britney @ DIY Home And Gardens says

    January 18, 2013 at 9:43 am

    You got that for $30? Now that really is DIY on the cheap! Finished article is wonderful.

    Reply
    • Erin Spain says

      January 22, 2013 at 7:02 pm

      Yes, $30!! I was very excited about the bargain. Thanks so much.

      Reply
  10. Lauren Davison says

    July 4, 2013 at 5:27 am

    the after is waaay better than I would have expected from the before shot! -Lauren

    Reply
    • Erin Spain says

      July 9, 2013 at 11:28 pm

      Thanks Lauren!

      Reply
  11. Y Hamilton says

    August 7, 2013 at 11:46 am

    I am wondering. what type of brush or roller you used? I have a buffet exactly like this, and I am desperate to paint it.

    Reply
    • Erin @ DIY on the Cheap says

      August 7, 2013 at 12:41 pm

      Hello! I used a small foam roller for most of it, and just a small paintbrush in the crevices. I also used a very small artist’s brush for the tiny nooks and crannies.

      Reply
  12. Leslie says

    August 28, 2013 at 12:52 am

    I am doing something similar but having trouble getting the original hardware to take paint. I tried sanding the finish off and still it won’t go on even. Is there a product that you used to treat the hardware first, or something you can recommend? BTW this looks great and I may try something similar on some bad 70’s retro side tables I picked up. Thanks for the inspiration

    Reply
    • Erin @ DIY on the Cheap says

      August 28, 2013 at 1:17 pm

      Hmm, that’s strange! First, I would use a product like Goo Gone to get rid of any possible residue. Then rinse off and wipe with a clean cloth. I always use a spray primer first, then spray paint. Make sure you use the right type of spray paint – for metal or an all-surface type formula. Good luck!

      Reply
  13. Heather says

    October 23, 2013 at 3:48 pm

    New follower! I was checking out your home tour and your house is beautiful. LOVE the card catalog you have in the living room! Need one! Will have to start scouring the fleas! Also was thrilled to see your beautiful buffet! I just so happen to have picked up two similar cabinets over the summer at yard sale and antique marts and I have been impatiently waiting to get to work on them. Seeing your project post makes me want to drop everything and get on it now!I just wish mine had such awesome hardware–those pulls are spectacular–you would pay an arm and a leg and possibly your first born to get something similar at a design shop!

    Reply
    • Erin @ DIY on the Cheap says

      October 23, 2013 at 11:17 pm

      Hi Heather! Thank you for your sweet comment! I laughed out loud at your first born comment. 😉 So funny and true! Can’t wait to see what you end up doing with your cabinets – please share pics! And I hope you find some awesome hardware to go with them!

      Reply
      • Heather says

        October 24, 2013 at 9:24 pm

        Hey Erin! Glad you liked the first born comment–mine is a teenager and there are those moments when I would consider trading him in for some spectacular pulls… or anything bright and shiny. LOL. I am just so glad that I binged on DIY blogs last weekend and subscribed to yours! LOVE all the creative ideas–I am really feeling the need to overhaul some stuff around here. Hoping to get to the first of the cabinets soon–need my husband to put some feet on it first so it is the height I need (which is part of the delay)… although also not sure of the paint I already picked out. Wanted blue and now a bit uncertain of the blue I picked (certified waffler here). Plus, I have been back and forth to Hobby Lobby several times over the hardware. I have huge drop-hoop-earring styled pulls on one of them and thought about spraying them because the medallion plates they hang from are gorgeous, but big “hangy” pulls can be annoying if the cabinet gets a lot of use (which it will since I am thinking of dedicating it entirely to PopTarts so I can reclaim space in my pantry). TMI, I know. Sorry. Obviously I still have some stuff to figure out. Ugh.

        Reply
        • Erin @ DIY on the Cheap says

          October 24, 2013 at 9:50 pm

          Haha! Well I hope you get it all figured out soon! The pulls sound beautiful! But I know what you mean about if they get a lot of use. You could always try them out and live with it for a while to see what you think. Good luck with whatever you choose. Please keep me updated!

          Reply
          • Heather says

            October 27, 2013 at 2:51 pm

            Will do! I think you’re right about living with the old ones a bit before making any rash decisions. 🙂

  14. Terry East Sargent says

    October 27, 2013 at 2:24 pm

    how are you able to sand in all the little crevuces? I have an old cedar chest with terrible finish but lots of detailing ..would love to paint it white!

    Reply
    • Erin @ DIY on the Cheap says

      October 27, 2013 at 9:10 pm

      Hi Terry! Honestly, I’m not able to get in every tiny crevice. I try my best sanding those by hand with a sheet of sandpaper, but I don’t stress over it. It turned out ok even without being able to get in those nooks and crannies!

      Reply
  15. Betty819 says

    June 18, 2014 at 10:46 pm

    What a great buy and a beautiful piece of furniture! If I’d been at the sale, I’d considered that too. Beautiful job you did. Thanks for sharing before and after photos.

    Reply
    • Erin @ DIY on the Cheap says

      June 23, 2014 at 12:07 pm

      Thanks so much!

      Reply
  16. fimex says

    February 25, 2019 at 5:39 am

    Thanks for sharing!

    Reply

Trackbacks

  1. Christmas Home Tour 2013 - DIY on the Cheap says:
    December 20, 2013 at 12:45 pm

    […] little vignette is in our dining room, on top of my flea market console table. I grabbed some branches from the yard and decorated them with mini bulb ornaments from the Target […]

    Reply

Leave a Reply Cancel reply

Your email address will not be published. Required fields are marked *

SHOP ERIN’S FAVORITES

SPONSORS & AFFILIATES

CATEGORIES

ARCHIVES

Copyright © 2023 Erin Spain. Log in | Privacy Policy