Disclosure: This post is sponsored by The Home Depot. All opinions are my own.

I am so excited to be heading to Indianapolis this week for The Home Depot’s Do-It Herself Workshop on Thursday! (Details here.) If you’re in the Indy area, I would love to see you there! If you’re not local, no worries, you can REGISTER HERE for a workshop near you. We will be making DIY Rustic Pumpkin Stands, and today I am sharing my own customized version of the project along with a detailed how-to.
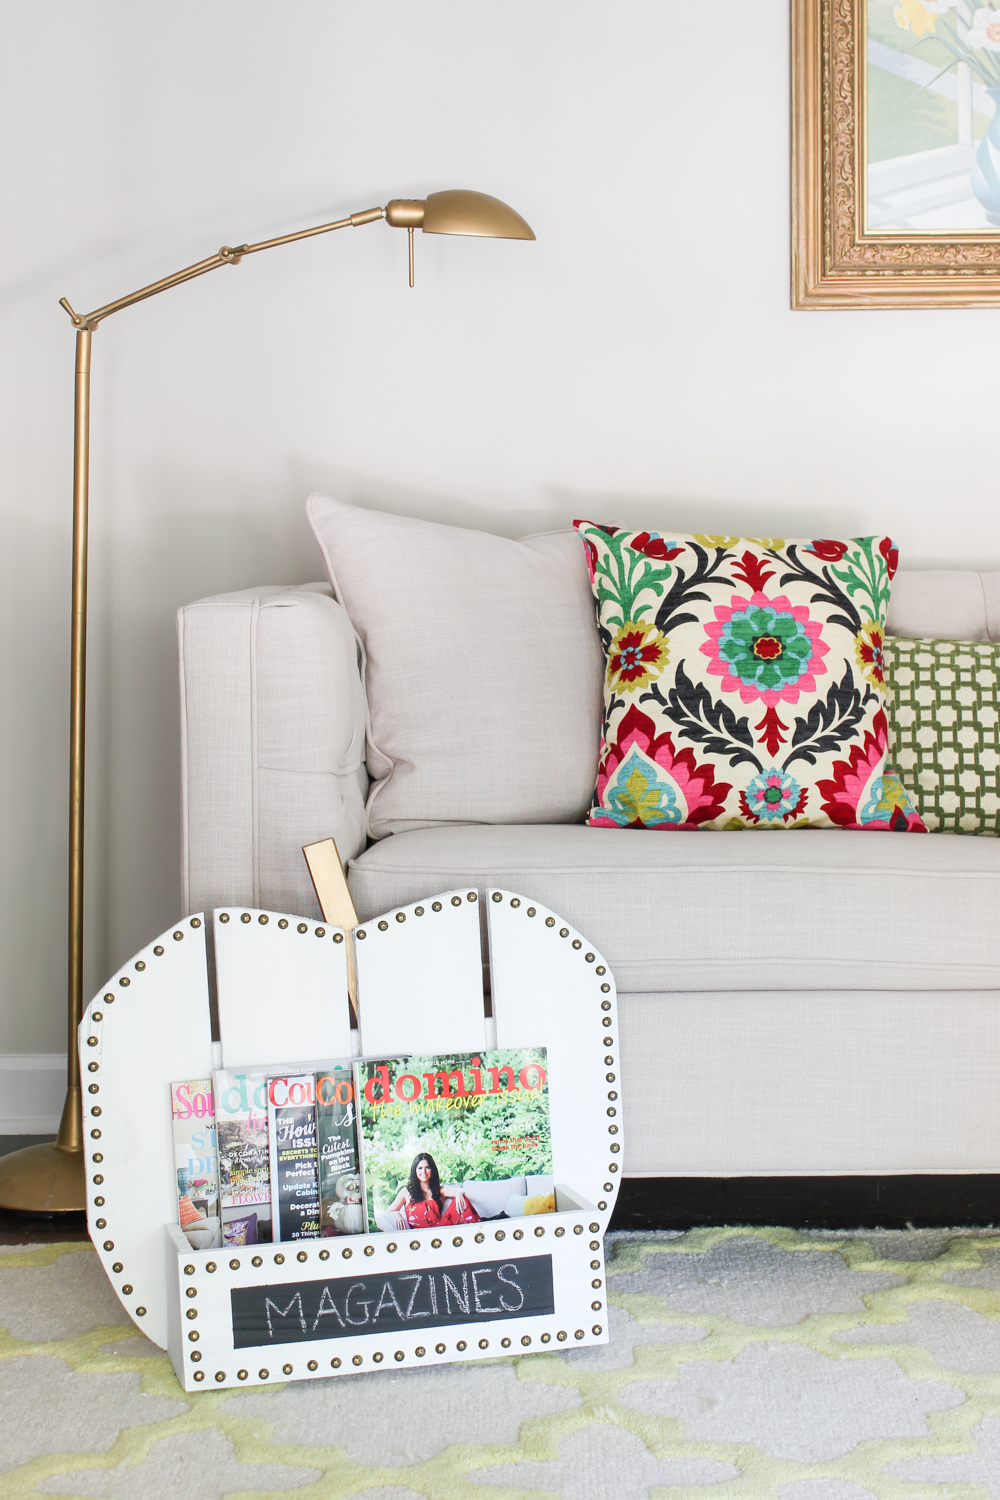
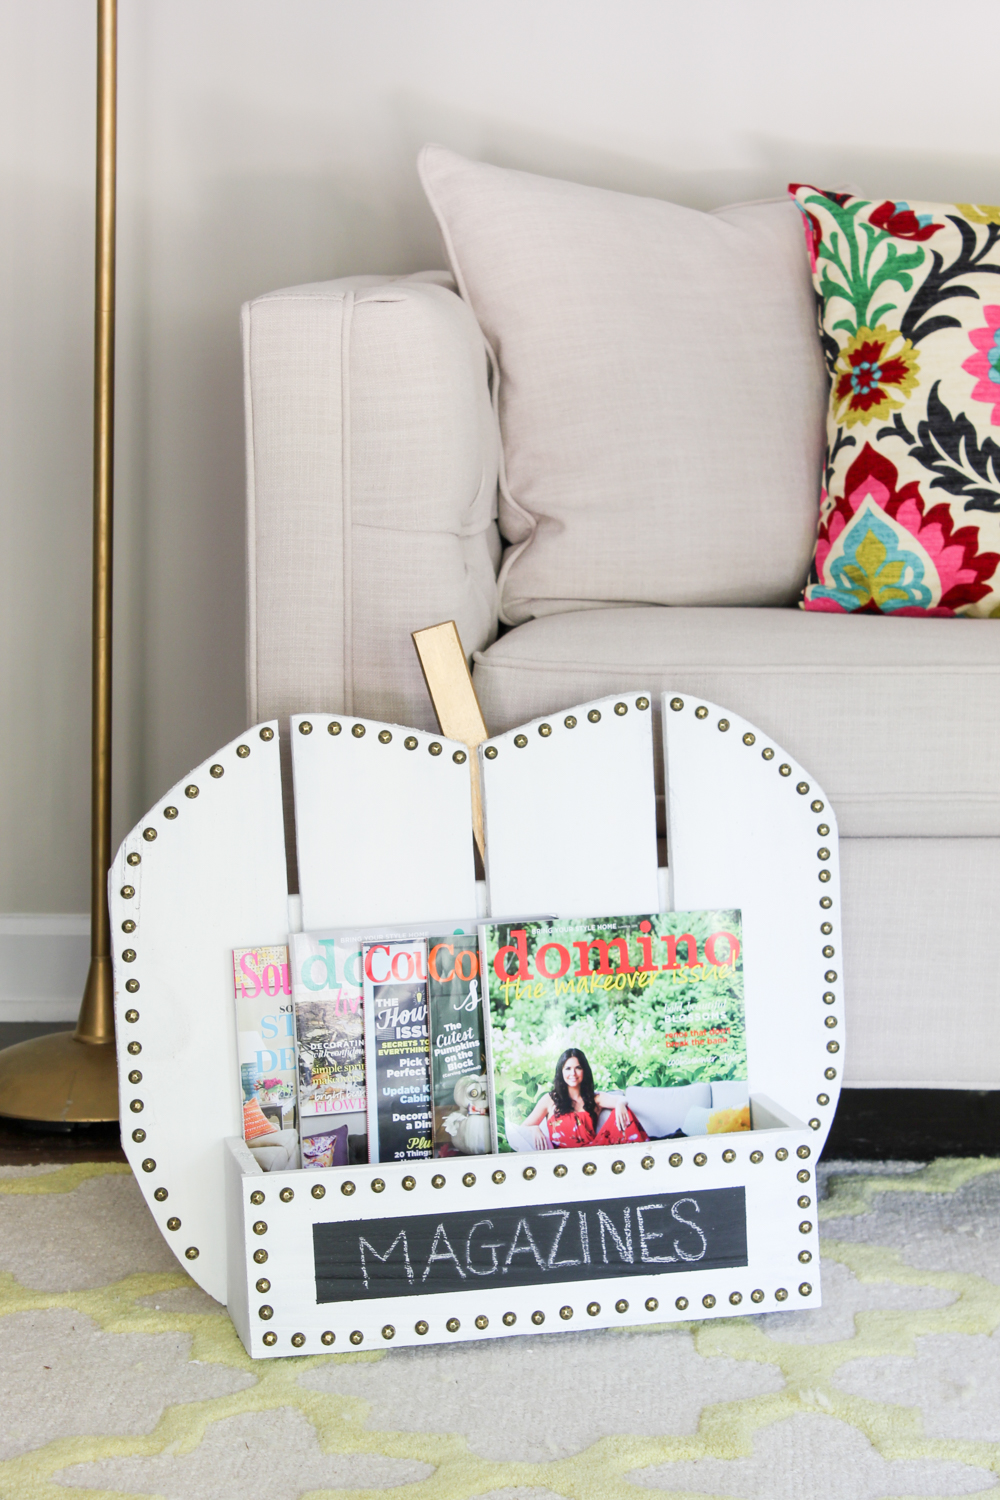
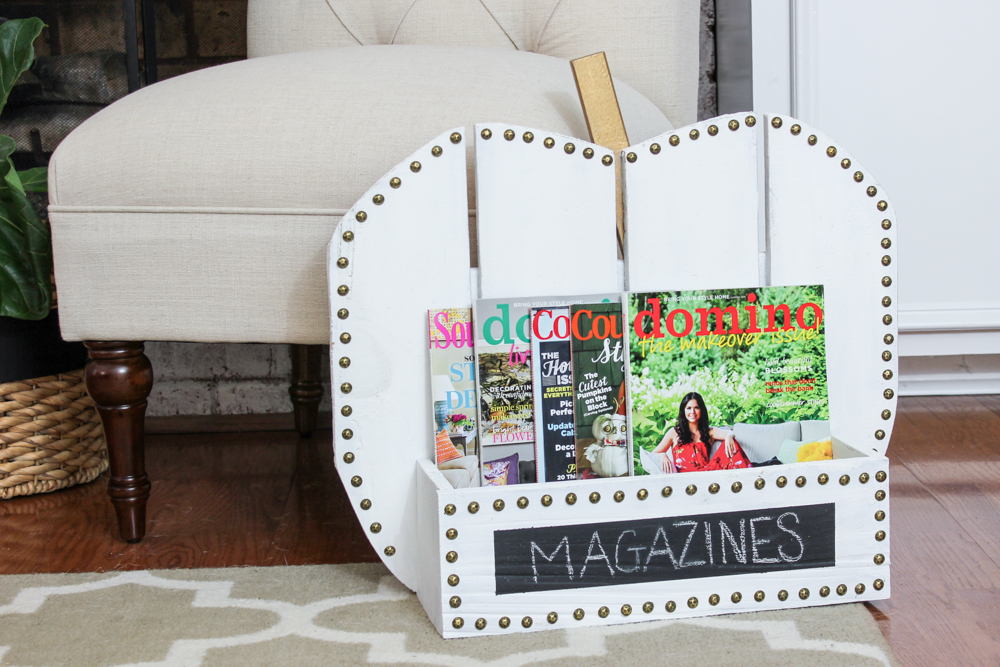
I decided to add a little “glam” to my rustic pumpkin stand in the form of brass nailhead trim and a metallic gold stem, and I teamed up with a few of my favorite bloggers for a fun little “virtual party.” We all built our own pumpkins and put our own individual design spin on it, and we were challenged to create one that could be used in a specific room. I was assigned the living room. (I couldn’t decide whether to put it in our family room or living room, so I am showing it to you in both places!) I’m linking up to all of the other bloggers’ awesome projects too, so check out that list at the end of this post!

Here’s what you will need for this project.
Supplies:
- 2 – Cedar Fence Pickets
- 1 – 1×2
- Crown Stapler
- 1″ Staples
- Interior/Exterior Wood Glue
- Jig Saw
- Miter Saw or Circular Saw
- Chalky Finish Paint (I used Americana Decor brand in white and gray – “Everlasting” and “Yesteryear” were the color names.)
- Furniture Wax or Polycrylic (optional)
- Rust-Oleum Chalkboard Paint
- Paint Brushes
- Brass Nail Heads
- Drill
- Hammer or Mallet
- Painter’s Tape
- Measuring Tape
- Pencil
- Spray Primer
- Metallic Gold Spray Paint
- Sander and/or Sanding Block
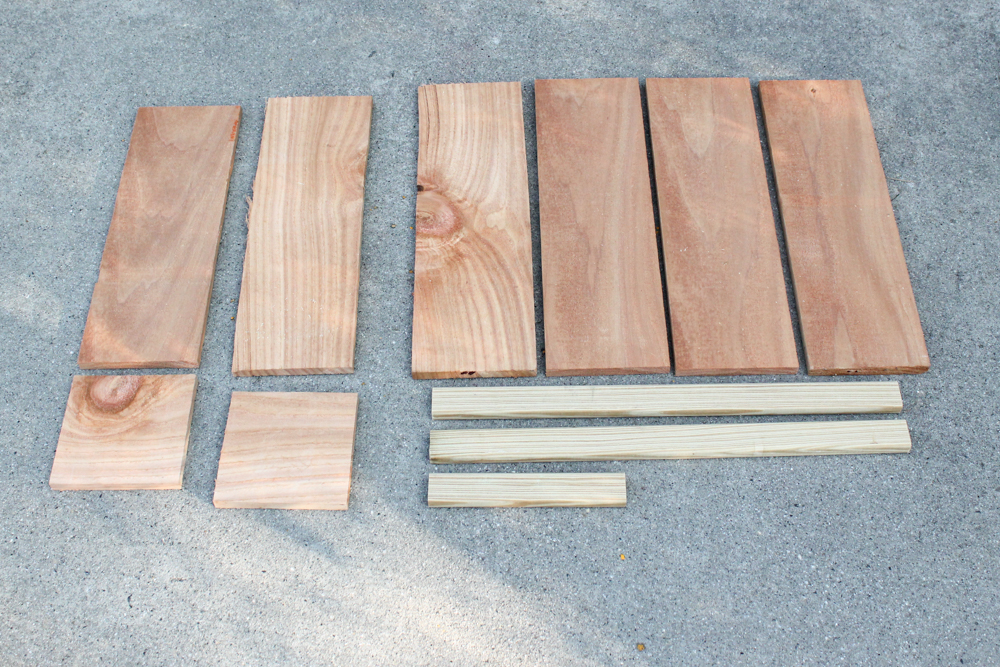
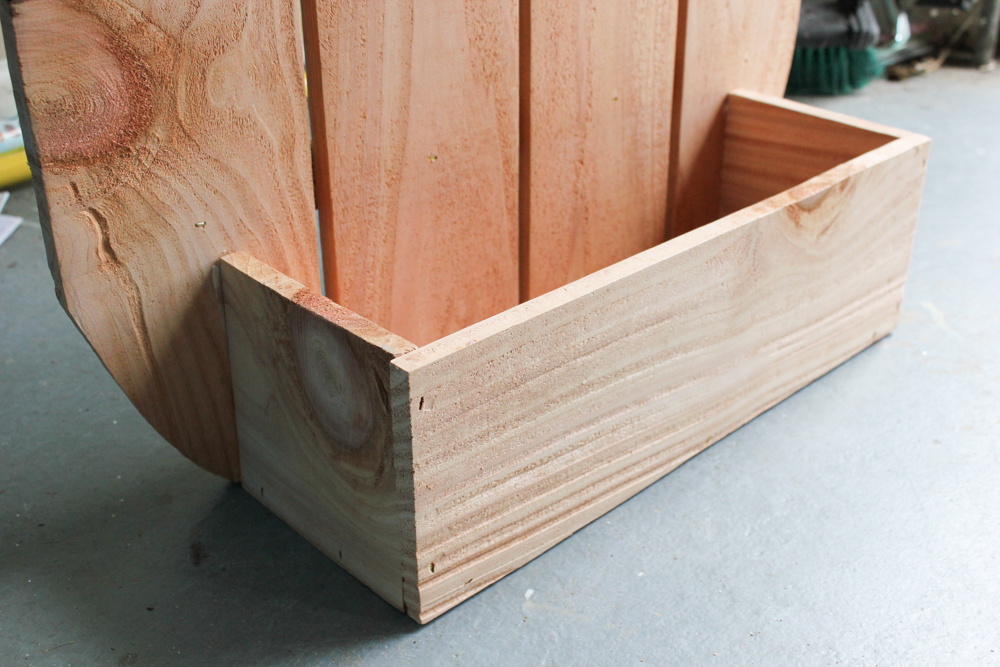
First, cut your wood to the following specifications: For the pumpkin – 4 Cedar fence pickets, each at 18″ long; (2) 1×2 boards at 20″ long; (1) 1×2 at 8″ long. For the box – 1 Cedar fence picket at 17″ long; 2 Cedar fence pickets at 5″ long; and 1 Cedar fence picket at 16″ long. I used a miter saw for this, but a circular saw would work too. Sand the surface smooth and also sand any rough edges.
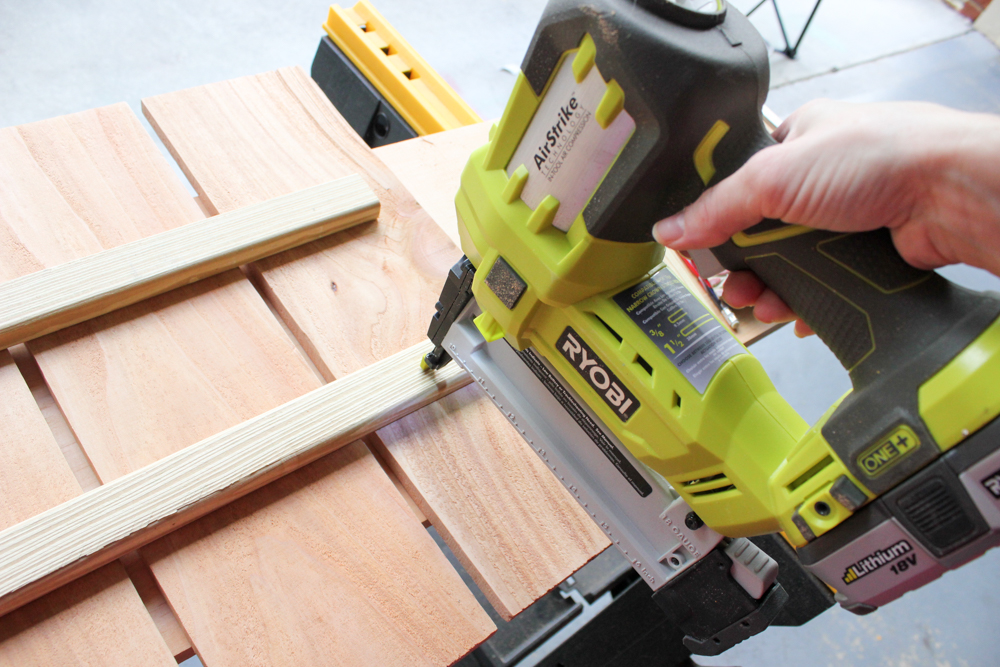
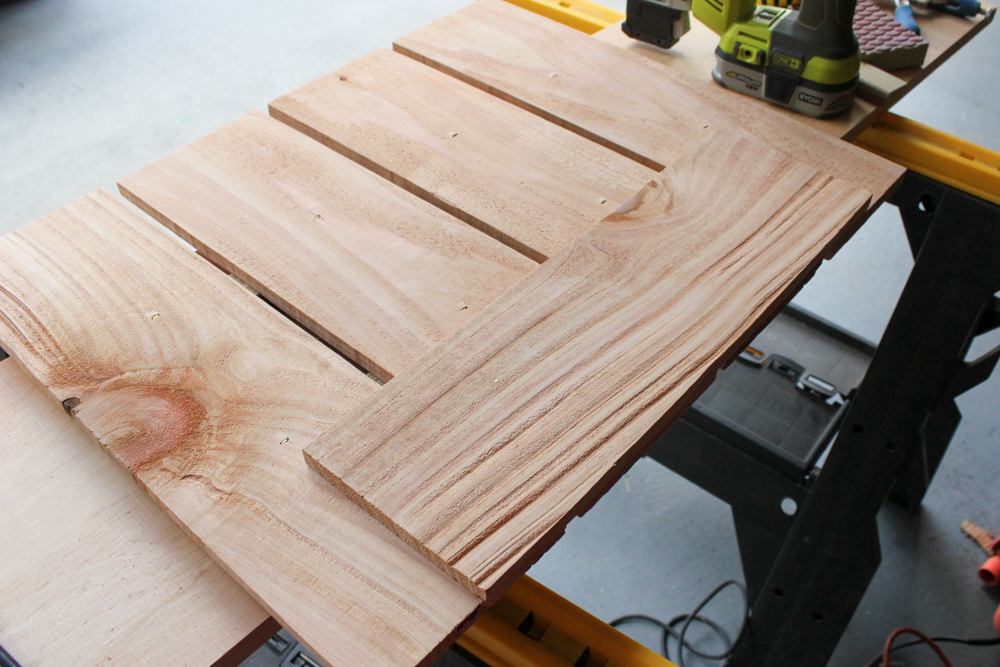
Lay your (4) – 18″ long fence pickets out flat, and then attach them by gluing and stapling the 20″ 1×2 pieces across them, leaving about a 1 1/2″ gap on each side. Staple from the front too to make sure everything is attached really well.
Use a pencil to draw a pumpkin shape on your boards. I recommend centering the 17″ long board along the bottom where the front box will be located and using that as a guide for where to start drawing your pumpkin shape, leaving the bottom flat since it will be standing up.
(Bonus points if you use a Spider Man pencil.)

Cut out your pumpkin shape using a jig saw.

Spray paint your stem before attaching (I accidentally forgot and attached mine first so I used liquid gold leaf instead). Then, attach your stem with glue and staples.
Use glue and staples to attach the sides to your box, and then attach the bottom.
Lay the box open side up on the work surface and lay your pumpkin on top face down, and attach with glue and staples.
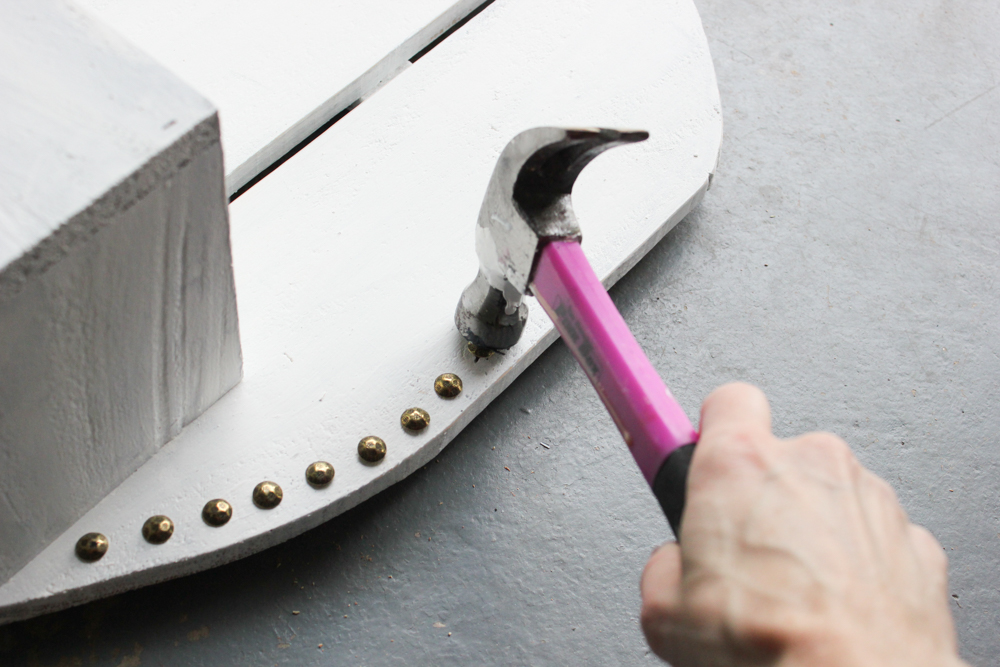
Lay your nailheads face down around the perimeter of your pumpkin to get an idea of how far apart you’d like to space them. I suggest drilling pilot holes to make them easier to hammer in later.
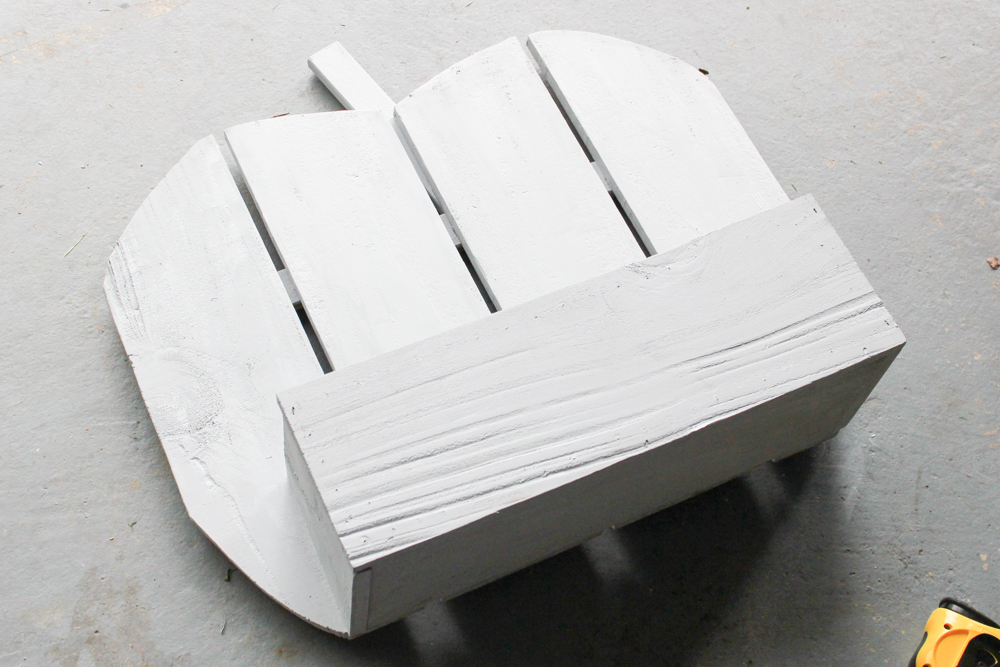
Paint your pumpkin with a coat of gray chalky finish paint. (Tip: Cover any major wood knots with wood filler to prevent bleed-through.)
Paint a coat of white chalky finish paint on top of the gray, then lightly sand and distress the edges and anywhere you want the gray finish to peek through.
Use painter’s tape to tape off a rectangle in the center of the front box. Paint two layers of chalkboard paint, then peel the tape off while the paint is slightly damp.

Optional: Add a topcoat (wax or polycrylic) to the white area, avoiding the chalkboard area, for extra protection.
Hammer your nail head trim into your pre-drilled pilot holes, around the perimeter of the pumpkin and the perimeter of the front box.
“Season” your chalkboard area 2-3 days after it has cured by rubbing the side of a piece of chalk all over it and then wiping it off with a damp cloth.
I opted to store magazines in my pumpkin stand, but there are so many possibilities! You could put Halloween candy in it and stick it out on the porch, make it into a planter, or display Fall or Halloween decor in it. We are hosting a family reunion at our house next month so I’ll probably use it to hold snacks or something for guests.
By the way, The Home Depot offers workshops at all of their locations for do-it-yourselfers of all ages and experience levels. If you’re not familiar with The Home Depot’s workshops, they’re designed to provide a mix of associate-led instruction, demonstration, and some hands-on learning. Materials can be purchased to make your own project. (For more info, contact your local Home Depot store.) There are 3 types of workshops: Do-It Yourself (DIY), Do-It Herself (DIH), and Kids. Customers can learn how to build decor projects, how to make easy home repairs, and how to operate tools through demonstrations and step-by-step instructions. Visit http://workshops.homedepot.com for more info, or REGISTER HERE for a DIH Workshop near you. Don’t miss Thursday’s workshop where you’ll learn to make your own DIY Pumpkin Stand!
Be sure to check out all of the other awesome blogger projects and how they customized their pumpkin stands for the following spaces. Here’s the full list:
OUTDOORS
KITCHEN
GUEST ROOM
LIVING ROOM
DINING ROOM
Disclosure: I acknowledge that The Home Depot is partnering with me to participate in this Workshops Program (the “Program”). As a part of the Program, I am receiving compensation in the form of products and services, for the purpose of promoting The Home Depot. All expressed opinions and experiences are my own words. My post complies with the Word Of Mouth Marketing Association (WOMMA) Ethics Code and applicable Federal Trade Commission guidelines.
YOU MIGHT ALSO ENJOY THESE POSTS:
- Swiss Cross Paver Planter
- DIY Faux Concrete Planter
- DIY Outdoor Serving Station
- Mod Podge Halloween Lanterns
- or check out my project gallery here!
You can also connect with me here:
![]()
![]()
![]()
![]()
![]()
![]()
