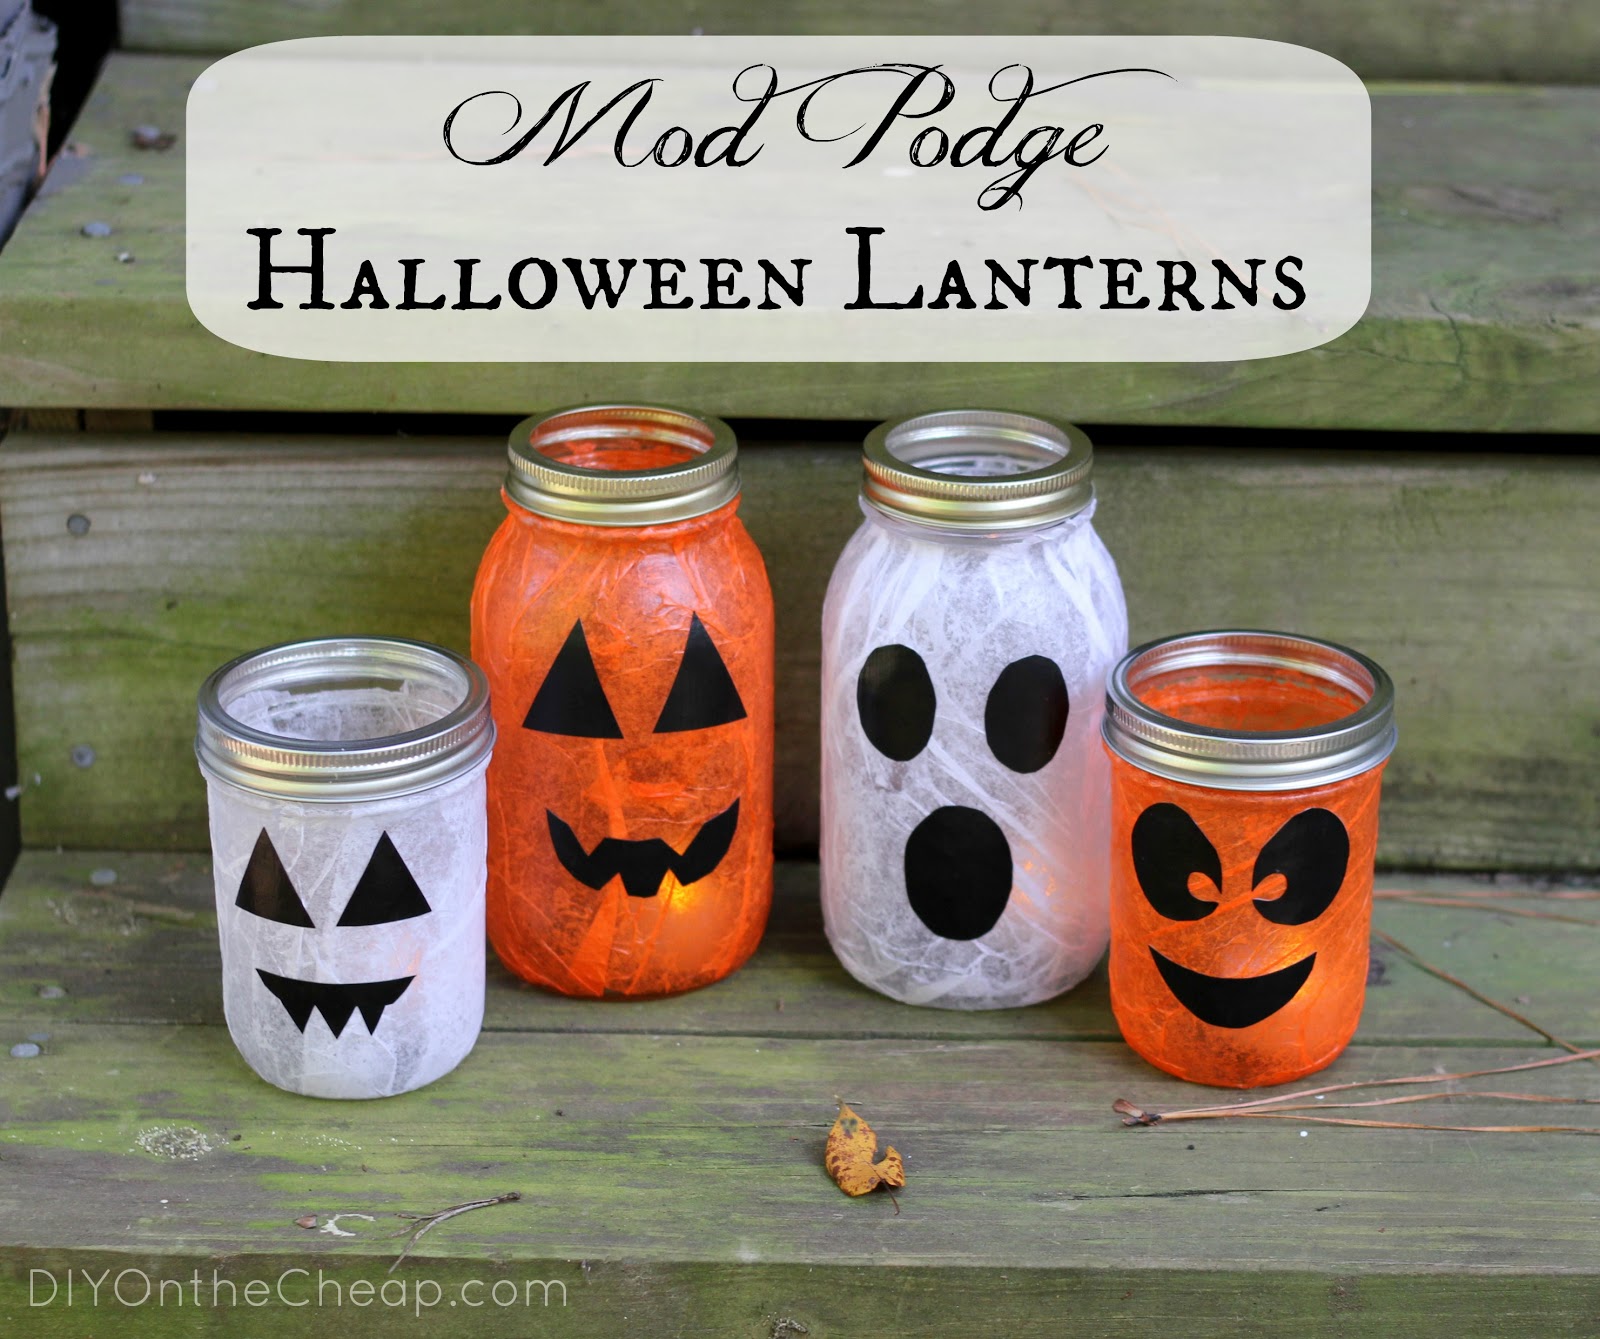
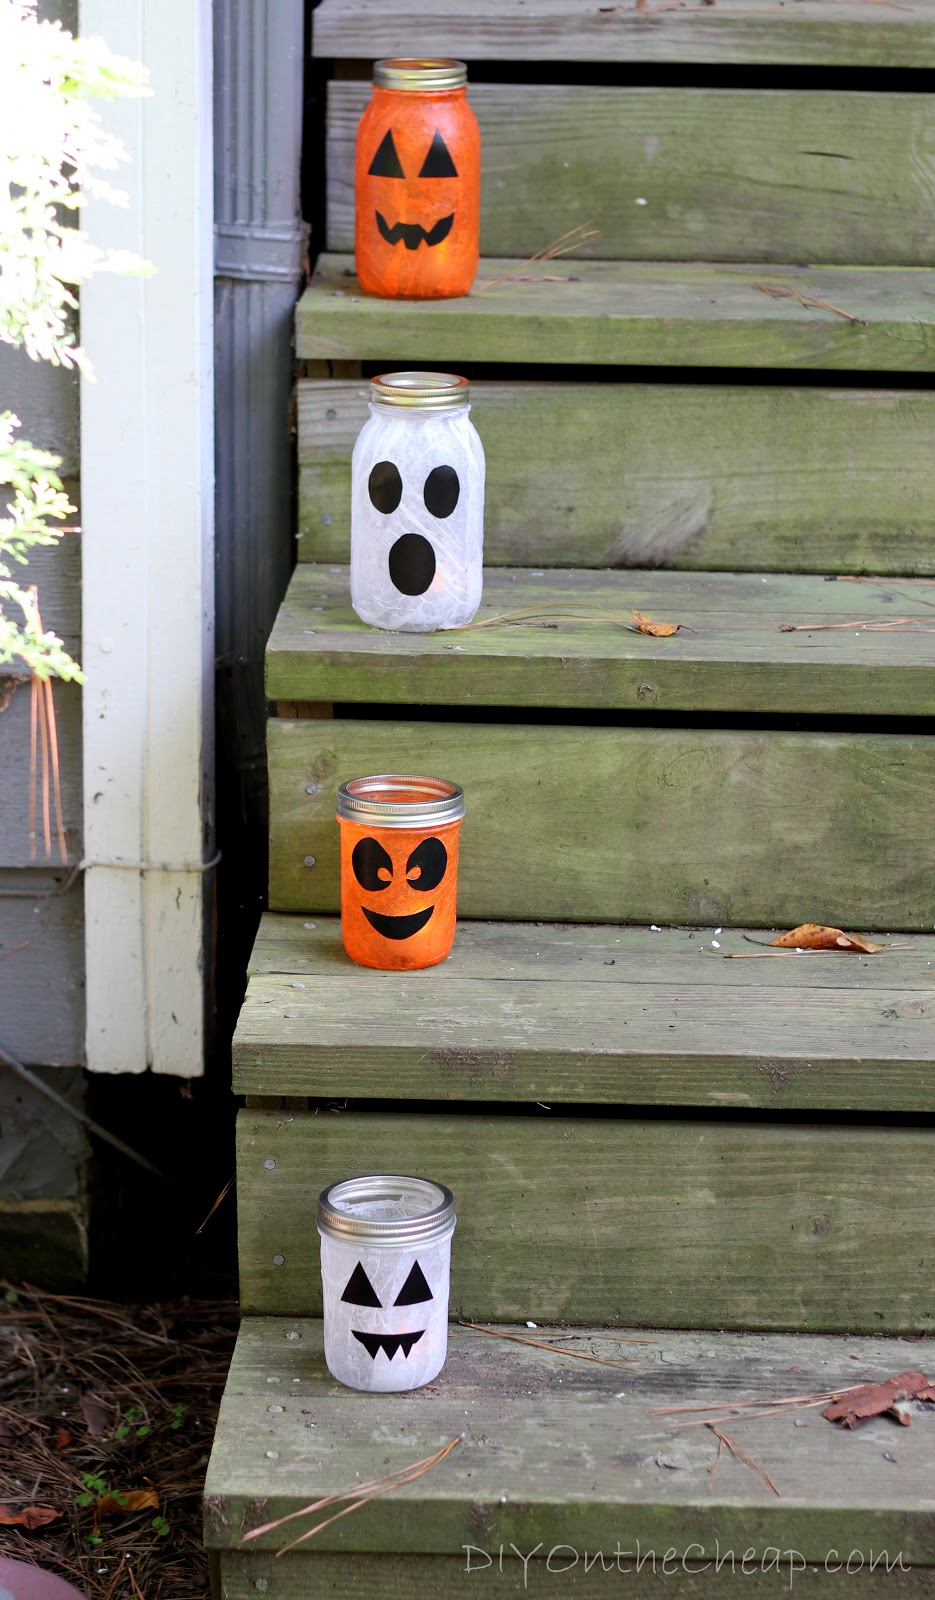
I was searching for a fun Halloween craft to share with my MOPS group, since I am the crafty leader person on our steering committee. (P.S. That’s not my official title.) I came across oodles of adorable mason jar lanterns all over the web, some painted and some Mod Podged, and I thought it sounded fun and easy enough for our group to do within an hour period of time. We opted to make Mod Podge Halloween Lanterns, and some people picked ghosts and some made Jack-O-Lanterns. I made some of each.
Here’s what you’ll need for this craft project (Affiliate links included):
- Mason Jars
 (you can use an old pickle jar or pasta sauce jar)
 - Tissue paper in your choice of color (Green for Frankenstein would be cute too!)
- Black Cardstock
- Mod Podge
- Sponge Brush
- Scissors
- LED Tealight Candles
Step 1
First, cut your tissue paper to fit around your jar. (I did not cover the bottom of mine.) It’s ok if you overlap the edges.
Step 2
Apply a very thin layer of Mod Podge all over your jar, working quickly since it doesn’t take long for it to dry. Wrap your tissue paper around the jar, smoothing as much as possible with your hands. Do not expect it to end up smooth. It will be textured, and it will not be perfect. It’s impossible to get a perfectly smooth finish with tissue paper, but the textured look is fine in the end. Also, Mod Podge is very forgiving. If you get a tear, just dab some Mod Podge and patch with a small piece of tissue paper, smoothing it with your fingers. Wrinkles are fine, just press them down as smoothly as you can and try to press out the bubbles. Anywhere the tissue paper is not adhering, just add a dot of Mod Podge and smooth out with your fingers or sponge brush. We’re not aiming for perfection here! Just have fun with it.
Step 3
Ok, as I told my MOPS group, at this point, your project is going to look like a hot mess. It’s ok. All will be fine in the end. Use your scissors to snip away excess tissue around the rim, and continue to press the tissue down with your fingers.
Step 4
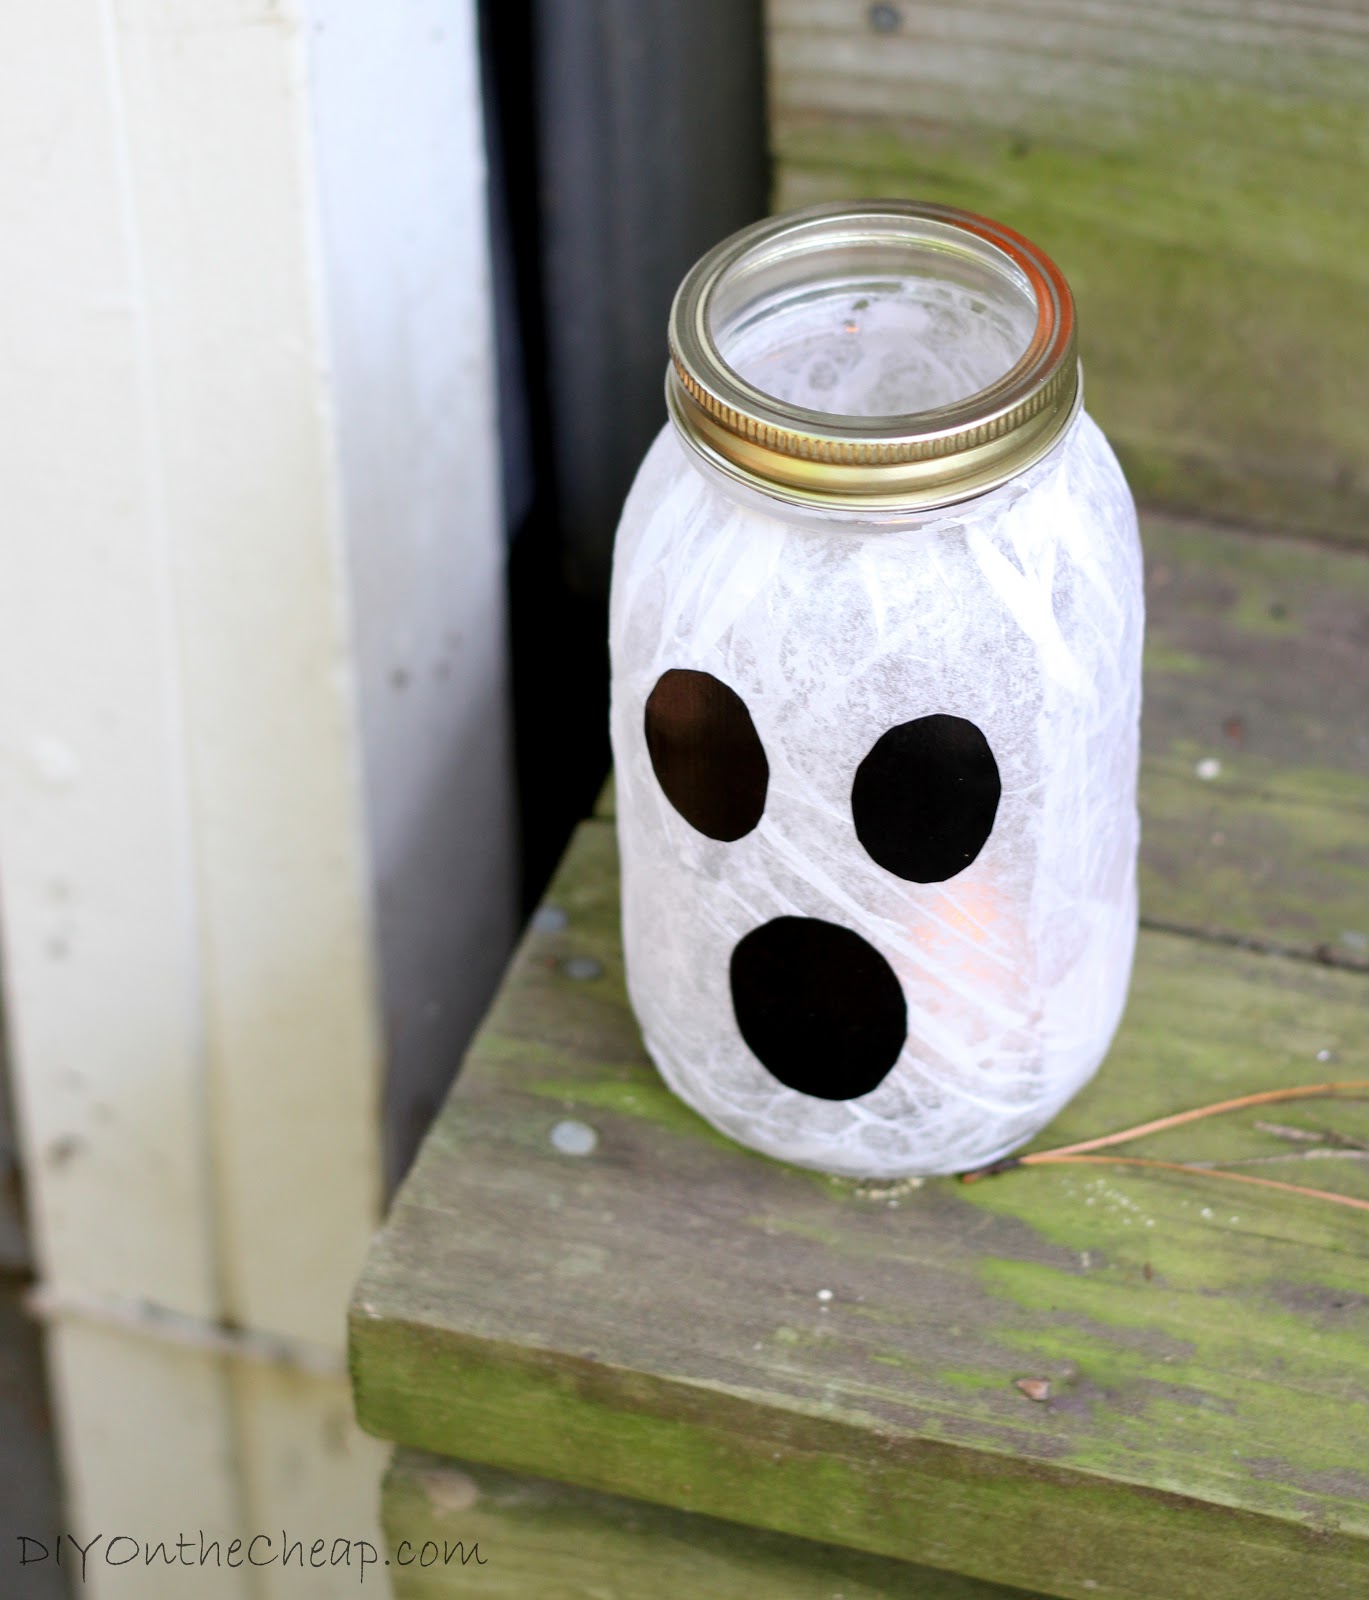
While your Mod Podge is drying (for 10-15 minutes or so), work on cutting out your cardstock to create eyes and a mouth. Dab some Mod Podge on the spots where you want your eyes and mouth to go, and glue them down. (Mod Podge acts as a glue and a sealer, so it will be our adhesive and our topcoat for this.)
Step 5
Now, use your sponge brush to paint on another thin layer of Mod Podge all over your jar, this time on top of the tissue paper and eyes/mouth. Allow it to dry (it will dry clear, by the way), then screw on the ring part of the lid.
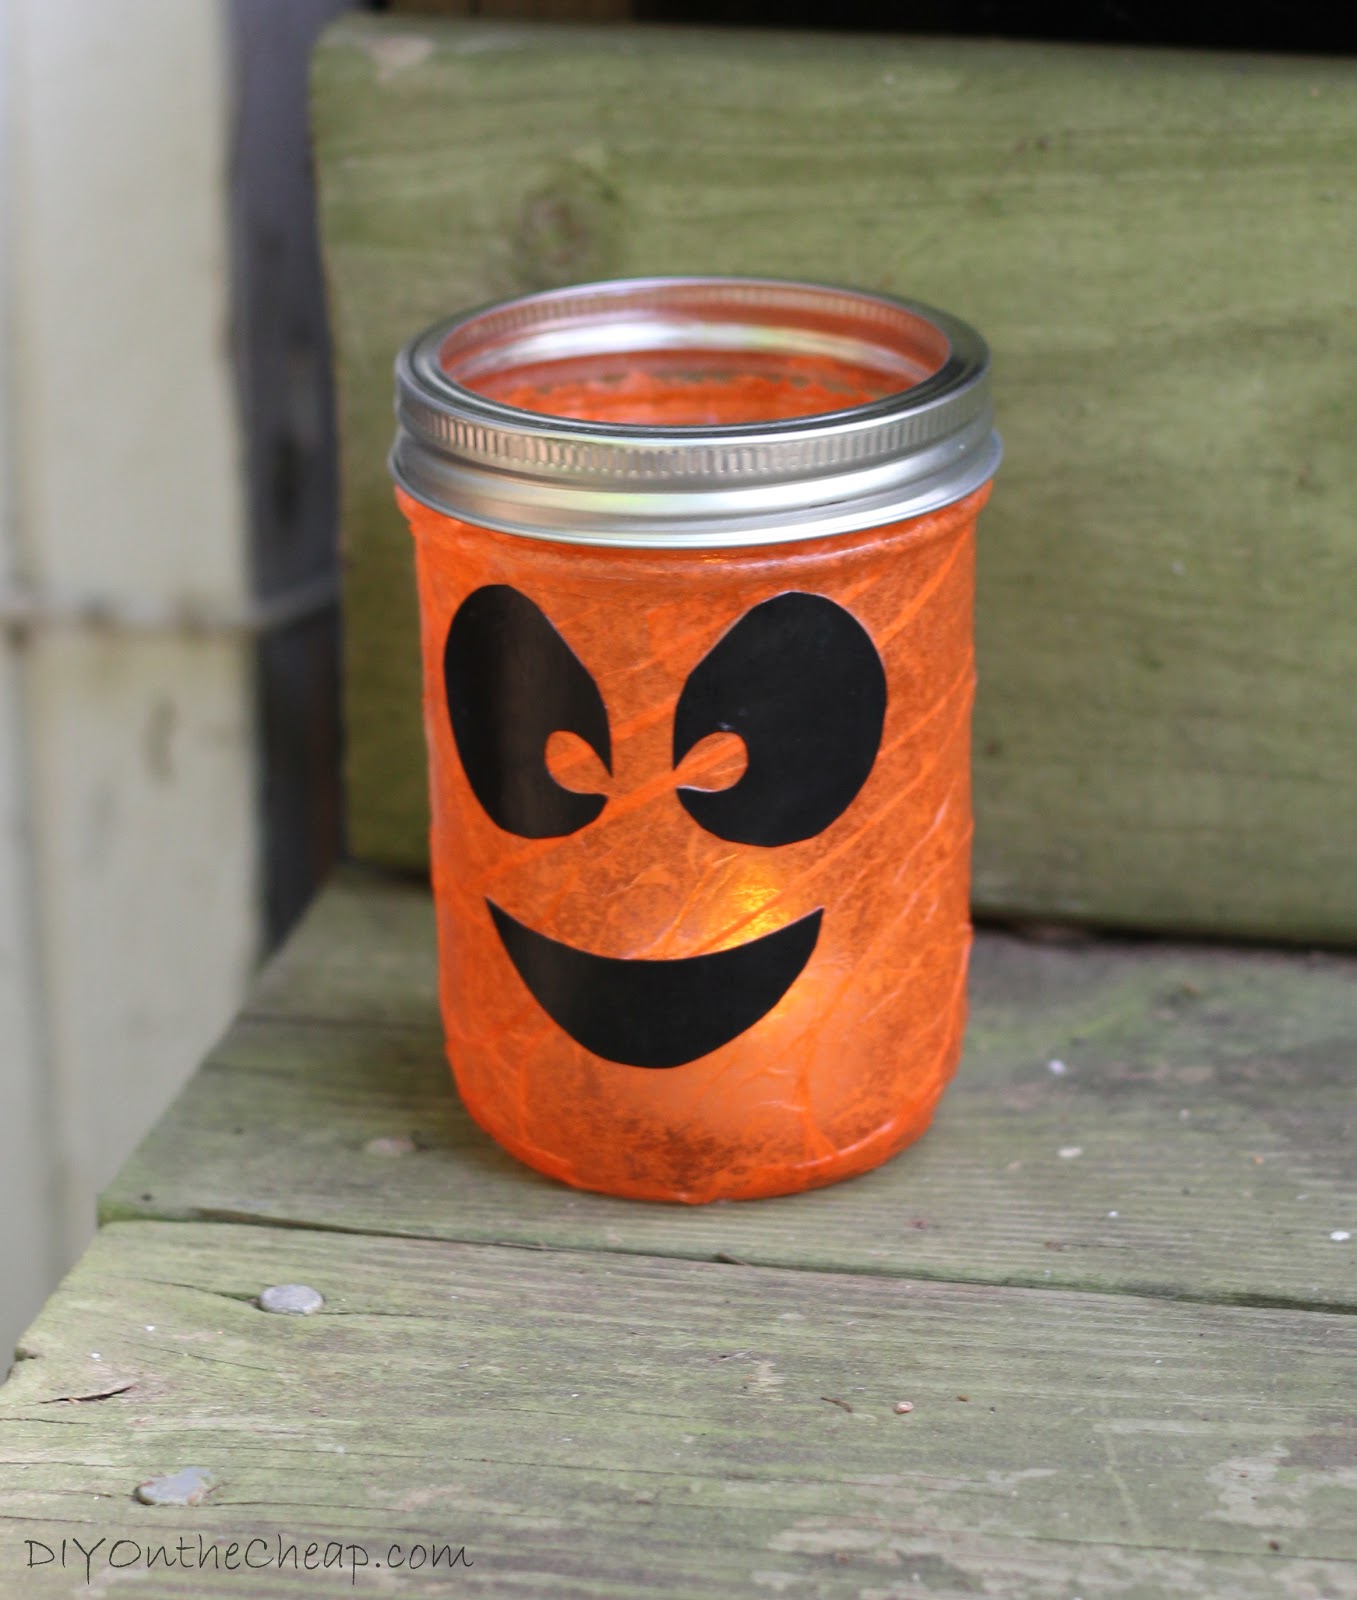
Add a little LED tealight candle, and you’re done!

Do you decorate for Halloween? Have you ever made your own mason jar lanterns?
YOU MIGHT ALSO ENJOY THESE POSTS:
Disclosure: This post contains affiliate links.
