Erin Spain

Home, DIY, & Photography

  • Home
  • About
    • Press
    • Advertise
    • Podcast
    • Disclosure & Policies
  • Project Gallery
  • YouTube
  • Photography
  • Contact

How to Stain Furniture {The Basics}

August 16, 2012 By Erin Spain 16 Comments

How to stain furniture

Considering my life has recently revolved around staining this beast of a library cabinet, I thought a “How-to” post was appropriate. If you haven’t stained furniture before, or just want to make sure you’re doing it the right way, I am going to walk you through the basics of exactly how to stain furniture.

How to Stain Furniture: The Basics

What you’ll need:

(Disclosure: Affiliate links included. As an Amazon Associate I earn from qualifying purchases.)

  • Paint and varnish stripper (if existing finish needs to be removed) I recommend CitriStrip.
  • Putty Knife
  • Odorless Mineral Spirits
  • Steel Wool
  • Tack Cloth
  • Sandpaper
  • Pre-Stain Conditioner
  • Staining cloths
  • Stain
  • Polyurethane, Polycrylic or finishing paste wax
  • Protective gloves.

(First of all, be sure to check your state’s regulations for disposing of these types of materials when you are finished. You are working with toxic chemicals that need to be disposed of properly. I usually seal my cloths etc. in a metal container filled with water.)

HOW TO STAIN FURNITURE

STEP 1: Prep

The first step is to prep your furniture, which consists of stripping off any existing finish and sanding down to bare wood. (Here is my post on stripping furniture.)

STEP 2: Condition


Once you have a bare wood surface to work with and all residue has been cleaned off, you should condition your wood. (I use Minwax Pre Stain Wood Conditioner. This isn’t a sponsored post, I just like the product.) This ensures that your stain will be absorbed evenly. Apply the conditioner with a cloth and let it soak in for a few minutes. Then wipe off the excess with a clean cloth. You will need to apply your stain within 2 hours of conditioning the wood.
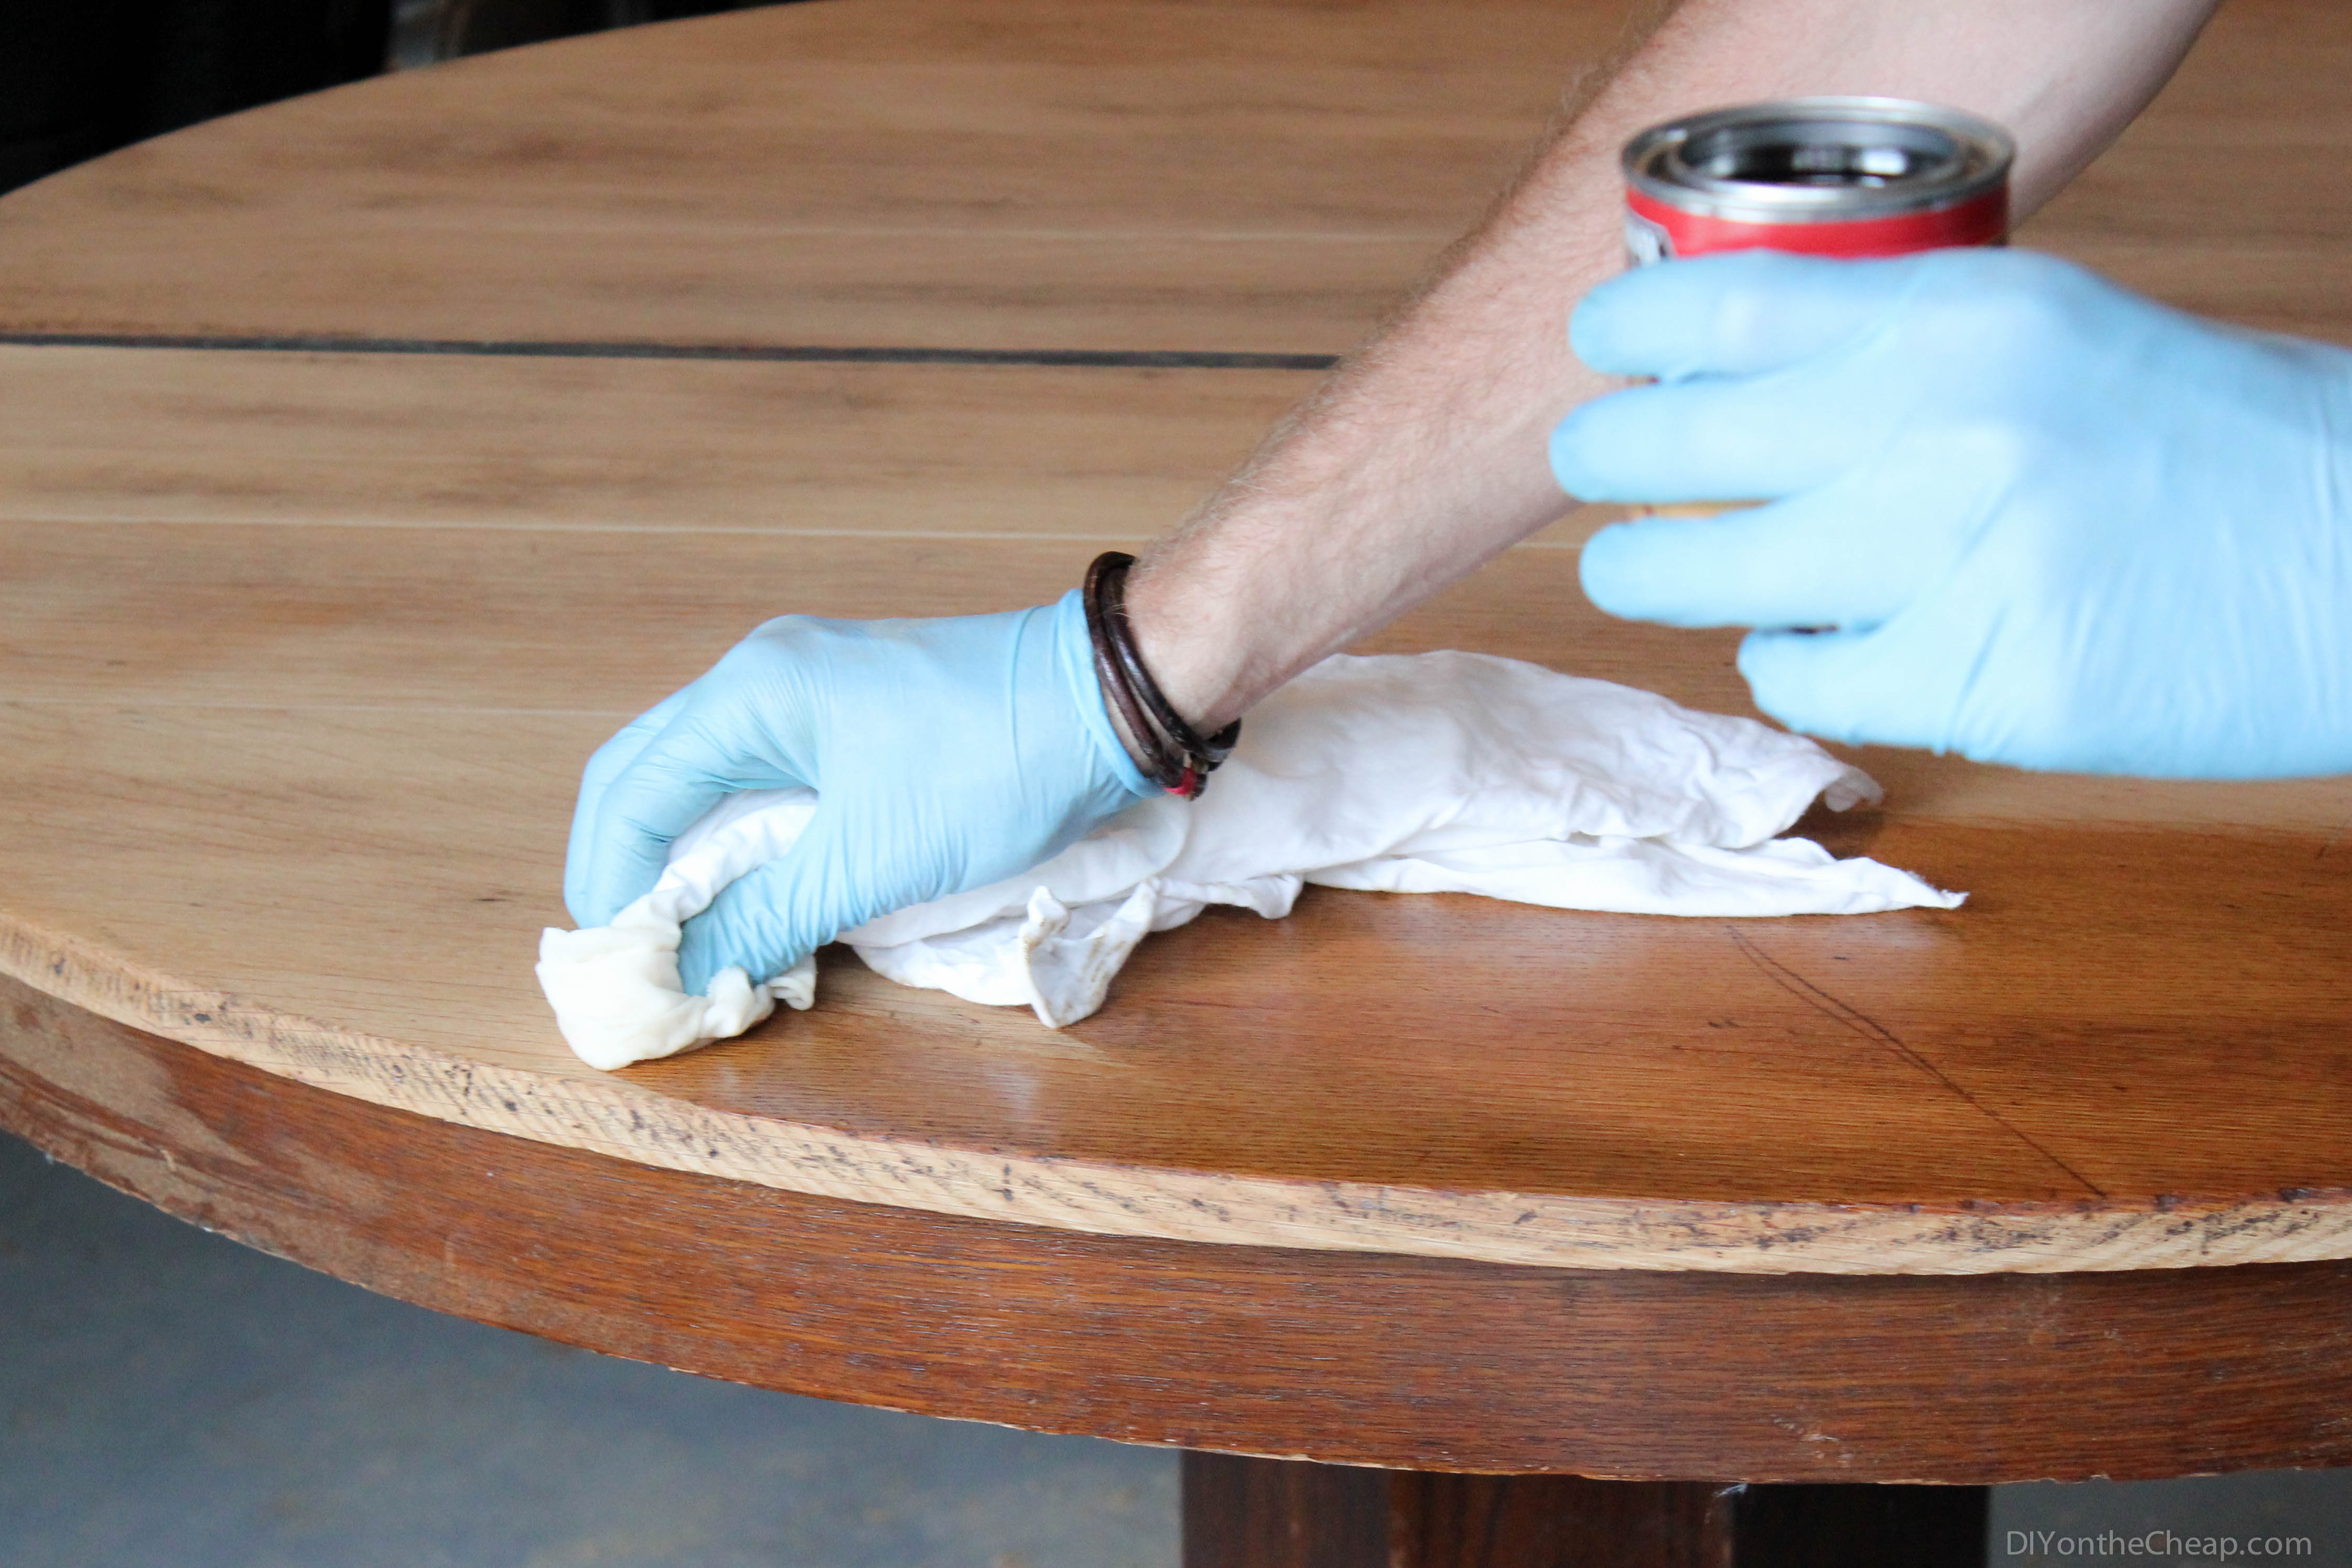
STEP 3: Stain

Now it’s time to stain! You can buy staining pads, but I prefer to use plain white cloths. Stir your stain with a stir stick, and then dip your cloth in. Apply the stain in a long sweeping motion along the piece of furniture. The thicker the layer you apply, and the longer you leave it on before wiping, the darker your stain will be. Let it soak in for a few minutes and then go back over it with a clean cloth to wipe off the excess.

Depending on how dark you want your stain, you may want to apply a second coat. Just use fine steel wool between coats and be sure to get any dust off with a tack cloth before reapplying.

How to Stain Furniture {The Basics}

STEP 4: SEAL


When your stain is the color you want it to be and it is totally dry, it’s time to seal it. I usually use Satin Wipe-On Poly or Polycrylic, but any topcoat is fine.

Alternatively, you can use furniture wax (I’ve used Minwax Finishing Paste), but I typically prefer to use that on painted furniture.

Apply the polyurethane with a clean white cloth in a long sweeping motion along the grain of the wood. If it is a surface that will get a lot of use, I recommend applying 2-3 coats, rubbing down with fine steel wool between each coat. Let it dry thoroughly (at least 24 hours) before moving it or placing items on top of it.

If you’re using furniture wax, I recommend applying it with cheesecloth and buffing it with a clean white cloth.

If you use water-based polycrylic, I recommend brushing it on.

card catalog

That’s all! Staining can be time consuming, but it’s really not difficult. The prep work tends to be the hardest part. It’s worth the work though since refinishing a piece of furniture can make it look brand new! And if you’re looking to paint furniture instead of staining, I posted a beginner’s guide on that here.

Have you stained furniture before? Do you have any additional tips you’d like to share?

YOU MIGHT ALSO LIKE THESE POSTS:

  • How to Paint Furniture: A Beginner’s Guide
  • How to Strip Paint off Furniture
  • How to Tell if Wood Furniture is Real or Fake
  • Project Gallery

(Disclosure: This post contains Amazon affiliate links.)

subscribe box post footer

Filed Under: DIY, Home & DIY Blog, Tutorials

« RIDGID Wet/Dry Vac: A DIY-Lover’s Necessity
Stenciled Cabinet & Royal Design Studios Review »

Comments

  1. nadz says

    August 21, 2012 at 12:59 am

    absolutely cool.

    Reply
  2. Whitney says

    August 12, 2014 at 4:05 am

    Hi Erin, I’m staining some raw wood furniture I got from Ikea. I’m using a water-based stain and I have a water-based polycrylic sealer… would that be okay instead of the polyurethane? Thanks

    Reply
    • Erin @ DIY on the Cheap says

      August 12, 2014 at 2:06 pm

      Yes, that would work fine!

      Reply
  3. Blake Soule says

    September 12, 2015 at 9:06 pm

    Just a couple of things that might help you guys a little. It helps to sand the wood with a block or a sander down to 220 grit. It always helps the top to look a little better if you sand it with the grain and watch those “elbow arcs” that can show up when you stain it. Also, in order to get riches look out of the stain, first stir it then put the top back on it and then shake it well. If you don’t then you can get 2 different colors out of the same can as stirring will not separate the color particles well enough. I hope this helps.

    Reply
  4. rt66vintage says

    October 14, 2015 at 6:03 pm

    Beautiful, you did a good job and shared it with the world!

    Reply
    • Erin Spain says

      October 14, 2015 at 8:26 pm

      Thanks so much!

      Reply
  5. Brigid says

    November 5, 2015 at 4:02 pm

    Your finished product is inspirational! Thank you for sharing.

    Reply
    • Erin Spain says

      November 7, 2015 at 8:39 pm

      Thanks Brigid!

      Reply
  6. juliana says

    April 8, 2016 at 10:37 am

    this is soooo helpful, i’m starting my first project and want the stain to come out like what you used on your card index table?

    Reply
    • Erin Spain says

      April 8, 2016 at 8:19 pm

      Glad you found this helpful, Juliana! I used Minwax Dark Walnut Stain on the card catalog. Let me know if you have any questions!

      Reply
  7. Earl Knight says

    June 3, 2019 at 2:32 pm

    This actually came in useful as I was dig more into the process as I have a large volume of builds coming up that are mostly getting stain instead of paint. Thanks Erin!

    Reply
    • Erin Spain says

      June 6, 2019 at 8:54 pm

      Thanks, Earl! Glad you found it helpful.

      Reply

Trackbacks

  1. Scrap Wood + Mason Jar Centerpiece - DIY on the Cheap says:
    August 8, 2013 at 5:17 pm

    […] minutes to measure, cut and attach everything and then 5 more minutes to stain it. (Here’s a furniture staining tutorial for you.) I’ll round up and say this is a 15 minute project. Add a little extra time if you […]

    Reply
  2. How to Strip Furniture - DIY on the Cheap says:
    August 8, 2013 at 7:57 pm

    […] How to Stain Furniture […]

    Reply
  3. Stick a Fork in it, It's Done! {Library Card Catalog Reveal} - DIY on the Cheap says:
    August 12, 2013 at 12:08 am

    […] I opted not to paint it after going back and forth about it in my head. I really just wanted to stain it and keep it classic. This is a piece I plan on keeping forever and I don’t want to do anything “trendy” to it, plus I love the look of the wood. I feel like although it has been restored, it still has a vintage feel, complete with imperfections and patina on the hardware, etc. Painting it would have been pretty too, it just wasn’t the look I was going for this time. (Here are tutorials for how I stripped it and stained it.) […]

    Reply
  4. wood staining, wood, how to wood stain, home improvement, diy, craft, refinishing, furniture, ikea, creative says:
    September 29, 2013 at 12:05 am

    […] 10. Revamp a lovely filing cabinet – here […]

    Reply

Leave a Reply Cancel reply

Your email address will not be published. Required fields are marked *

SHOP ERIN’S FAVORITES

SPONSORS & AFFILIATES

CATEGORIES

ARCHIVES

Copyright © 2023 Erin Spain. Log in | Privacy Policy