Disclosure: This post is sponsored by HomeRight. All opinions are my own.
You all know I love a good challenge, and I’m very excited to be participating in this month’s Thrift Store Challenge sponsored by HomeRight. The objective is to show you how easy it is to transform a piece of furniture, so if you see an old diamond in the rough at a thrift store, keep an open mind and know that it can easily be transformed into something great. Paint can work wonders! Seriously. Armed with my HomeRight Finish Max Paint Sprayer![]() and the awesome new Homeright Spray Shelter
and the awesome new Homeright Spray Shelter![]() , I set out to turn an old, worn out dining table into a fresh new kid’s art table for my boys to enjoy.
, I set out to turn an old, worn out dining table into a fresh new kid’s art table for my boys to enjoy.
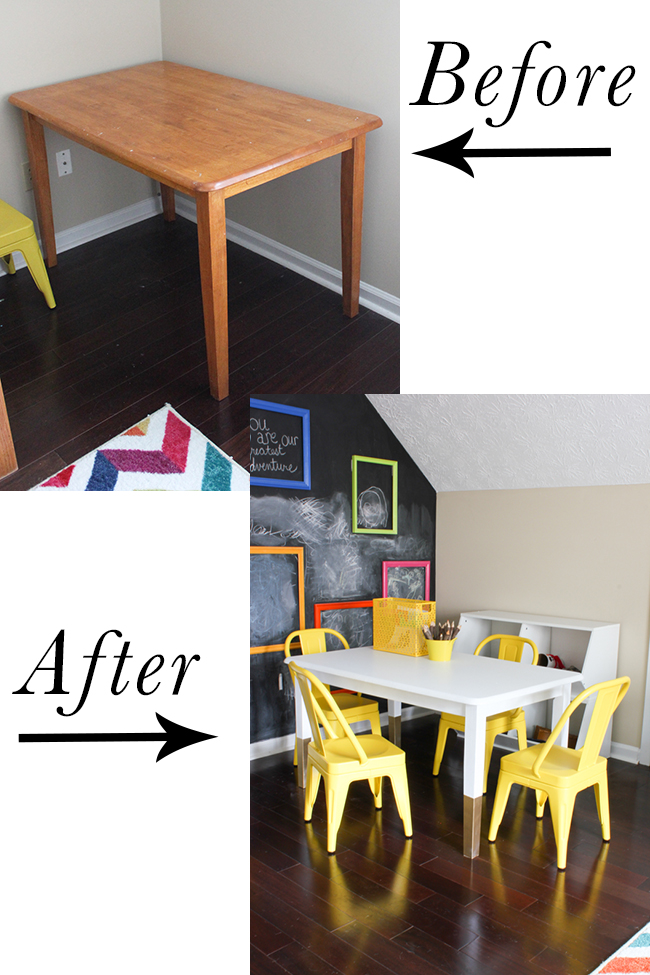
Here it is “Before”:

This ancient dining table has been sitting around our house forever. In fact, my boys started using it as an art table in the playroom not too long ago, but it was too high to use with their cute little kid chairs. The finish was damaged and there were all kinds of splotchy paint and stain splatters on it from years of wear.
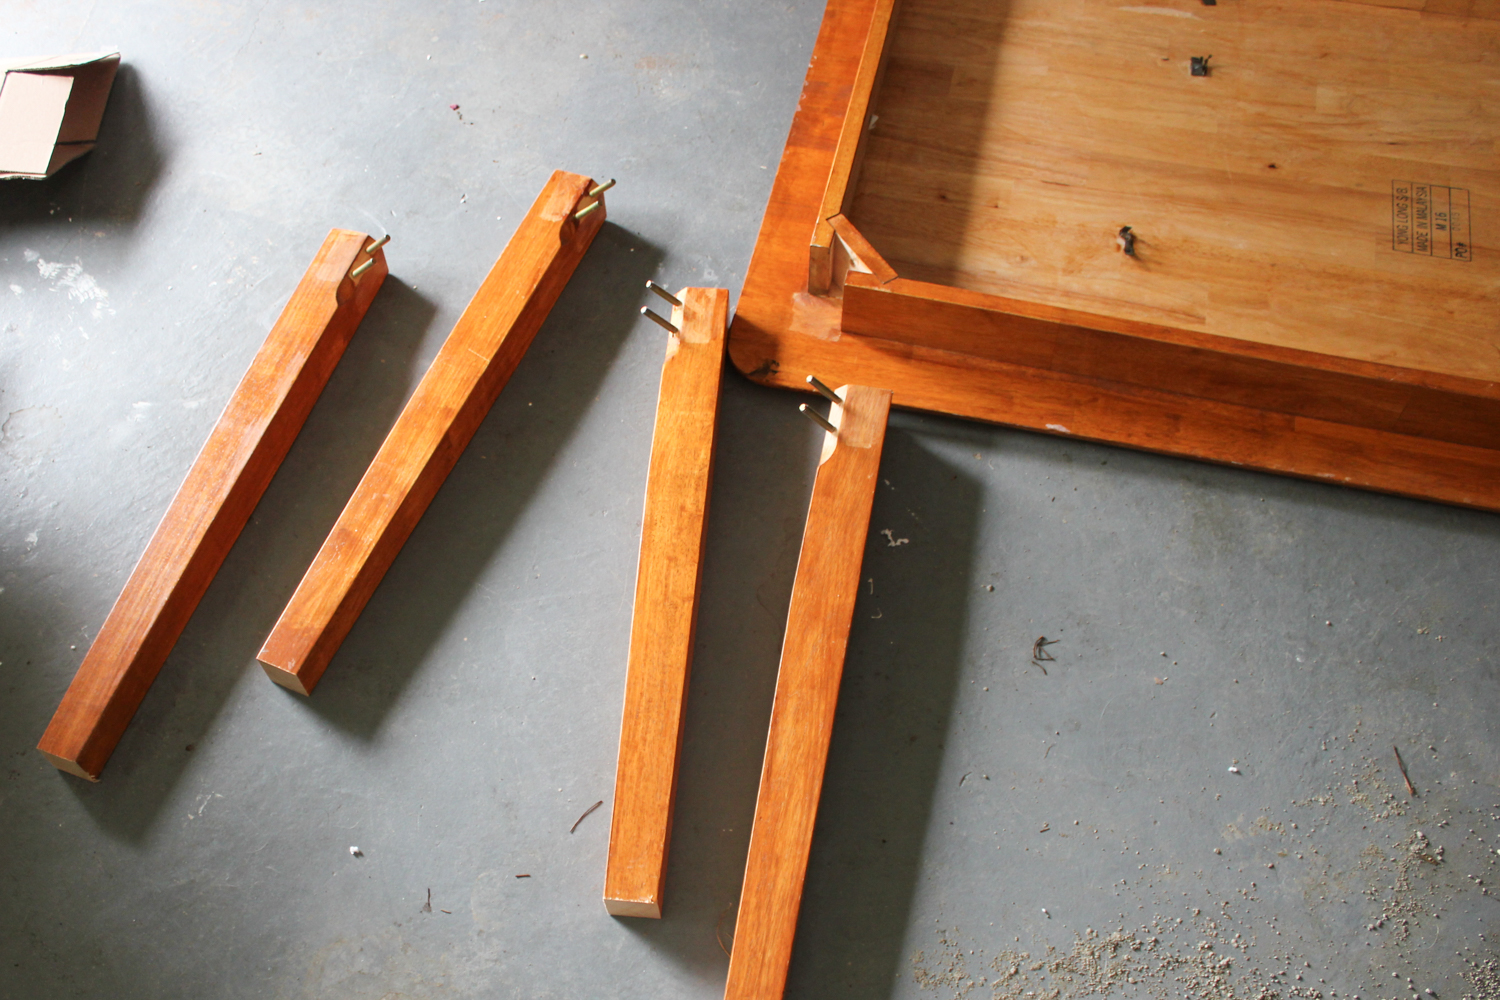
First, I measured how much shorter their kids chairs are than the original chairs that came with the table. The height difference was 3-3/4″, so I unscrewed and removed the table legs and used my miter saw to cut that much length off the bottom of each leg. (A hand saw would work fine too.) Then, I reattached them and had a table that was the proper height.
Next, I set up my Homeright Spray Shelter![]() in the driveway, but since it’s been raining nonstop here in Atlanta, I moved it into the garage to paint.
in the driveway, but since it’s been raining nonstop here in Atlanta, I moved it into the garage to paint.

The Spray Shelter can be put together by one person, but an extra set of hands makes setup a breeze. My husband helped me set it up and we had it up in just a couple of minutes. It protects your surroundings from overspray — simply throw a tarp or large drop cloth on the ground inside the spray shelter and you’re good to go.

I love the HomeRight Finish Max![]() for a quick paint project. I sanded and primed the table, and used BEHR Marquee in White. After the table was dry, I taped off the bottom 10 inches of the legs, covered most of the legs above where I was spray painting in plastic and spray painted them in Rust-Oleum metallic gold.
for a quick paint project. I sanded and primed the table, and used BEHR Marquee in White. After the table was dry, I taped off the bottom 10 inches of the legs, covered most of the legs above where I was spray painting in plastic and spray painted them in Rust-Oleum metallic gold.

I plan on waxing the top of the table with Minwax Finishing Paste to protect the surface since it is sure to take a beating, and I’ll probably add felt pads to the bottom of the legs so the table doesn’t scratch the wood floor.
Now my boys have a cute kid’s art table to use for creative projects and drawing their many pictures!

I love how paint can completely transform a piece of furniture. (By the way, check out how we organized our playroom, plus here is info on the chalkboard wall and the cute kid’s chairs.) The boys love hanging out here and creating art.

HOMERIGHT FINISH MAX & SPRAY SHELTER GIVEAWAY!

Enter to win a HomeRight Spray Shelter and a Finish Max paint sprayer! To enter, wait for the Rafflecopter box to load below (email subscribers may need to click over to the web version of the blog) and follow the instructions. Giveaway ends Wednesday, October 4 at Midnight EST.
YOU MIGHT ALSO ENJOY THESE POSTS:
- DIY Lego Table IKEA Hack
- IKEA TARVA Hack
- Interactive Chalkboard Gallery Wall
- The 20 Toy Rule: How We Decluttered Our Playroom & Simplified Our Life
- or check out my Project Gallery here!
*This post contains affiliate links.
You can also connect with me here:
![]()
![]()
![]()
![]()
![]()
![]()
