It occurred to me recently that while I shared a peek at our kitchen table eons ago, and I shared a full tutorial on the Minwax blog last year, I’ve never actually shown you a before and after of our kitchen table. Today I want to give you all the details on our antique pedestal table makeover, including a tutorial for how we did it.

This table was a lucky discovery a couple of years ago. (I shared that story a long time ago here.) Here is what it looked like when we first got it, although in these pictures you can’t really see the extent of the damage and deep scratches and nicks. Before you yell at me for painting the base, it really was in pretty rough condition!

We decided to go for a two-toned look, so we painted the base and stained the top. Here’s what it looked like when we were finished.

Project Supplies:
- Sander
- Sandpaper
- Tack Cloth
- Minwax Pre-Stain Conditioner
- Cotton Cloths
- Rubber Gloves
- Minwax Dark Walnut Stain
- Minwax Wipe-On Satin Poly
- Kilz Primer
- Benjamin Moore White Diamond Semi-Gloss Paint
- Paintbrushes
- Small Foam Roller
- Minwax Finishing Wax Paste
- Cheesecloth
- Wood Filler
- Putty Knife
How to Refinish an Antique Pedestal Table to get a Two-Toned Look
Step 1
Since I was pregnant when we refinished it, I did all of the prep work and sanded it by hand since I wanted to avoid chemicals. I sanded the top down to the bare wood, and dusted it off with a tack cloth. (Alternately, you could use a chemical stripping agent like Citri-Strip to remove the existing finish.) I also filled in the cracks with wood filler and sanded those smooth. Chris did the staining and I did the painting.

Step 2
Lightly sand the base of the table just enough to rough it up so the paint will have a good surface to “grab” onto. (You can follow this furniture painting tutorial for refinishing the base of the table.)
Step 3
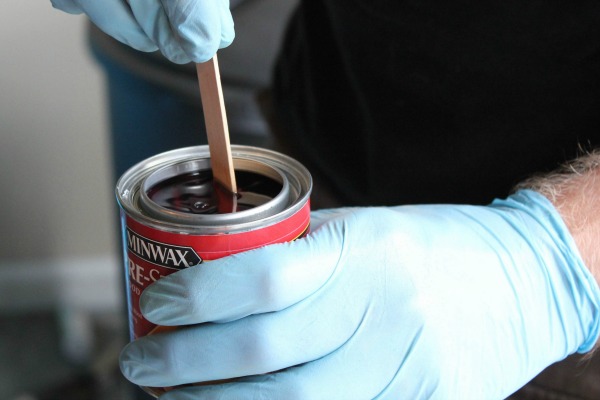
Apply Minwax Pre-Stain Conditioner to the tabletop using a clean white cloth.
Step 4
Apply your stain using a cotton cloth or staining pad. (Here is a helpful tutorial for how to stain furniture.) Follow the directions on the can of stain regarding number of coats and dry times.

Step 5
Apply a protective topcoat. We used Minwax Satin Wipe-On Poly. (My husband got to do the honors since I was pregnant at the time.)
Step 6
Prime and paint the table base, sanding lightly between coats (but not after the final coat). I used Kilz primer and Benjamin Moore Semi-Gloss Paint in White Diamond.

Step 7
Apply a protective topcoat to your painted base. I used Minwax Finishing Wax Paste in Natural, applied through two layers of cheesecloth. I buffed it with a clean white cloth.
We decided to pair the table with metal industrial-style chairs, mainly because they were cheap and the kids can’t ruin them. We chose these chairs from Target.
Here’s the table in our kitchen. We really enjoy having a round table in our eat-in kitchen area, and I love the fact that we were able to find something unique and with a lot of history.

This table spent entirely too much time collecting dust in our garage, so I’m so happy to have it refinished and that we are putting it to good use every day.
You Might Also Like:
- How to Paint Furniture: A Beginner’s Guide
- How to Stain Furniture: The Basics
- How to Strip Furniture
- How to Tell if Wood Furniture is Real or Fake
Disclosure: This post contains affiliate links.

You can also connect with me here:
![]()
![]()
![]()
![]()
![]()
![]()
