Finally, I get to show you the dresser that I’ve been working hard to refinish. It actually worked out nicely since my husband was out of town last week, so I had some down time each evening after the boys went to bed so I could really focus on working on this project.
Just to recap, I found my dresser on Craigslist for $40. I found a photo which I used as inspiration for what I wanted it to look like.
First, let’s take a trip down memory lane. Here’s what my dresser used to look like:
Supply List:
- Murphy’s Oil Soap
- CitriStrip
- Putty Knife
- Medium Grit Sandpaper
- Fine Sandpaper
- Minwax Ebony Stain
- Minwax Wipe-On Satin Poly
- White Staining Cloths
- Benjamin Moore White Diamond Semi-Gloss Paint
- Minwax Finishing Paste in Natural
- Cheese Cloth
- Kilz Primer
- Paint Brush
- Foam Roller
Tutorial:
First, I gave the whole dresser a really good cleaning with Murphy’s Oil Soap. Once it was clean and dry, and after I removed the drawer pulls, I used furniture stripper just on the top since I would be using stain on that surface rather than paint. The furniture stripper didn’t do a whole lot since the top was actually a thin veneer. By the way, you CAN stain veneer if it is real wood. If it isn’t real wood, you can’t stain it. (But you can paint it. You can paint basically anything.) Luckily mine proved to be real wood. I carefully sanded it with medium grit sandpaper and then finished it off with fine sandpaper (220 grit). Be careful sanding veneer, by the way. You don’t want to damage the edges or, worse yet, sand the whole veneer off! Some people say not to sand it at all, but I had to get that shiny finish off somehow since I was staining, and that seemed to be the only thing that would work.
After I sanded the top, I used medium grit sandpaper to sand the whole base and drawer fronts. This part didn’t have to be perfect since I was going to paint it instead of using stain. All you have to do is just sand the sheen off of it so it has a dull finish, creating a surface that is easier for the paint to “grab” onto. After all my sanding was complete, I gave the whole piece a good wipe down with tack cloth to get all of the sanding dust off.
I opted to stain the top first. I wanted that to be totally done, sealed, dry, etc. before I started on the rest. I didn’t want to risk getting stain all over my brand new paint job, and I didn’t want sanding dust from the base to fly up and stick to my wet polyurethaned top. For the top, I applied one coat of Minwax Ebony Stain. I was nervous since this was my first time staining, but it was SO easy! Just be sure to follow the directions and don’t skip a step or get impatient. Let it dry!! I used a staining pad and rubbed the stain in the direction of the grain, being careful to go from one end to the other in a continuous motion to avoid an uneven finish. I only applied one coat of stain because it was all it took to get the shade I wanted (a dark Espresso brown). After it dried, I took a lint-free cloth and wiped any excess off before sealing. I then sealed with 3 coats of Wipe-On Satin Poly (follow directions! I let my final coat dry overnight before doing any more work.)
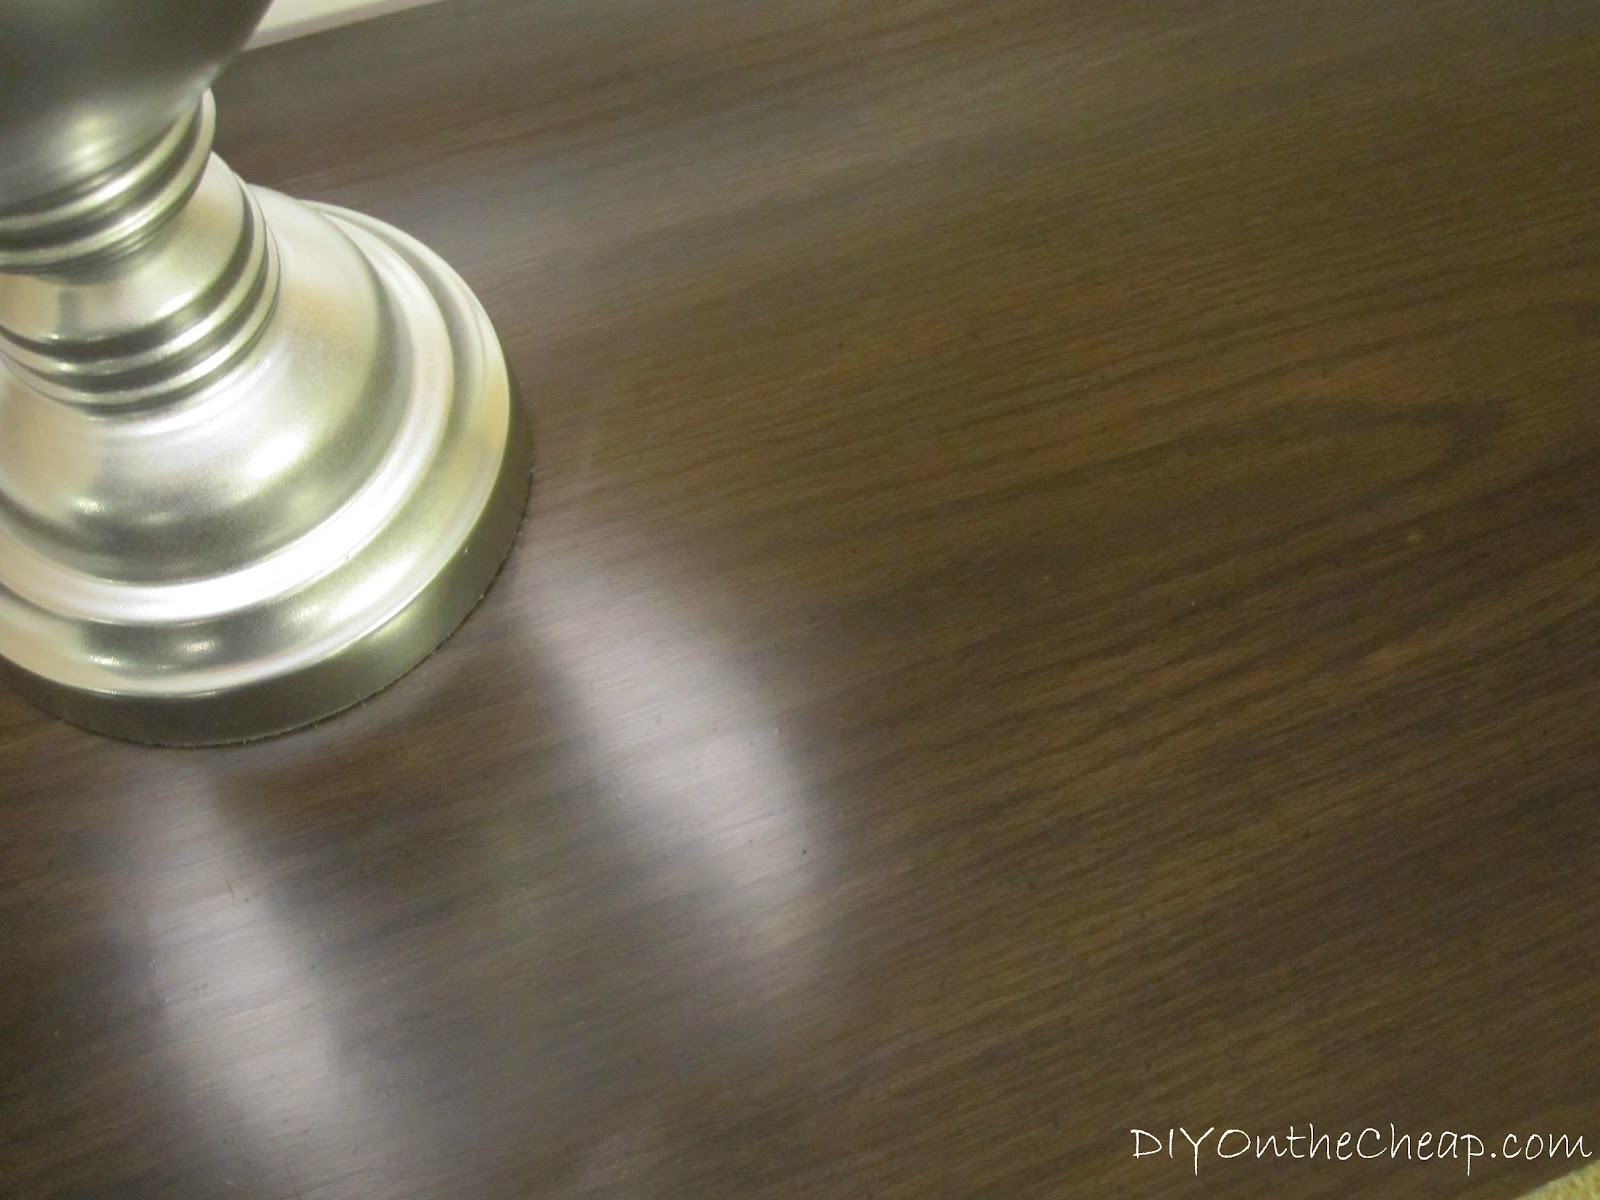
Closeup of Stained Top |
Finally, my top was done! I patched any tiny nicks and scratches on the base with wood filler, then I laid the dresser on its back, allowing me to more easily paint the little nooks and crannies along the bottom. I primed with a coat of Kilz, then painted with Benjamin Moore White Diamond Semi-gloss interior latex paint. I sanded with fine sandpaper between each coat. I ended up applying 3 very thin coats of paint. Thin coats are better and produce a more professional-looking result.
Finally, I very subtly distressed the dresser with fine sandpaper. And I do mean VERY subtly. I wanted to give it that Pottery Barn time-worn look, but not too rustic. Then I sealed the painted part with Minwax Finishing Paste. This stuff is great because it will not turn yellow as polyurethane often will when applied on top of white or a light color, but it still provides protection. This is the first time I’ve used it, but I had heard great things about it. Just apply to one side of a cheesecloth, then double the cloth over and use the opposite side to apply it evenly to the wood. (The right amount will soak through the cloth and onto the furniture). Let it dry for 10-15 minutes, then buff with a clean, dry cloth.
I decided not to change the original hardware at all. After I gave them a good cleaning, I loved the way they looked in their natural state. And I loved their shape too.
I know this tutorial is a bit lengthy, but I wanted to give step by step instructions for anyone interested in doing a similar project. I know I found these type of instructions helpful myself. If you are interested in any other tips or advice on furniture refinishing, I highly recommend that you visit Perfectly Imperfect, which I used as a guide myself. |
- How to Paint Furniture
- How to Stain Furniture
- How to Tell if Wood Furniture is Real or Fake
- How to Strip Paint Off Furniture
- How to Paint a Striped Wall
*This post contains affiliate links for your convenience.
Lindsey Nickens says
Love this!! I can’t wait to find the perfect piece of furniture to try it myself! You did an awesome job!
Erin Spain says
Thanks Lindsey!
Sarah@budgetfriendlydecorating says
I love this..I am redoing a cabinet myself right now. Its a lot of work but its so worth it!
SJ @ Homemaker On A Dime says
Love it 🙂 Happily following you now, too. Thanks for joining Creative Bloggers’ Party & Hop.
Lisa G says
So pretty! I’m constantly scouring CL for pieces to refinish but I’ve only had luck once! Lovely job you did!
Erin Spain says
Thank you! I keep checking for more finds too! Hoping to find another diamond in the rough soon.
Cynthia says
So pretty now! I actually usually do the opposite of you and stain and finish the top last… mainly because I once dropped some paint on my newly finished top. The original hardware looks great!
Erin Spain says
Thank you! Yeah, I had a hard time deciding which to do first. But I knew I would be a sloppy stainer and I figured I’d stain my white paint job. But it could go either way! I may switch it up one of these days and do it the other way around.
Michelle Wilkes says
Thanks for all the details. I have had bad luck with poly on white things, so it’s good to know about the finishing paste. I will try that next. Your furniture looks awesome!
Erin Spain says
Thanks Michelle! I love the finishing paste. It’s easy to work with and I really like the fact that you can buff it more or less depending on how much shine you want.
Taylor says
I love the transformation! It’s a beautiful piece!
I would love for you to share this with my “Unveil Your Genius” link party.
http://taylornorris.blogspot.com/2012/03/unveil-your-genius-link-party_22.html
Happy Sunday!
Erin Spain says
Thank you, and done!
Taylor says
Thanks for linking up, Erin! I hope you’ll link up again soon! 🙂
Beth says
Very nice job. I love the way that came out. Nice score!
Erin Spain says
Thank you!
Heidi says
I am going to follow this exact method to refinish the Kroehler Dresser I scored on Craigslist. Thank you so much for going into so much detail about the products and processes you used! I love your blog!
Erin Spain says
Thanks, Heidi! Glad you like it!
Anonymous says
Love this dresser! I want to do the exact same thing. So I need murphy oil soap, minwax stain, wipe on poly satin, Kilz primer, wood putty, minwax finishing paste and cheese cloth…is that everything? Also did you use an electric sander or sanding block? I appreciate the detail you put into this post because this is a very intimidating project for me. It’s for my babys nursery. The crib is white with espresso trim so I wanted the dresser to match and my mom has a solid wood dresser hanging around her basement. -Miranda
Erin Spain says
Hi Miranda! Thanks for stopping by. Along with the items you mentioned, you will also need staining cloths (old white t-shirts will do, or they sell plain white cotton cloths for this purpose at hardware stores); and I would use either Mineral spirits or a pre-stain wood conditioner before applying stain. It will condition the wood and ensure that your stain is absorbed evenly.
I hand sanded the whole thing, but you could certainly use an electric sander (orbital sanders are great and small/manageable).
This type of look would be beautiful in a nursery. I’d love to see pics when you’re finished!!
Anonymous says
Hi Erin!
I have another silly question…did you use a paint brush or a roller for the white? I have heard that sometimes you dont get the paint brush streak if you use a small roller.
I will definitely share pictures with you when it’s finished. I just hope it comes out okay! LOL. I’m planning on starting this weekend and getting as much done as I can. Like you I have a son and could do a little each night once he’s in bed.- Miranda
Erin Spain says
This isn’t a silly question! It’s important! I actually used both a brush (for the nooks and crannies and hard to reach crevices) but then used a small foam roller for the drawer fronts, sides and any flat surfaces. You may very well see brush strokes if you use a brush for the whole thing, plus that takes a lot longer.
Can’t wait to see yours! I’m sure you’ll do just fine. And the great thing about paint is if you mess it up, you can just sand it and start over. Just be sure to lightly sand with fine grit sandpaper between EVERY coat of paint. You’ll get a much smoother finish that way.
Anonymous says
Oh man!! I just sanded the front of one draw by hand and my arm feels like it fall off. LOL I give you credit! I am definitely going to get an orbital sander tomorrow! Did you sand all the way down to the bare wood to paint it white? – Miranda
Erin Spain says
It is a lot of work but no you do not have to sand down to bare wood on the part you are painting! In fact, you hardly have to sand at all. Just enough to get the glossy finish off and rough up the surface a little so your paint has something to grab onto. Good luck! Keep me posted!
Anonymous says
Another question…when you say 3 coats of paint are you including the coat of primer or are you saying 3 coats of white? Also do I sand down the primer before applying my first coat of paint? Thank you so much for your help! So far so good! – Miranda
Erin Spain says
Yes, lightly sand the primer with extra fine sandpaper. Just go over it quickly to smooth it a bit. And yes I did 3 coats of paint on top of primer cause I did super thin coats. You might be able to get away with 2, just evaluate at that point and decide if you think you need a little more coverage. Most of my projects require 2, but I added a third on this one cause it needed a teeny bit more coverage.
Anonymous says
Well my dresser is finished! It will carried into the nursery in a few days! Thanks for all your help!! I love the end results. I opted not to pay the extra $ for new knobs and refinished those too! How do I share a picture with you? -Miranda
Erin Spain says
Yay! Can’t wait to see it! You can either email me a pic to [email protected] or post it to my Facebook wall, at http://www.Facebook.com/DIYOntheCheap. I’m so glad you love the results!
Anonymous says
Stinkin’ gorgeous! I am amassing a collection of furniture to refinish once I get up the nerve. 🙂 Your instructions may have finally gotten me there. Have you considered replacing the top of a dresser with a custom-cut remnant piece of granite? I can picture it…but not sure if it would work. Thanks for the inspiration!
Erin Spain says
Thanks so much! A granite top could definitely be very cool.
decking says
If you like a dresser, but think that you need more small compartments than it offers for your jewelry or lingerie, consider investing in a set of drawer organizers, which will give you smaller compartments to work with.
Britt @ Chicago Runner Girl says
Love this dresser and thanks so much for all of the detail you’ve put into the directions. I’m in the planning stages of refinishing an old dresser of mine while looks almost exactly like this. When you gave it that light sanding to give it the warm aged look, is that the original coloring showing through or did you put a darker color underneath the white for it to show? Never done a DIY project like this so I’m just trying to make sure that mine doesn’t turn out all funky and looks like a child did it!
Erin Spain says
Thanks Britt! I didn’t add anything underneath the white paint other than primer. The distressed parts are just the natural color showing through.
Lee Hunt says
what type of Kilz primer did you use?
Erin Spain says
Hi, Lee! I used the Kilz Latex Multi-Purpose Primer.
Webluence says
you have nicely refinished it but it will look more beautiful if you change its handles.
click here
alaya says
Very Cute! Thanks again for the inspiration! Love your blog! (I added you to the list of my fave blogs!) Please come check out how you inspired!
http://my-diy-diary.blogspot.com/2013/01/diy-beautiful-nightstand-makeover.html
Sarah Navina says
This comment has been removed by a blog administrator.
Careo says
Loved what you did with this piece. I have an old wood dresser in my garage that I was trying to sell on CL but decided that re-finishing might be a better idea. First time doing a job like this but your blog was pretty easy to follow so I think I will give it a try.
Erin Spain says
Thank you! I’m sure you’ll do fine. I’d love to see pics when you finish! Good luck and let me know if you have any questions!
BethElderton says
This is absolutely gorgeous!
Erin Spain says
Thank you! 🙂
julya says
Gorgeous! Buying a dresser off craigslust today for our nursery. Hope it comes out half as nice as yours.
Erin Spain says
Thanks so much! I’m sure yours will turn out great!
Unknown says
Hi, this is amazing! I am so inspired to copy it, but I was wondering, did you consider painting the top black instead of staining it? What factored into your decision? I am short on time and am considering black paint instead of stain. I would love to know your thoughts.
Erin Spain says
Thank you! You certainly could paint it black if you wanted to. I chose to stain it because I wanted the wood grain to show through. In person, it is a dark brownish black color and you can see the grain.
Anonymous says
I have a question about the minwax finishing paste. I just painted an armoir and I was planning on sealing with the minwax. Is that durable enough (the armoir is going to be used in the kitchen to hold appliances and pots and pans) or should I use something else? And if so, what? Thanks and loved your tutorial!
Erin Spain says
I’ve had great luck with it and all of my pieces have held up fine! Just let it fully dry/cure for at least 24 hours before touching it or placing anything inside. Another alternative that I like is Minwax Polycrylic. It’s water-based so it doesn’t have the strong fumes like polyurethane but it provides a nice topcoat. Good luck!
Lesley Gaines says
Hi Erin! I am finishing a dresser like this one. I used black paint. It looks black on the swatch however it is turing out to be more of a dark grey. Do you think it would be ok to buy a different paint and paint over that to get more of the black color I was going for? I did 3 coats and it still looks dark grey. Also I bought minwax polyacrylic for finish the dresser. Can I use this on both the black and white? Or woould you recomment the paste instead? The polyacrylic is expensive, not sure about the paste yet. Thank you!
Erin @ DIY on the Cheap says
Hi Lesley! Yes, it would be fine to paint over it. Just sand it lightly first. The polycrylic is fine to use on both the black and white. Just apply it in very thin coats, especially on the white. It isn’t supposed to cause yellowing like polyurethane, but thin coats would be best just in case. You can use the finishing paste on both colors too if you change your mind and decide to go with that. I like both.
Lesley Gaines says
THanks Erin! I just finished my dresser yesterday and love how it came out! I decided on the finishing paste. I would love to share my before and after finished product pics with you since you were my inspiration! I do have one question, do you own a sander? I was looking yesterday at the store and noticed there are a few kinds. It would be nice to have for bigger pieces, I just don’t know which one to go with, any suggestions? Thanks!!
Erin @ DIY on the Cheap says
Awesome, Lesley! I can’t wait to see photos! Feel free to email them to me or post them on my Facebook page! As for a sander, I own a couple. I normally use my orbital sander for furniture.
Lana says
Hi Erin. I absolutely loved how detailed your tutorial is! I recently bought a desk with attached shelves for my som. I like the color which is creamy white but it has some gold on details which is a little too girly. Do you think it is possible to cover the gold stain without repainting the whole thing. And can I add stain on detailing only or it does not work that way? If I have to repaint it what paint do you recommend for furniture , flat or semi-glossy? I like the finish desk has right now. It’s glowing but not too glossy like a mirrow. Which paint would give me this kind of finish? Minwax finishing paste, will it give the piece any finish, or does it take the finish of the paint you use underneath it? Thank you so much in advance. Lana
P.S. I have some pics of the desk. I didn’t find how to post them.
Erin @ DIY on the Cheap says
Thanks Lana! Feel free to email me pics if you’d like. You could try painting over the detailing only, however it might be hard to match the paint color exactly if you are trying to go for the same color as the rest of the piece. I’d really have to see the piece to know exactly what you are describing, but to get an even, professional looking finish you’ll probably want to paint the whole thing the same color. I always recommend semi-gloss paint for furniture since it is much easier to clean. If you don’t want it too glossy then go with semi-gloss as opposed to Gloss/high-gloss. The Minwax finishing paste can be buffed as shiny as you want it. So the less you buff, the less shiny it will appear.
Lana says
Thanks!!! I think I’ll repaint the whole thing since it has a few scratches here and there. Do you think I should use a primer on the whole thing or can I get away just priming the gold details? Do you have a primer that you prefer to use? Thanks again. Lana
Erin @ DIY on the Cheap says
You’re probably ok just lightly sanding it all, but I’d probably prime too just to be on the safe side. I usually use Kilz but I’ve also heard Zinsser is good. Good luck!
Krissie says
Hi Erin,
I love the dresser. I’m actually trying to do something similar to a bedroom set I have at home. I followed your steps for staining the top, however the stain does not seem to be adhering evenly. Is there something I can do to salvage the work I’ve already done or do I need to sand it down again? If I need to sand it all the way down again what can i do to make sure it doesn’t happen again?
Thanks!
Erin @ DIY on the Cheap says
Hi Krissie! Did you pre-condition and use a newly opened can of stain? I have run into this problem once before and I ended up using a gel stain on top. It has better coverage and a couple coats fixed the problem. If this doesn’t work, then you probably will have to sand it down and then I recommend pre-conditioning and using a gel stain from the get-go just to prevent this from happening next time. Good luck!
gladia says
This dresser us my dream dresser. I got s solid wood with dovetail design. This is the actual color I am looking for. Please let me know what color you used. .. Do you suggest any brand? Thank you
Erin @ DIY on the Cheap says
Thank you Gladia! I used Benjamin Moore White Diamond in semi-gloss, and the stain is Minwax Ebony. For paint I usually recommend Benjamin Moore or Sherwin Williams as I have found them to be the best quality and truest to color. As for stain, I love Minwax!
Terry Joslyn says
I followed your instructions. However, the surfaces where I applied Minwax finishing paste are very sticky. Any suggestions before I move onto the next piece?
Erin @ DIY on the Cheap says
Hi Terry! It sounds like you may have applied the wax too thick, which is very easy to do. You have to be very careful to apply an extremely thin layer. I usually apply it through two layers of cheesecloth, and you’ll barely even be able to see it go on. At this point I would continue to buff as much as you can, and if you can’t buff it enough for it to dry then you may have to sand it and try again unfortunately. Sorry! Wax can be a little tricky at first, but the results are great once you get the hang of it.
Elizabeth says
Lovely dresser! I’m in the middle of redoing an old one using this one as a guideline – so excited to see how it turns out! I have a question for you about the hardware. It looks like it got darker from the original to the finished version. Did you do anything to change the color (besides clean it?) The hardware on mine looks like it’s brass but has gone black in most places. I like the black, so I’m a little reluctant to polish. Do you think painting it black would work? Thanks in advance for any tips and congrats again on your beautiful refinish of this dresser!
Erin @ DIY on the Cheap says
Hi Elizabeth! I actually didn’t do anything to the hardware. I was surprised to find that it looked darker after a cleaning too. If you like the black, you can always spray paint them. Just use a good spray primer first and then follow it up with a couple of light coats of black spray paint.
Elizabeth says
awesome – I’ll give that a shot! Thanks so much!
Brenda says
I totally love this piece…it is gorgeous! !
Erin Spain says
Thank you, Brenda!
Jules says
It’s really great. Thank you for the effort and time you’ve put into creating such a fabulous site.
If you are still there answering posts..(a few years on) – Do you think this can be done on laminate kitchen cupboards? Thanks.
Erin Spain says
Hi Jules! Yes, you could. Another option that I’ve seen done with success is chalk paint. (Chalk finish paint, NOT chalkboard paint.) It requires less prep work and adheres to pretty much any surface, so that’s another option to consider!
Sandy says
Thank you for the tutorial! My bedroom furniture turned out beautiful! I really liked all of the products you recommended! It was a tough project with a lot of elbow grease but so well worth it! My before and after pictures are unbelievable! I love it!
Erin Spain says
That’s awesome! I’m so happy that you found the tutorial helpful.